|
This year I am growing onions from seed for the first time, after many years of using onion sets. Part of my motivation is cost, but I also read in Le Jardin Vivrier that onions from seed tend to store better. Here is the approach I am taking based on the principles of no-dig, intense planting. I started my onion seeds in a tray. I planted them very densely in rows. I didn't thin them. I trimmed them a couple of times to keep them around 6-10cm long. The trimmed ends are very fragrant and I used them in my cooking. 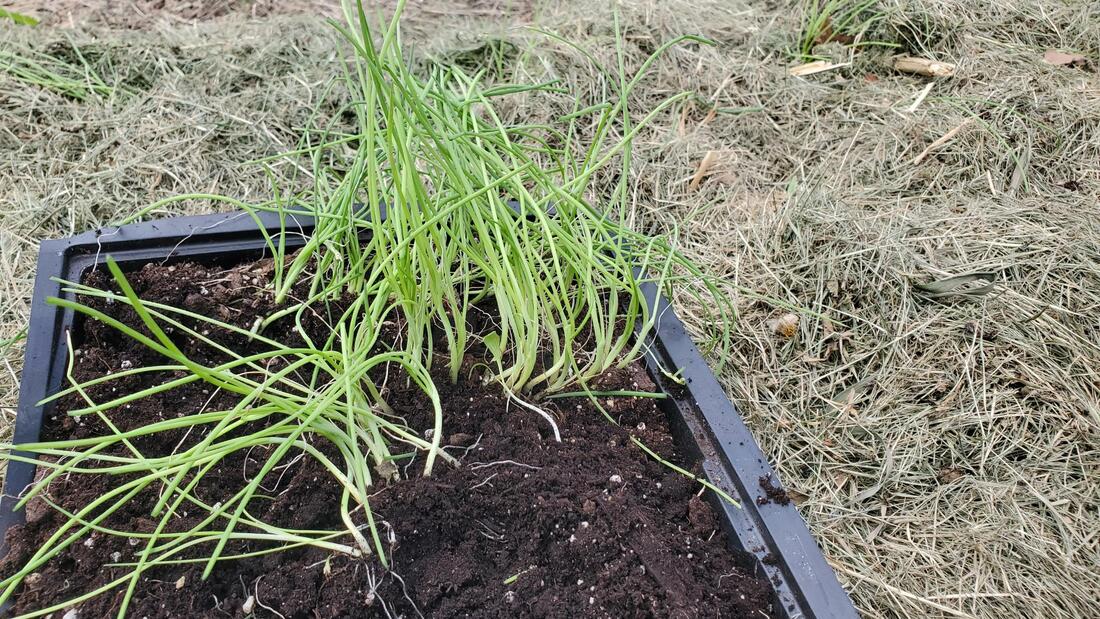 Once it was transplanting time, I trimmed them once more to around 6cm, and loosened the soil in the tray. It was easy to pull out the tiny onion seedlings and untangle them. 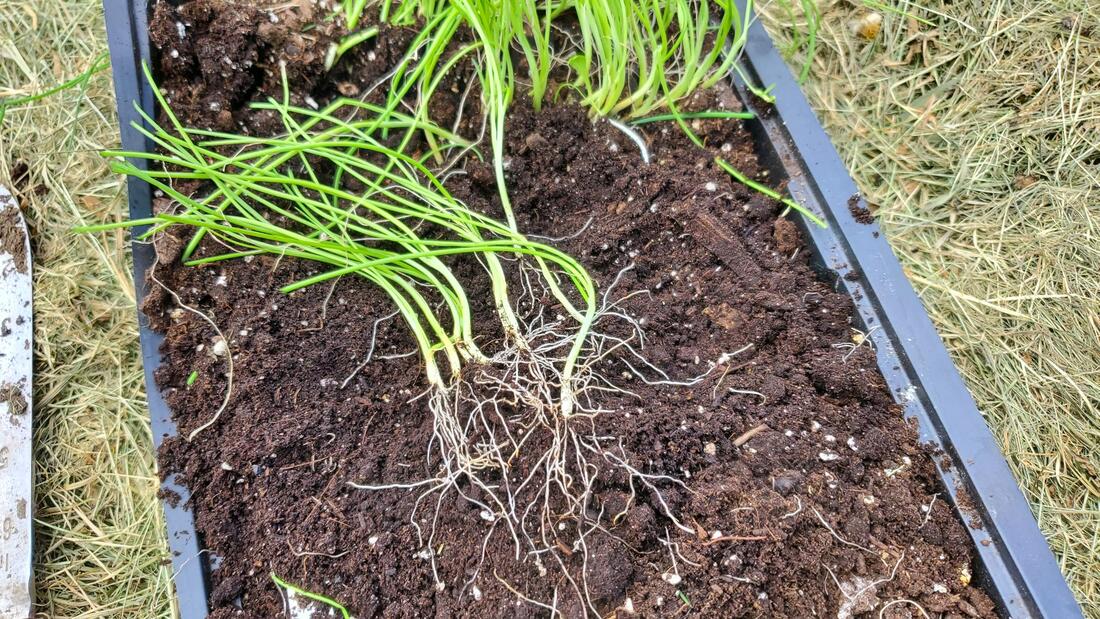 I grabbed 3-4 onion seedlings at a time 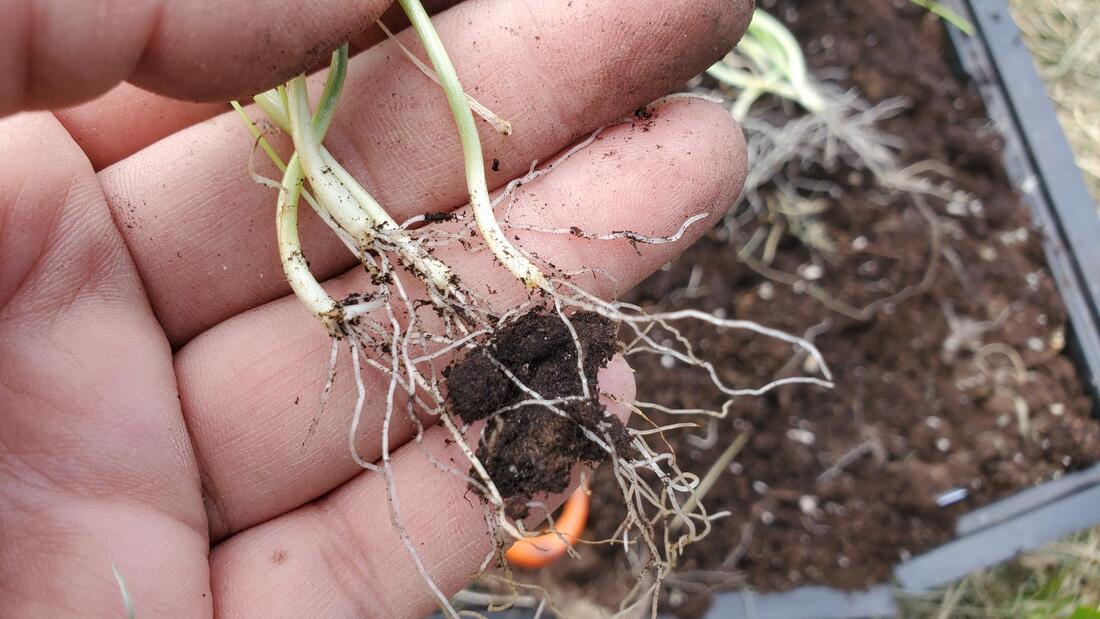 My garden surface was already loose soil (if it had not been loose I would have used the broadfork to loosen it). I had recently replenished the mulch covering it, with a layer of leaves and a layer of grass clippings. I used my hori hori knife to spread the mulch apart and make a small hole. I placed the 4 seedlings in the hole, making sure not to cover them above the split in their leaves. I packed the soil around them a bit. The reason I put 4 onions per hole is that they will naturally push each other apart as they grow. In many cases I will harvest one per hole as a "green onion" early in the season, and maybe even another one to cook as a young onion, but they'd be fine left together to maturity, too. 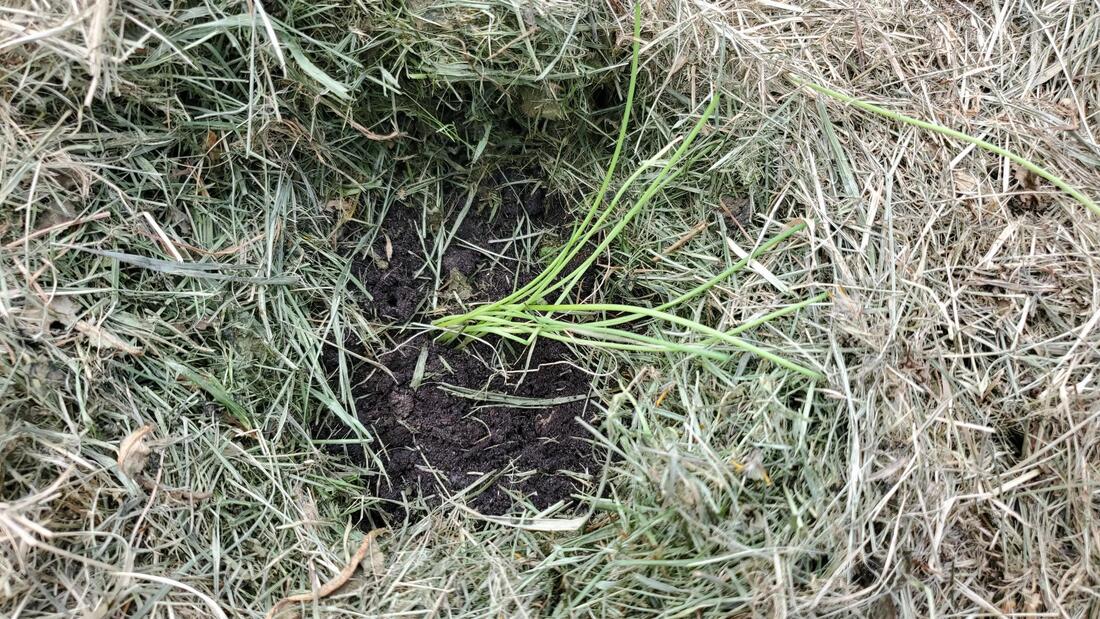 I used a distance of 8 inches between each 4-pack of onions. Even this densely packed, since onions have such skinny leaves, they won't shade the soil and weeds, so it will be important to keep a thick layer of mulch in between the onions, all summer long. I planted my onion sets the same way. In total, I have about 300 onions planted. They are one of those things that we never seem to have enough of! One of my favorite uses is French onion soup, which I pressure can. 
0 Comments
 The first year I gardened, I quickly became overwhelmed by weeds. After a week away, it was hard to get back on top of things. I had read about the importance of mulching, but all that came to mind at the time was expensive bags of mulch at the nursery. I knew the cost would add up quickly based on the size of my garden and needing to add mulch over and over again. However, it was clear that I needed a solution. Starting the next year, and for many years since then, I have been using landscape fabric to control weeds. I lay it down along the rows, over my drip irrigation lines. I secure it with a generous amount of ground staples, rocks, and logs. Advantages of this method include:
I think this is a very decent approach to weed control and I definitely would never go back to not having any kind of mulch. However, I did find that this approach had some downsides:
Over the last couple of years, I have been experimenting with switching over my landscape fabric to natural mulch. I haven't given in to buying commercial mulch - I use whatever I can get my hands on for free. For example:
When mulching with natural materials, I make a pretty thick layer - about 4-6 inches. I keep an eye on it as it decomposes and replenish the low spots every time I mow the lawn or whenever it's needed. Weeds do pop up here and there but they are typically easy to pull. The mulch continuously decomposes, so it keeps enriching the soil. In the fall we put an extra generous layer of mulch that stays there through the winter. It keeps weeds down in the spring and I just pull off the extra when I plant, ready to be used as replenishment as needed. I still have fabric mulch in my main kitchen garden, but I don't use it in any new gardens and I am replacing it with natural mulch as it degrades. This is all part of the "no till / no dig" approach to gardening that I have been transitioning to. This biodegradable mulch composts in place and is making my soil better and better. The book that started me down this path is "Le jardin vivrier" by Marie Thévard. I also recently picked up "No-dig gardening" by Bella Linde and Lena Granefelt and "Building soil" by Elizabeth Murphy to learn more about the topic. One final tip. Years ago Ray decided to use some leftover construction paper as mulch. Not a good idea. It's waterproof so it doesn't let rain in, so you need to water a lot. And, now, 5 years into it, It's starting to fray in places and little bits of it are flaking off, I am afraid it may mix into the ground so we'll have to remove it. So be careful about using things such as this or tarps. Make sure whatever you use is biodegradable.  A few years ago I came across an interesting method of preserving carrots in the book "Root cellaring - Natural cold storage of fruits & vegetables" by Mike and Nancy Bubel - simply placing the carrots in sand. I have experimented with a few variations of this method with good success. I also use the same method for potatoes with great success. I tried with sweet potatoes and it didn't work. I may try other root vegetables such as turnips in the future. I usually store my carrots and potatoes in October and they stay well preserved until late April or May. At that time I replant any potatoes that are left. This is such an easy way to store these vegetables, it is my go-to for any that I will use from October to April. I can some as well for use in the summer.
Here is how I do it:
I have been working to transition to no till gardening. It is making a huge difference in terms of how early I can start gardening (since I don't have to worry about damaging wet soil with the rototiller), and the pleasantness and workload of spring. No more infernal rototiller noise, bad smell, gasoline purchasing, worrying about whether I can start to rototiller or not, flooding the carburator and all the fun stuff that goes along with small engines. When transitioning to no-till gardening, if you have a heavier, clay-based soil like mine, you will still want to "fluff" the soil in the spring (this should diminish with time as more organic matter gets added over the years). The perfect tool to do so is the broadfork. Although the broadfork is a manual tool, I find it much less of a workout to use than my rototiller. Basically, you insert insert the tip of the tines into the soil, step on the broadfork to drive them completely in, and use the two handles and your body weight to fluff the soil upwards. You don't turn the soil over - just aerate it a bit. If you do this right, you should see that the soil is sitting a couple inches higher after you do this. You repeat this down your row. Personally I really like moving the tines a few inches to the left or right after each scoop, I find that does a better job at lifting and aerating the soil. Here is a video of someone using a broadfork. Now that I have a broadfork, I will only use my rototiller to create a new garden bed from scratch, when I need to break the sod and grass. For maintenance, I will rely on my broadfork. 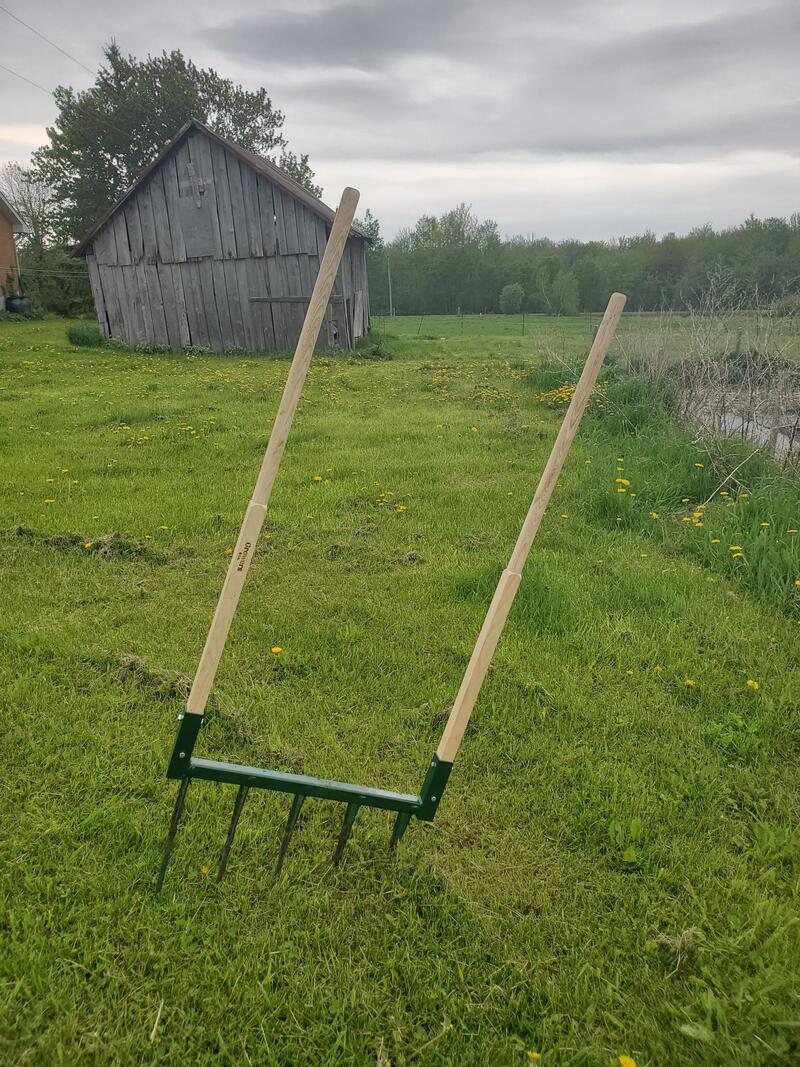 My broadfork, it comes from Growers. Choose one that is the right width compared to your garden rows. 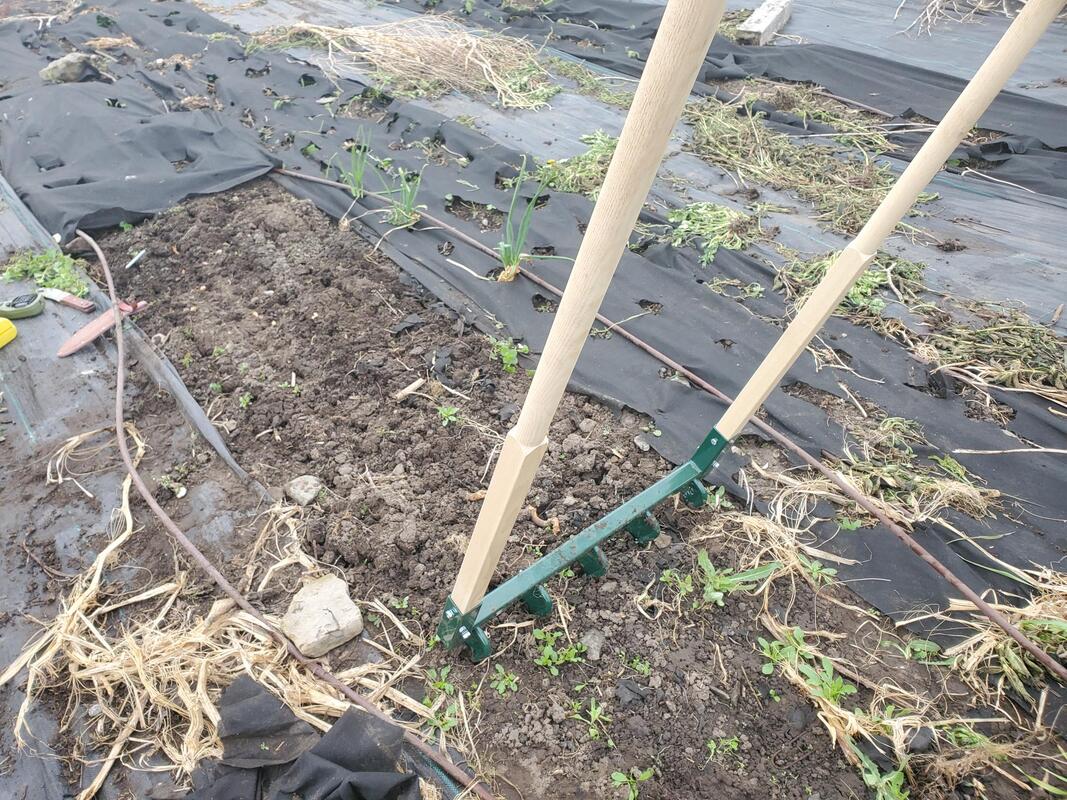 in the process of aerating one of the rows in my kitchen garden
I have previously been hesitant to venture into Hydroponics. The pumps, algae etc seemed to be a source of many problems and expenses. However, going into winter, and with the rising cost of food, I started to miss having salad at every meal, and lettuce isn't exactly something that is easy to preserve. Looking into proprietary systems like Aerogarden was discouraging though. They seemed expensive and design to tie you down to a proprietary system, with special pods, non standard light bulbs, etc, and I didn't always hear good things about people who had used them. I almost abandoned my hydroponic dreams, until I stumbled onto the Kratky method, and now I'm a convert. The Kratky method is easy to do with household materials - no need for pumps, aerators, etc. It is a "set and forget" approach with the simplest possible materials. How is it different than typical hydroponics? The dilemma of hydroponics is that roots need to take in oxygen, water and nutrients. If you simply submerge roots in water, they won't be able to get oxygen properly (that's also why plants do poorly in soil that is saturated in water). Most hydroponic systems address this by using a pump that pumps air bubbles into the water. The pump is the most expensive part of the system as well as the most prone to failure. Instead of using that approach, the Kratky method ensures that part of the roots is submerged in water, and part is exposed to the air. When you install you seedling in its container, the roots should only be partially under water. At time goes by, two things happen simultaneously: the level of the water drops as it gets absorbed by the roots, and the roots grow longer and longer. The end result is that as the roots grow, a balance is kept between how much of the roots is submerged in water and how much is exposed to the air.  This approach cuts out a lot of the complexity and expense. The other appealing element of the Kratky method is that you never add any nutrients or other additives to the water as the plant grows - you just mix up the initial solution and leave it. You can use pretty much anything you have on hand to make your Kratky system. In my case, I used mason jars and soft drink bottles as the main containers and covered them with old mismatched socks to block out the light and prevent algae growth (some people use aluminum foil for this purpose). I used my 2D printer to print the little cups that hold the seedling - but you could use small yogurt containers with holes in them, for example. The initial solution needs to have nutrients added to it (I use Maxigrow), and be PH balanced (so you will need a PH test liquid and Ph+ or Ph-). Instructions on the Maxigrow inform you about quantities to use. I started seedling in soil and transplanted some to Kratky cups, and some to bigger soil pots. The seedlings in the Kratky method grew so much faster and became much bigger. It simply doesn't compare. Out of curiosity, Ray tried a few with normal fertilizer instead of Maxigrow and they did pretty well too. If you grow things that will flower or bear fruit, you may need different types of nutrients. But for greens, Maxigrow is sufficient and simple enough.  Starting the seedlings in soil 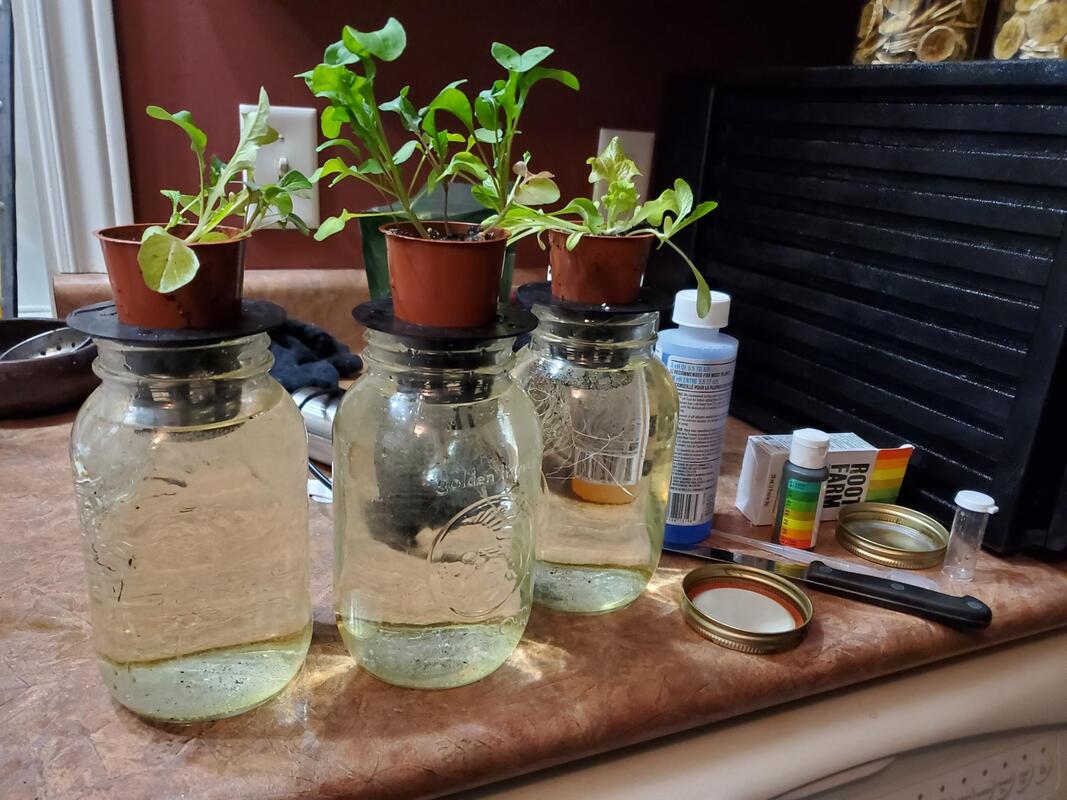 My Kratky setup - mason jars, 3d printed net cups, Root Farm Ph testing kit and Ph- liquid. I also use Maxigro nutrients (not shown) and I cover the jars with old socks (not shown). I leave the seedlings in their seedling cups for simplicity, I just make sure their roots are partially submerged. 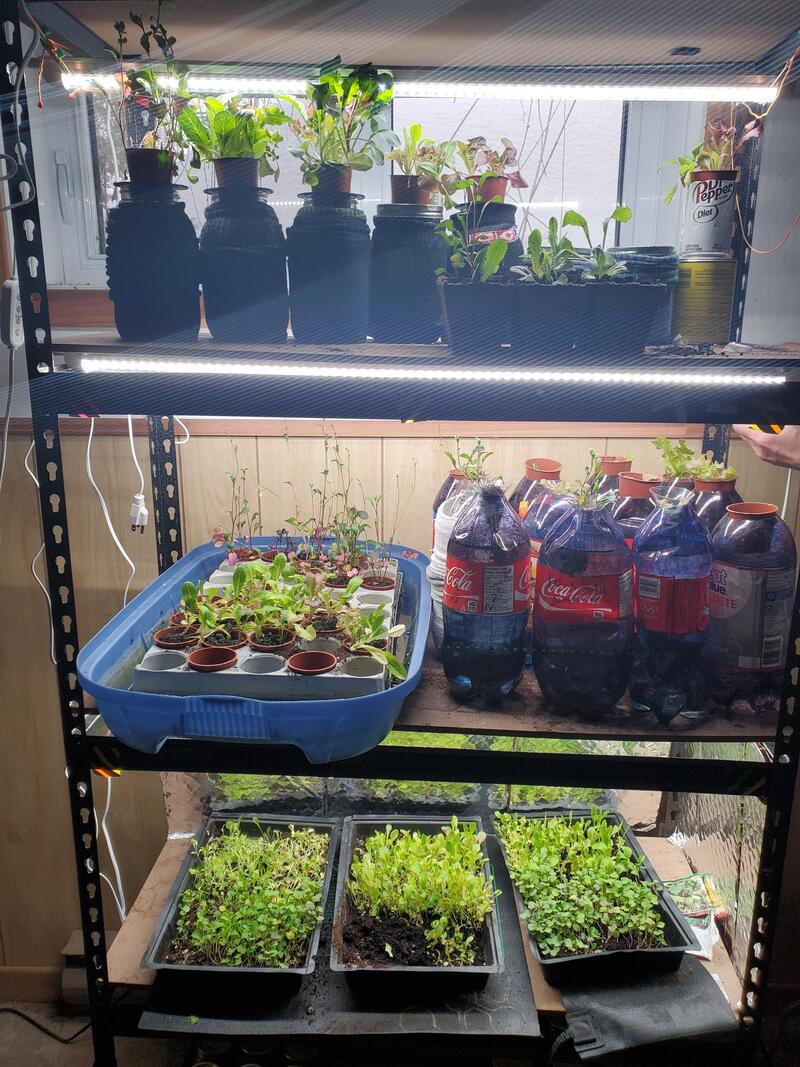 We tried different variations and compared soil vs hydroponics, it got a little bit out of hand. I loved that I could use my seedling starting shelves and lights. You can see we also grow microgreens on the bottom shelf. 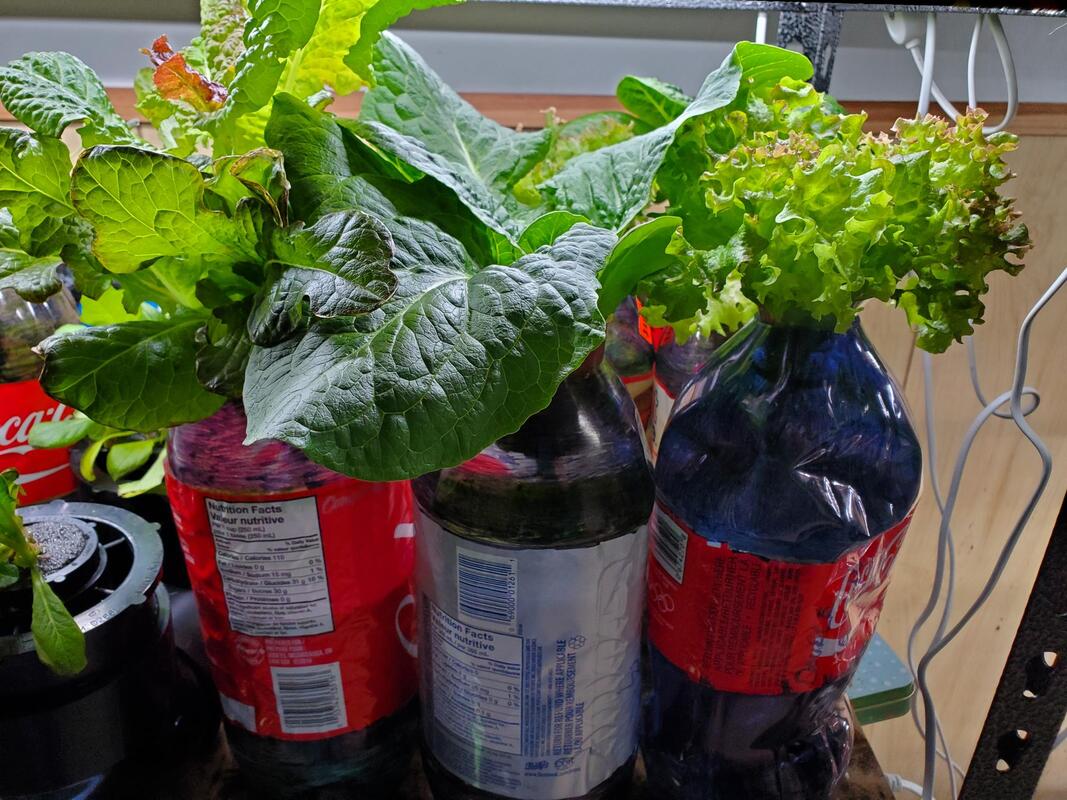 Beautiful hydroponic greens 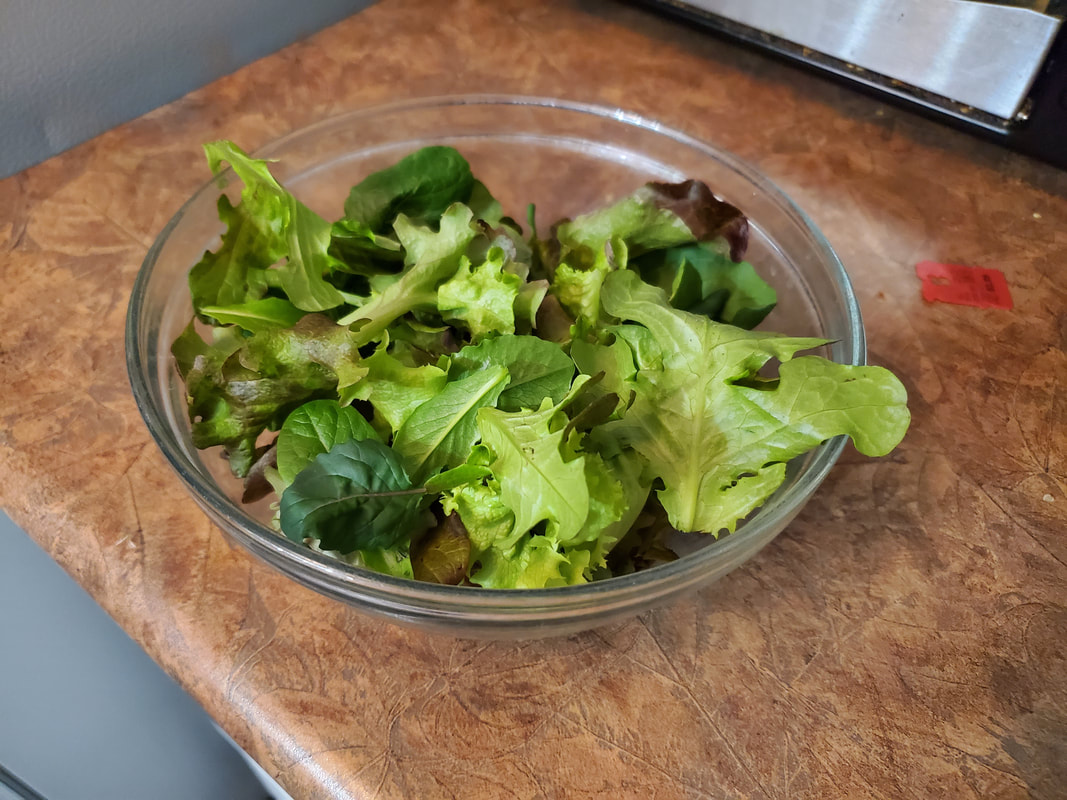 It was wonderful to have fresh salad in the wintertime.
 For me, composting is mostly a sustainable and convenient way to dispose of food scraps. Sure, it's good fertilizer but the amount of compost we generate doesn't put a dent into what we'd need to fertilize the gardens. When I need a lot of compost, our neighbor drops off a tractor bucket or composted manure, or I order some. When we first moved here, I started a compost bin outside. It was okay but a bit of a hassle to walk out and dump scraps, and we often procrastinated (especially in the wintertime) and ended up with a slimy bucket of scraps on the counter or even worse, fruit flies. Ever since I switched to vermicomposting (worm composting), those worries are over. I keep my worm bin next to the kitchen so it's easy to throw food scraps in as we go. To start vermicomposting, you need worms (you can order them online) and a worm farm or bin. There are many specialty bins available online, but, I'd rather make my own. I used two identical rubbermaid bins, one nested into the other. I drilled many, many holes in the inner bin, so that any excess liquid would drain out into the outer bin. Once my worms arrived, I put them in the inner bin along with some moistened bedding. I used coco coir (ordered at the same time as my worms) but there are many options. Once the compost is underway, I always keep about 3-6 inches of dry, shredded newspaper on top. I used to shred the paper by hand but I now use a paper shredder. This helps created a dark but airy environment for the worms, control humidity, and prevent fruit flies. The worms also gradually munch on it. Whenever I have food scraps, I lift up the shredded newspaper and add the food scraps in between the compost and the newspaper shreds. I don't have a lid on my bin. At first I did, but the lid made the bin too humid. The walls of the bins were covered in water and that made it very appealing for the worms to crawl up the sides and escape from the bin at night (they don't like light, so they don't escape during the daytime). Once outside the bin they would dry up and die. Not good! Once I stopped putting a lid on it, problem solved. The newspaper keeps it dark enough for them to be happy in the compost. There are many theories online about keeping the newspaper moist, but, I find that the lowest layer of newspaper gets moist just from absorbing moisture from the food scraps and compost. The top stays dry and the worms stay away from it. Once in a while, I throw in some eggshells grinded up in my food processor or mortar and pestle. The worms apparently need to eat this "grit" to help them grind up the food they eat. It's important not to overwhelm the bin with food scraps - the worms can only process so much. The worm population will adapt to the quantity of food you generate. However, in my case, when it's time to put up a lot of food (canning season), I have too much waste all of a sudden - in that case I put all the excess in my outdoor compost bin. But the rest of the year, the worm bin in sufficient. Every 1-2 years I harvest the compost. I have not found an easy way to do this. I used my 3D printer to print 3 sieves with holes of various sizes, that I designed to mimic the fabric screens people buy to make sieves. That allowed me to catch all the unprocessed bits of food (which I returned to the bin). But ultimately, I also need to do some hand separation of the worms and the compost. Since they run away from light, it's possible to scoop up the top layer of compost which will be worm less. By the time you put that layer into a bucket, the worms will have gone deeper and you can repeat that process. The worms need very little attention. Just topping up the shredded newspaper when it gets low. When we leave on vacation for a few weeks they don't need any special attention (don't overfeed them just before leaving - that's a recipe for fruit flies! Just give them the normal amount of food. They will keep busy processing leftover scraps and newspaper until you return. 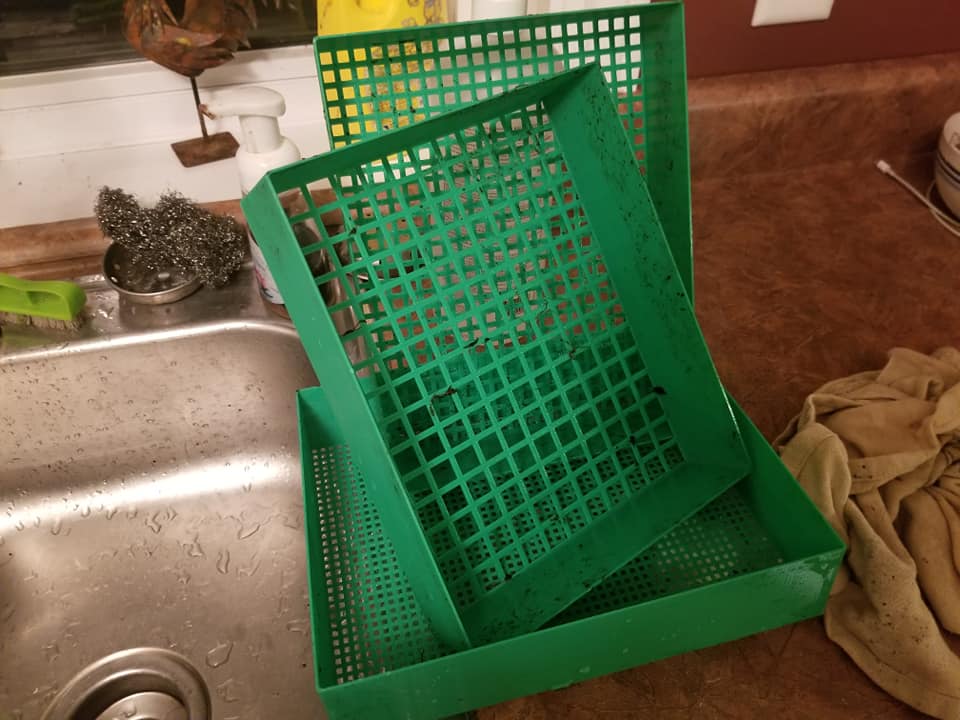 The 3D printed sieves I designed and printed In this part of the world, the first gift we get from the land every year is maple syrup. We tap about a dozen trees most years. Mirroring our approach to everything else, we aim to harvest enough maple syrup to last us for the year and give a few gifts. Since that's a fairly small production, we keep things very simple and use as little specialized equipment as possible.  To produce maple syrup our way, you will need:
As a rule of thumb, when it's freezing at night and above freezing in the daytime, the maple sap will flow. Once we see a stretch of time in the forecast that will fit that pattern (usually around mid-March), we tap our trees. We drill holes about waist high, with a slight incline up, and hammer in a spile - it should fit snuggly but not be too hard to take out at the end of the season. 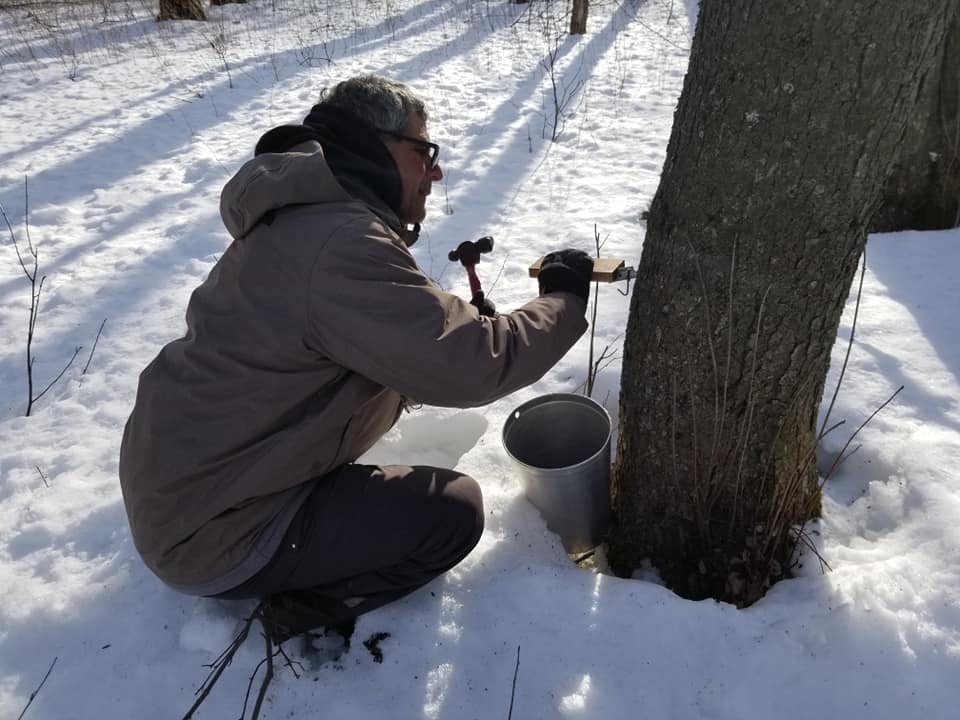 We tap about a dozen trees. On a good flow day, that could fill two big buckets (50L in total) which is about the maximum we can pull up the hill on the sled comfortably. The sap flow isn't always predictable. There is more to it than the rule of thumb I mentioned above... it depends on how sunny it is, how wide the fluctuations are, and it seems to depend not only on the weather in the last 24h but a little bit longer too. The science of the maple sap flow is very interesting. 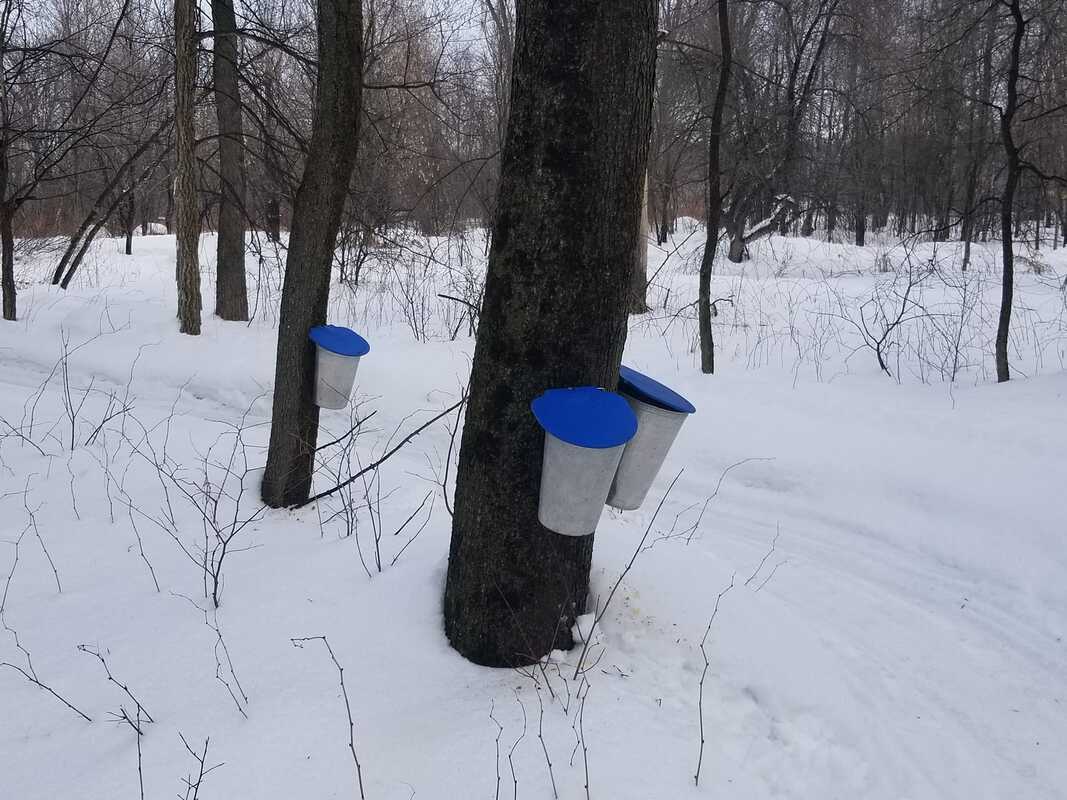 Every couple of days we empty the pails into plastic buckets and carry them up the hill. We filter the sap through a jelly bag and boil the filtered sap in big stockpots. We simply boil the sap on our electric stove. This produces a lot of humidity, which is why a lot of people boil outside, but we don't worry about it too much since it's a once-a-year occurrence. We open the windows, it's nice to get some spring air in the house. Sometimes we ran the dehumidifier. Lots of people say that if you boil sap inside, your walls will be sticky but I haven't seen this to be the case at all. As the level drops, we had more sap. You'll be able to tell by the color that it's getting more concentrated. 40L of sap will make approximately 1L of maple syrup. Stick a thermometer in there once in a while - once you reach 4 degrees over the boiling point (for us that's 104 Celsius but it depends on your altitude), your maple syrup is ready. Keep a close eye on it as you get close to this reading, because maple syrup that is close to being done can very easily boil over (spill over the top of the pot) and that is a huge mess to clean up! We keep combining new sap into the pots over several days, it's easier not to burn it if you have a good amount in the pot. Sap will spoil so we refrigerate it or put it in a snowbank in between boils. Don't forget to sample the sap at various points during the boiling process! We call this "maple tea"! 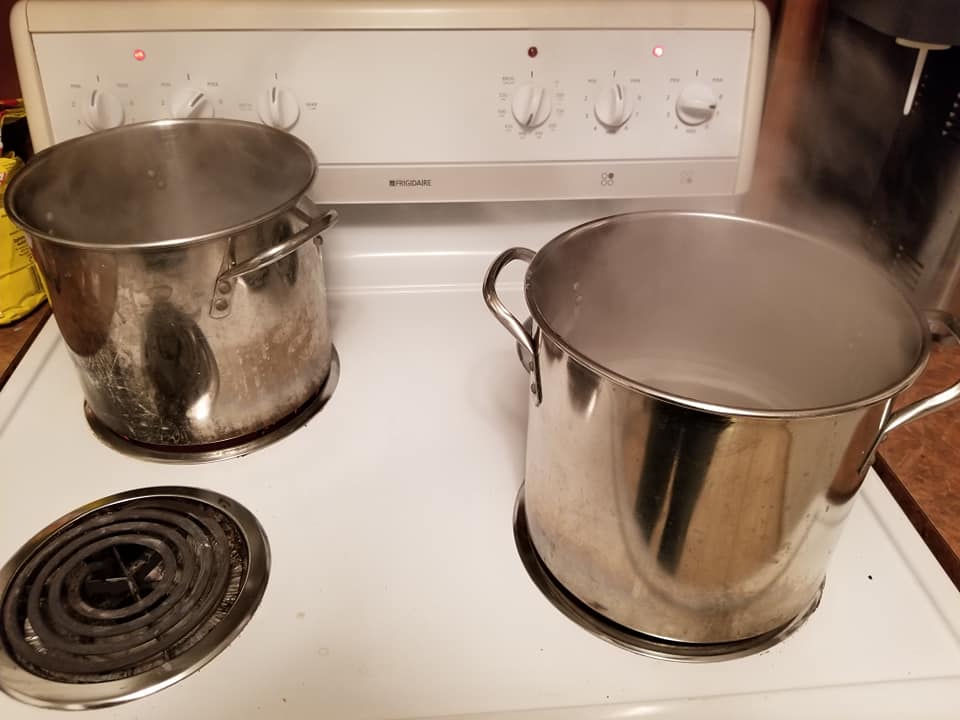 When the maple syrup is ready, I pour it into mason jars or whatever jars are on hand. I haven't found a safe canning procedure anywhere for maple syrup to make it shelf stable, so I store it in the freezer. I have had a bit of mold on it when I tried to store it at room temperature so I don't want to take any chances. I suspect you could use the same canning procedure as for canning simple syrup but I don't think it's been tested. 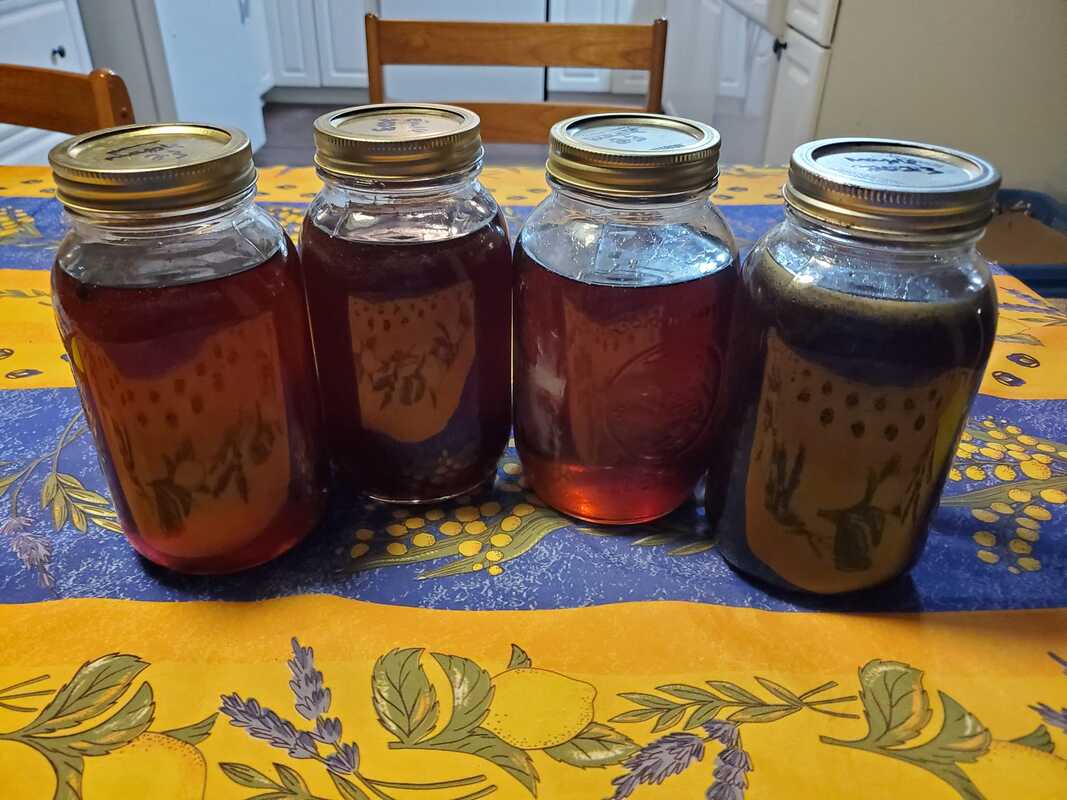 We use maple syrup all year long for pancakes (which is a camping treat), hot beverages, one of my favorite family recipes, turnip maple soup and a new favorite, maple delicata squash 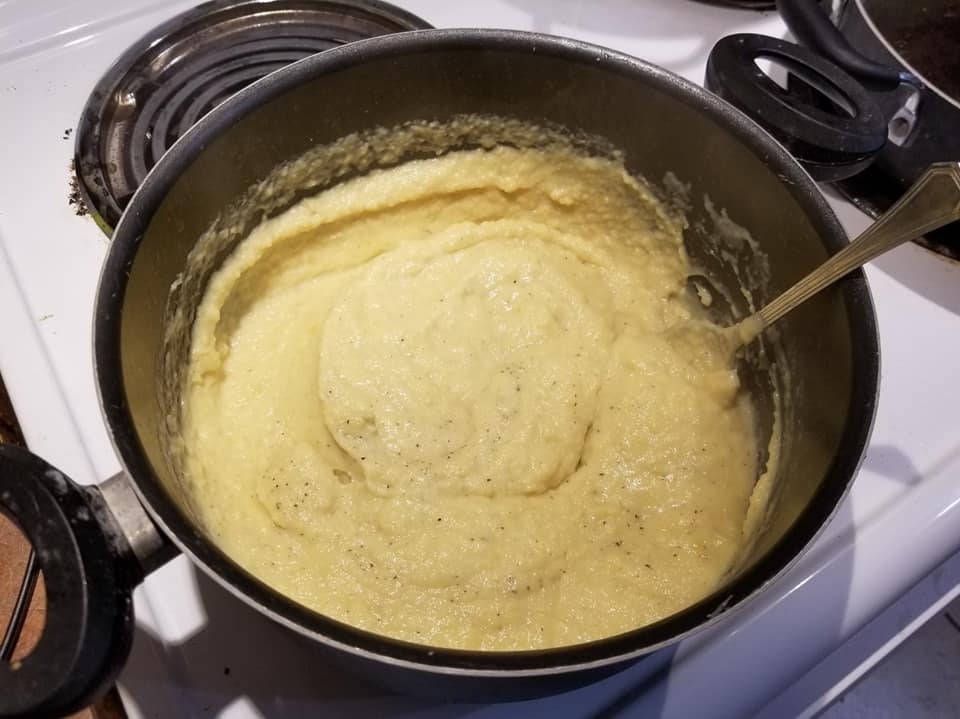 Turnip maple soup |
About this blogThis is where I share my learnings and adventures in homesteading Archives
May 2024
Categories
All
|
 RSS Feed
