|
Over the years I have worked to establish more perennial food plants on our property. They typically cost a little more upfront but having low-maintenance, recurring sources of food is great. In the process of writing this post, I realized we have over forty different perennial foods growing on our property - a mix of naturally occurring and purposefully introduced.
I have integrated these perennials plants in various places on the property, creating a bit of an edible landscape; but I also have a few dedicated perennial beds in a section of our property. I keep these beds separate from my main garden so that they don't interfere with crop rotation. Before I switched to a no-till approach, it was a also a concern that they would get in the way of rototilling. I'll provide a summary of the perennial foods we grow, in hopes that it will give you ideas if you live in a similar zone. Even though we live in zone 5, I tend to favor perennials that are rustic to zone 3, to ensure they are very rustic and survive our winters. Trees:
Berries and other small fruits:
Edible flowers:
Herbs:
Others:
Naturally occurring perennials (foraging - more details here)
Failures - things I might try again:
0 Comments
This year I am growing onions from seed for the first time, after many years of using onion sets. Part of my motivation is cost, but I also read in Le Jardin Vivrier that onions from seed tend to store better. Here is the approach I am taking based on the principles of no-dig, intense planting. I started my onion seeds in a tray. I planted them very densely in rows. I didn't thin them. I trimmed them a couple of times to keep them around 6-10cm long. The trimmed ends are very fragrant and I used them in my cooking. 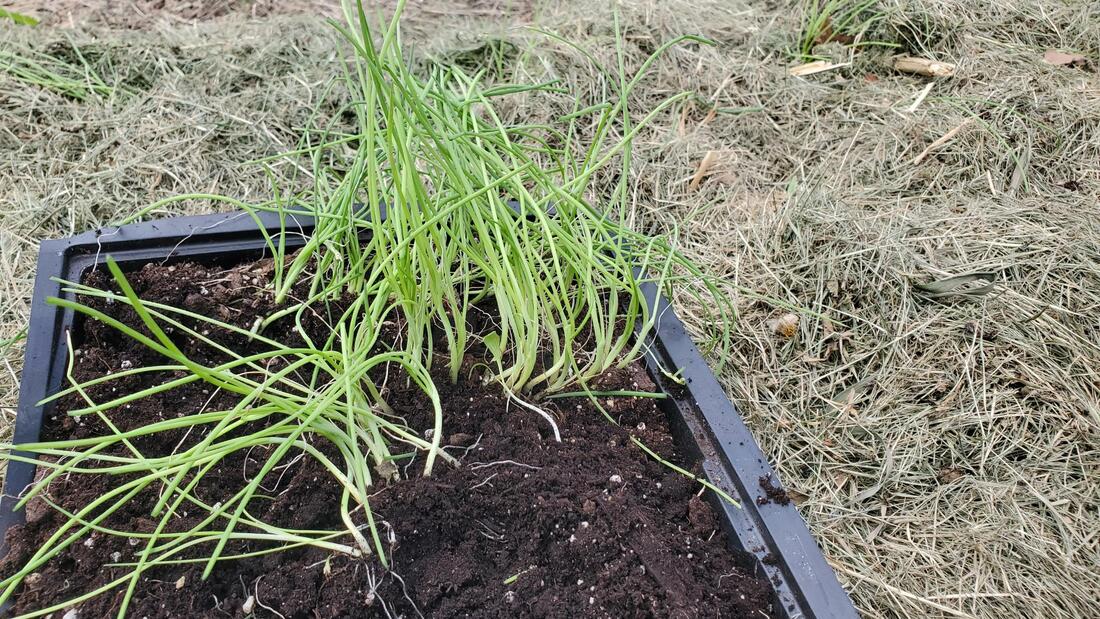 Once it was transplanting time, I trimmed them once more to around 6cm, and loosened the soil in the tray. It was easy to pull out the tiny onion seedlings and untangle them. 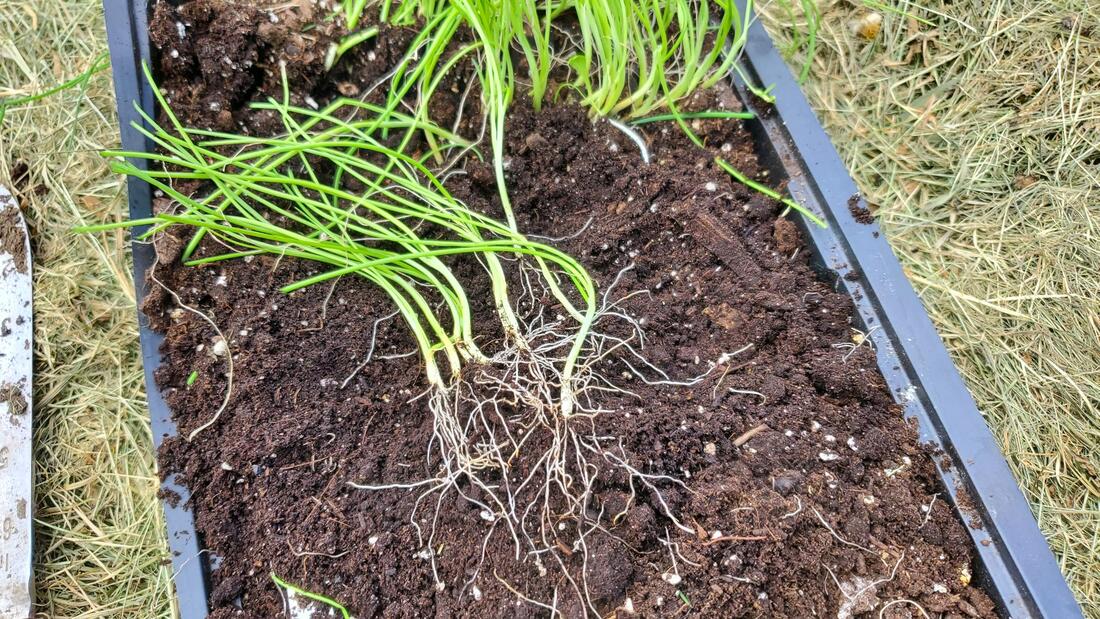 I grabbed 3-4 onion seedlings at a time 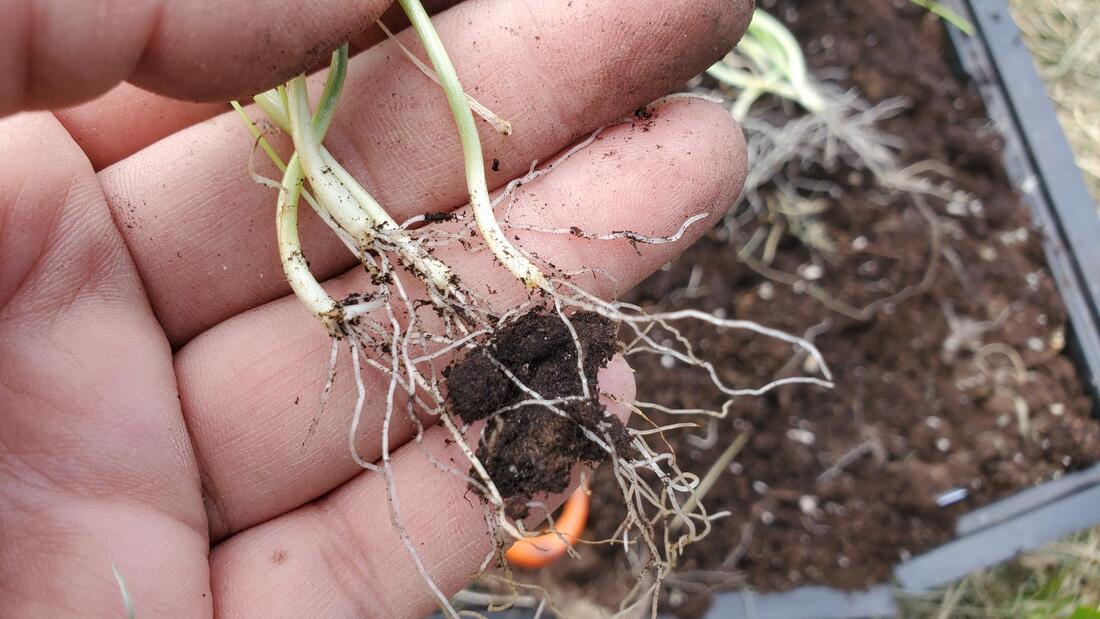 My garden surface was already loose soil (if it had not been loose I would have used the broadfork to loosen it). I had recently replenished the mulch covering it, with a layer of leaves and a layer of grass clippings. I used my hori hori knife to spread the mulch apart and make a small hole. I placed the 4 seedlings in the hole, making sure not to cover them above the split in their leaves. I packed the soil around them a bit. The reason I put 4 onions per hole is that they will naturally push each other apart as they grow. In many cases I will harvest one per hole as a "green onion" early in the season, and maybe even another one to cook as a young onion, but they'd be fine left together to maturity, too. 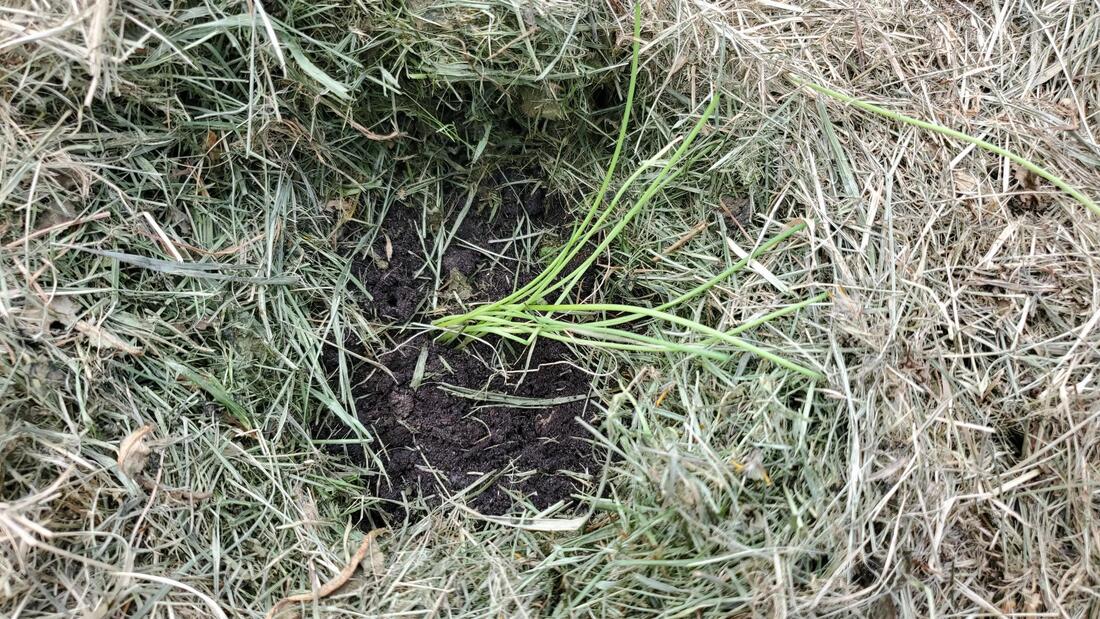 I used a distance of 8 inches between each 4-pack of onions. Even this densely packed, since onions have such skinny leaves, they won't shade the soil and weeds, so it will be important to keep a thick layer of mulch in between the onions, all summer long. I planted my onion sets the same way. In total, I have about 300 onions planted. They are one of those things that we never seem to have enough of! One of my favorite uses is French onion soup, which I pressure can.  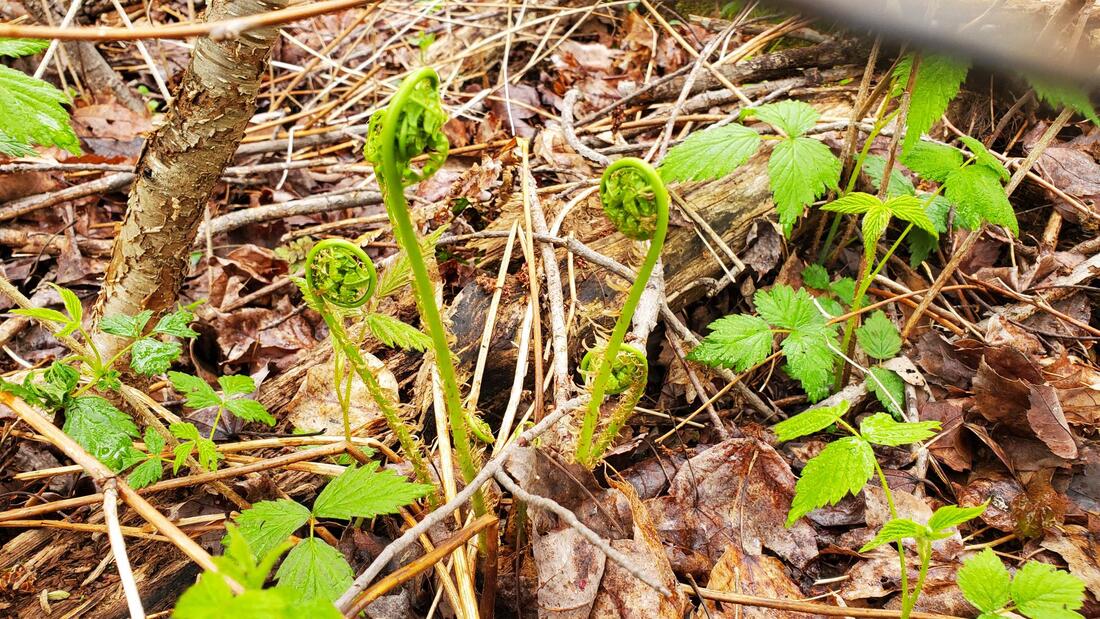 Fiddleheads are a great food to forage. They are very easy to identify around here, and come pretty early (early/mid-May this year where we live, in Eastern Ontario), right as nature wakes up and before I can get fresh greens from the garden. It might be easier to spot a nearby ostrich fern patch in the summer, and go back to harvest in the spring. We have lots in our forest. 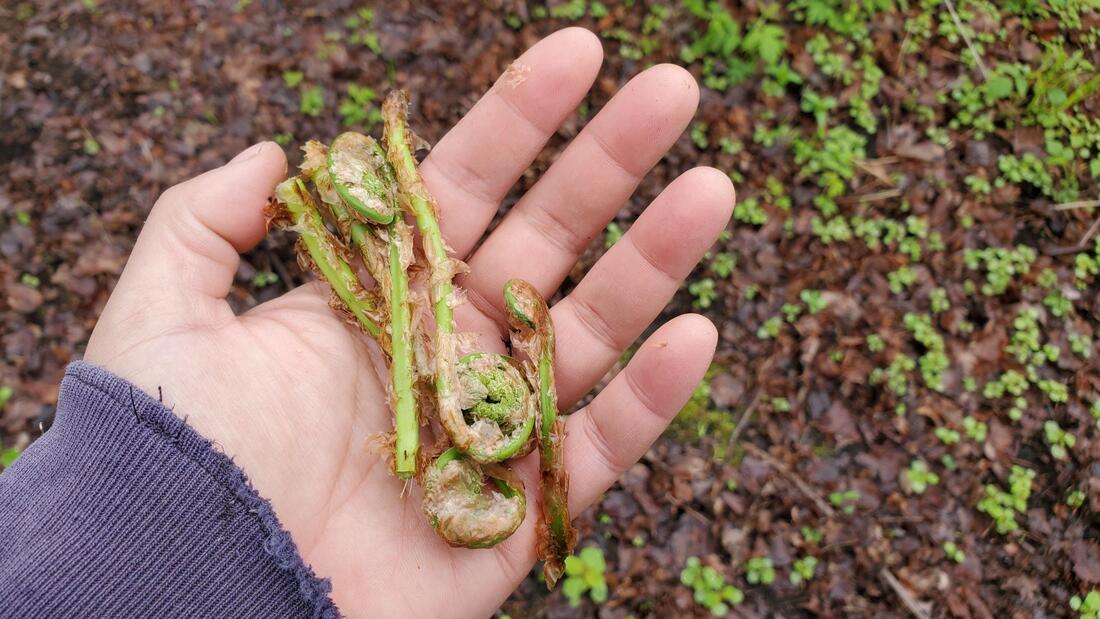 Fiddleheads are the early form of the Ostrich fern - one of two abundant ferns in our area, which also has a lot of Cinnamon fern. It's key to be able to distinguish between these two ferns, and luckily it's pretty easy. The first key characteristic of the ostrich fern is that is it covered with light brown / tan paper - as opposed to the white fuzz that covers the cinnamon fern. The second key characteristic is that its stem has a groove in it (a cross section would be U shaped like a tiny celery), as opposed to the cinnamon fern which doesn't. In the picture below, the ostrich fern is at the top and the cinnamon fern at the bottom.  I cut a couple of fiddleheads from each fern and leave the rest, to ensure a sustainable harvest. I cut them near the ground as the stem is quite good. Once at home, I sort through the fiddleheads to confirm identification, remove as much of the papery husk as I can (but it's fine if some stays), trim off the ends and wash them. I boil or steam them, then pan fry them in olive oil with garlic, salt, pepper. I add a little bit of lime juice. Delicious! 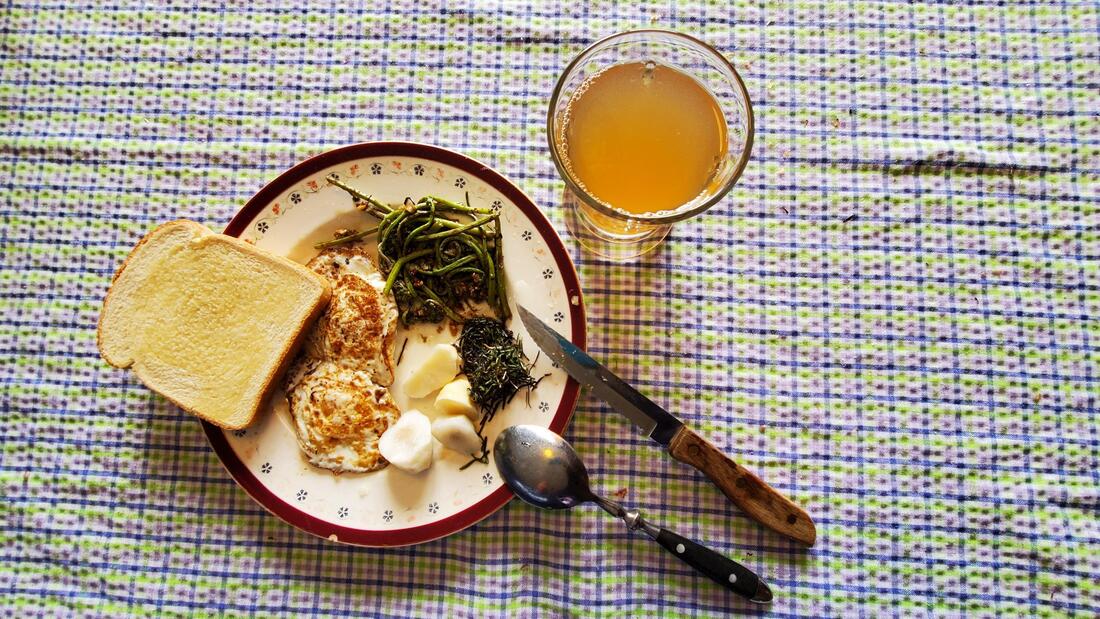 Delicious local lunch... harvested from our property: panfried fiddleheads, fermented sunchokes, the tops of my onion seedlings, which I trimmed yesterday, and hard apple cider; supplemented by guinea eggs from the neighbors 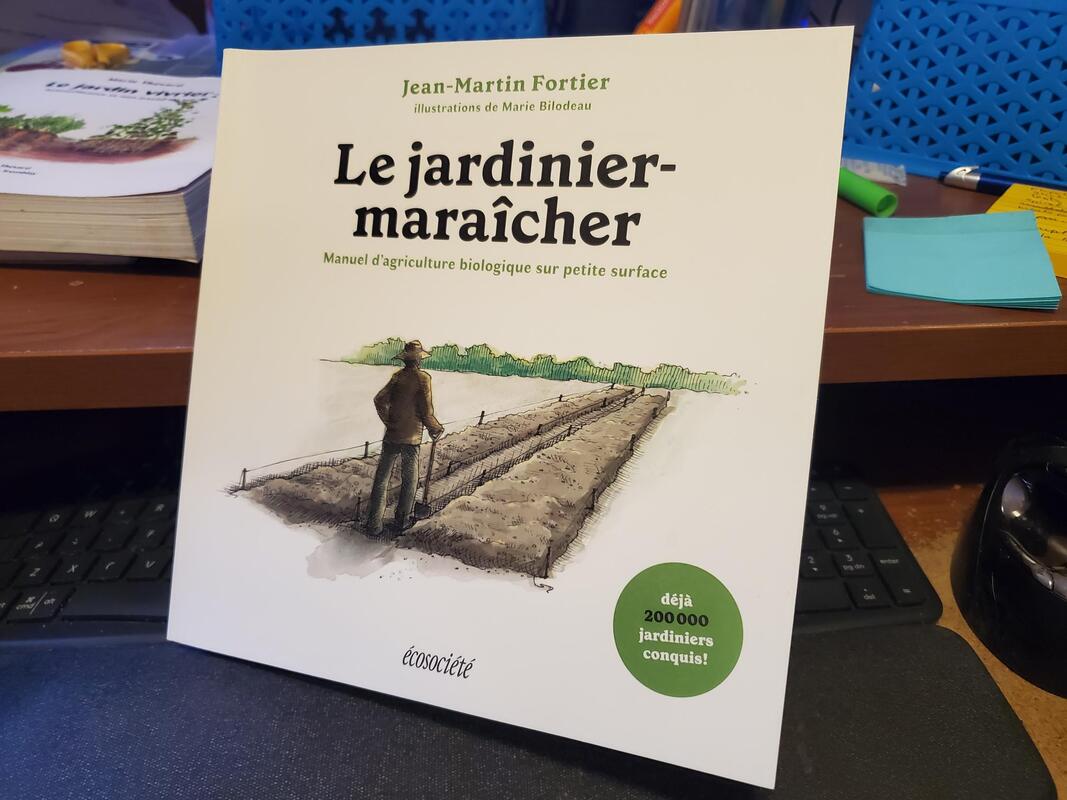 Le jardinier-maraîcher: Manuel d’agriculture biologique sur petite surface, Jean-Martin Fortier
The market gardener : A successful grower’s handbook for small-scale organic farming, Jean-Marc Fortier This very practical handbook is based on the experience of Jean-Martin Fortier and Maude-Hélène Desroches in establishing a successful small scale organic farm serving customers mostly through a CSA basket program, in the Eastern Townships of Québec. Their approach is centered on organic methods, intense planting, and efficiency of work, enabling them to minimize how much they invest in equipment and people power. Given these goals, a lot (but not all) of their conclusions are very applicable to a homesteading garden, where minimizing work and investment are typically very important. Where the applicability breaks down is where they make decisions based on building their customer base, and also, because minimal attention is paid to planning a garden with the goal of preserving food over winter, as their business revolves around selling fresh produce. I really enjoyed the way the book is organized – it is a true handbook, with chapters on every phase of setting up and operating a large garden. The first few chapters would be useful for someone who is still dreaming about homesteading. They cover how to chose the ideal property and how to set up your site. If you already have a property, you will probably only skim them. The rest of the chapters are dedicated to one topic each, including fertilizing, indoor seedlings, direct sowing, weeding, pests, prolonging the growing season, harvesting and planning your production. Personally, I also enjoyed how throughout the book, the author shares the philosophy behind their approach. The themes of sustainability, anti-consumerism and seeking a balanced life resonated strongly with me. These themes don’t take over the book, but they do incite reflection and give an intention to the work. There are many reference charts and appendices covering things such as rotation charts, crop spacing, planting calendars, solutions to common problems, etc. There is also considerable attention given to the business side of things, which I found interesting but not very applicable to my situation, where my goal is feeding myself and my family, as opposed to growing a business. After my first reading of the book, I have a few take-aways that I am immediately putting into practice:
Those are my immediately actionable items. The book also gave me some longer-term ideas. I would like to look into simple-ish ways to extend the growing season, such as floating covers, row tunnels, and maybe a small greenhouse. I am also curious to do some more scientific soil tests and to look into a more test-based approach to fertilizing my soil. There were also some aspects to the book which were not really applicable to my situation, and I feel that they may not appeal to most homesteaders. The approach explained in the book is not a no-till approach – some light hand-operated machinery is used. It makes sense from a business perspective but on the kitchen garden scale, I prefer the simplicity, and lower investment, of a no till method. Some of the equipment, although much more affordable than typical farming machinery, is still a bit pricy if you aren’t planning to recoup your investment through sales. Similarly, the farm relies on manmade mulches, and some options are interesting, such as a cornstarch based biodegradable membrane that is incorporated in the soil in the fall. However, in my case I will stick to natural mulches such as leaves and grass cuttings, which I can get for free and which contribute to improving the quality of my clay-based soil. In conclusion, I would highly recommend this book to anyone with a large garden, especially if they are based in zones 3-5. I would rank it as my second favorite book, after “Le Jardin Vivrier” by Marie Thévard – the reason I prefer the latter is because the scenario described in the latter is more similar to my own – a self-sufficiency goal, rather than a small business goal. Together, these two books make a powerful duo for people in a homesteading situation. After many years of canning, I started to venture out into fermentation as well. One of the new recipes I tried this year is sauerkraut. In this blog post I'll walk through the process I use. It's based on the NCHFP instructions. The first step is growing cabbage. Cabbage heads are huge so I usually just buy a few seedlings since I don't need too many. After picking the cabbage head, I take off the root and a few layers of outside leaves outdoors and compost them. 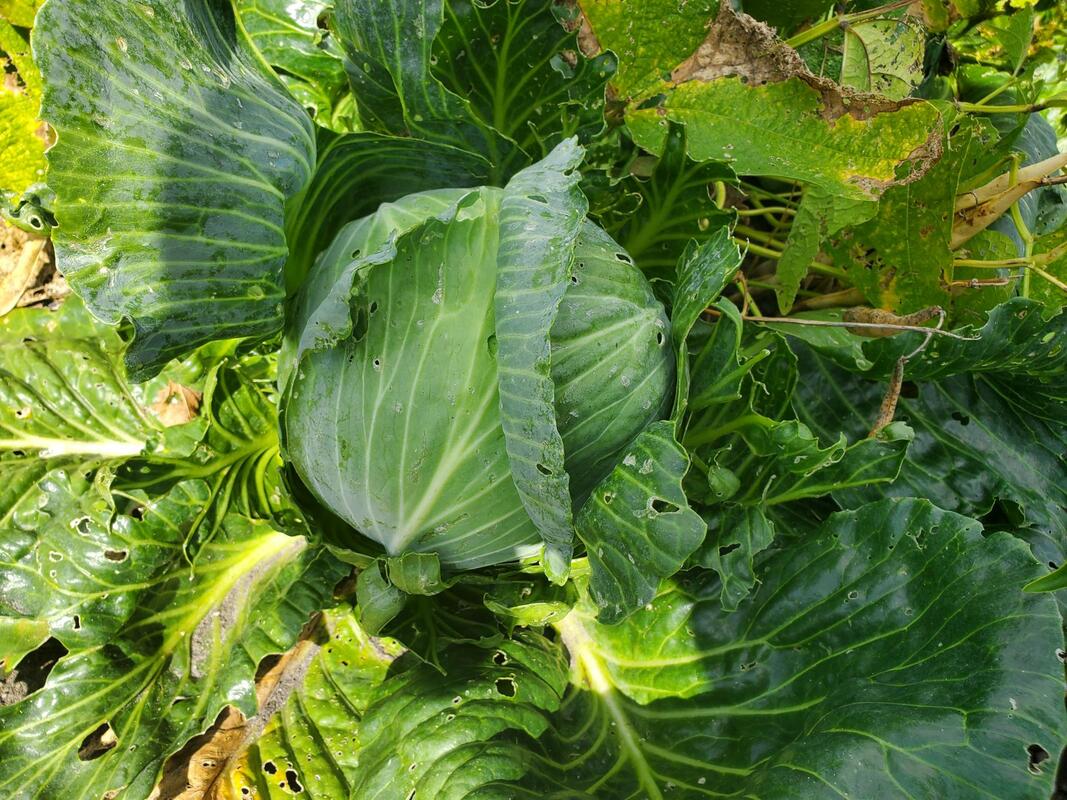 Once in the kitchen, I put the cabbage in the sink and wash and remove any outside leaves that are dirty. I set aside a few flat leaves for later, then I quarter the cabbage and start slicing it into the thinnest pieces that my patience allows. 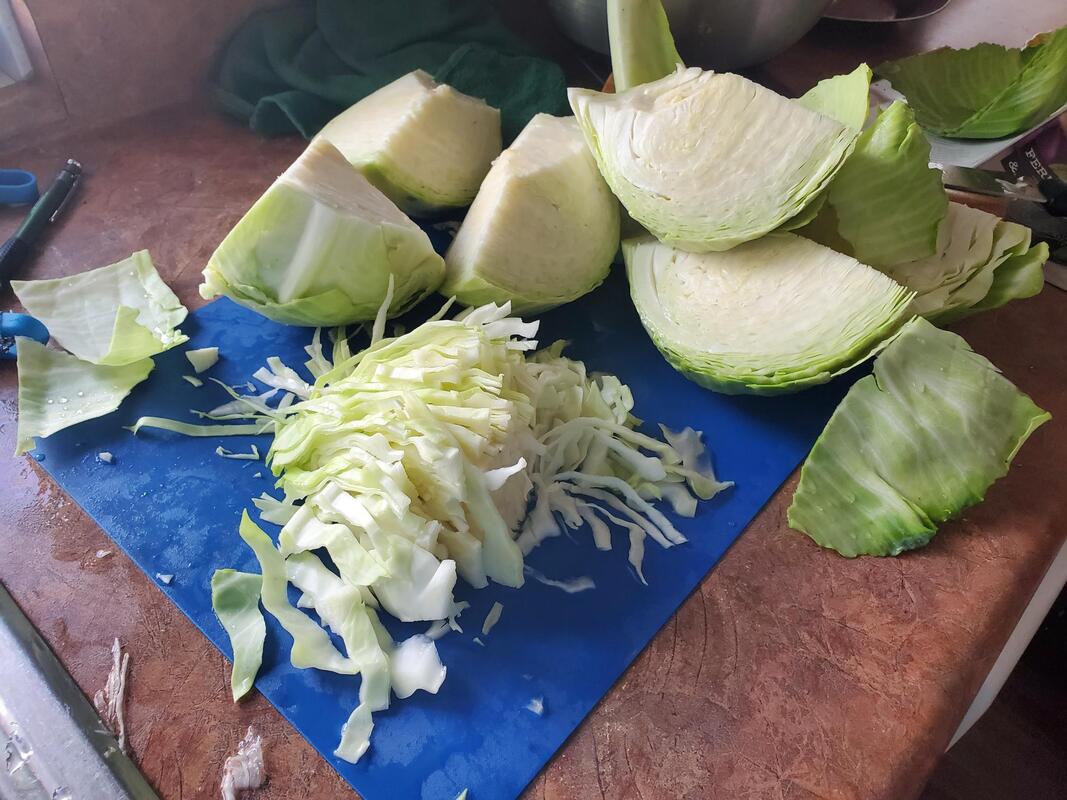 As I chop the cabbage, I dump it in a big pot and add canning salt. You need 3/4 cup of salt per 25 pounds of cabbage. I alternate layers of cabbage and sprinkled of salt. 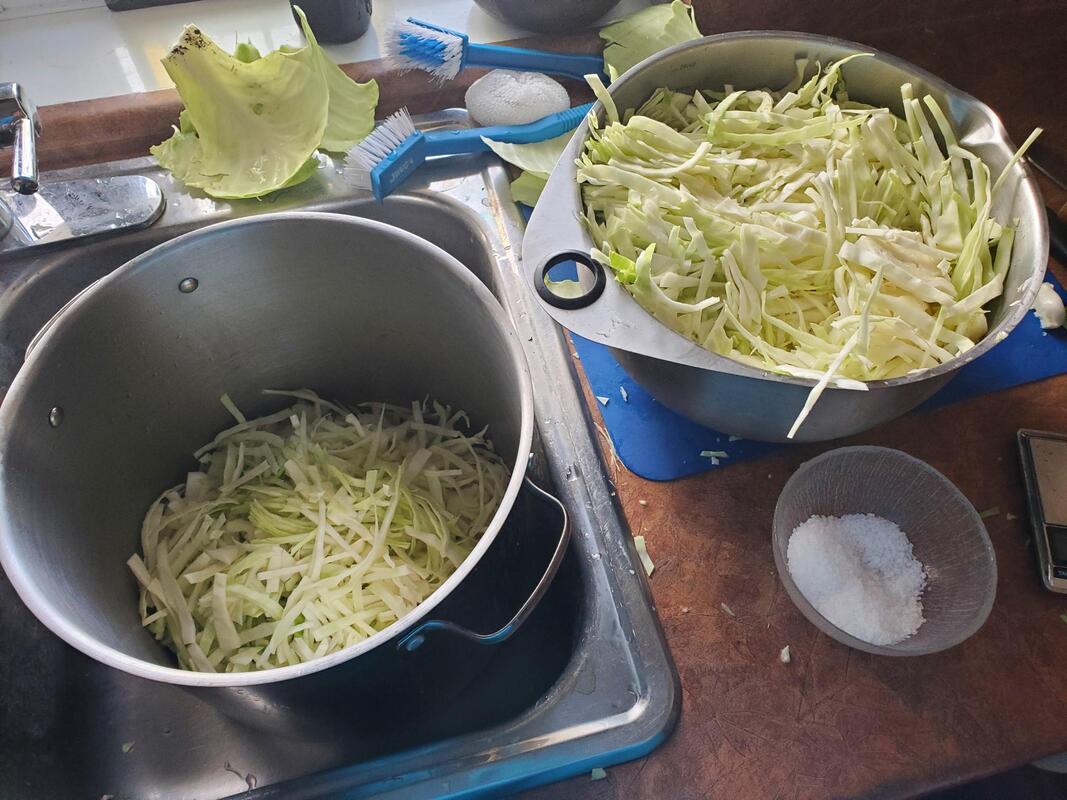 Then comes the fun (stress relieving) part. To tenderize the cabbage and help it release its juices, you have to massage it with your hands, and then pound it with a pestle of some kind. It is truly amazing how much the consistency of the cabbage changes, how much more compacted it becomes, and how much juice comes out of it. 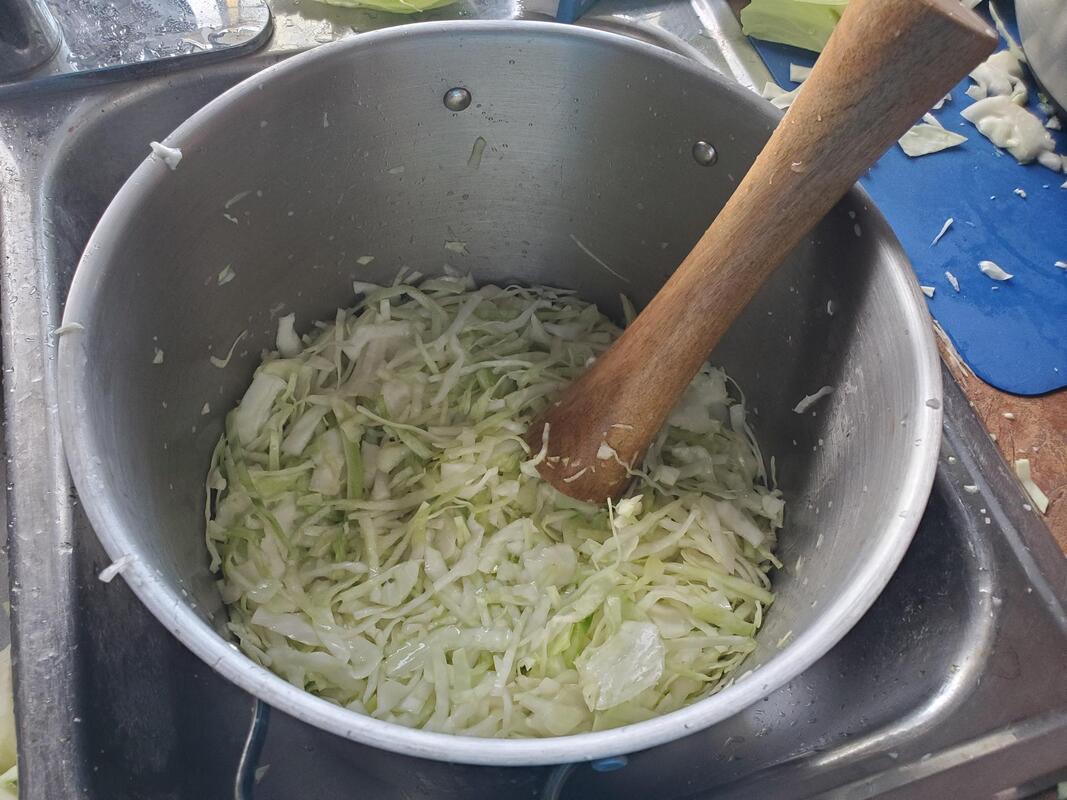 After a period of rest, I pack the cabbage in its juice in mason jars. Again, I use the pestle to make sure there aren't any air gaps. I cut circles out of the flat cabbage leaves I saved and put them on top of the cabbage and juice (you can see one in the middle jar in the picture below). 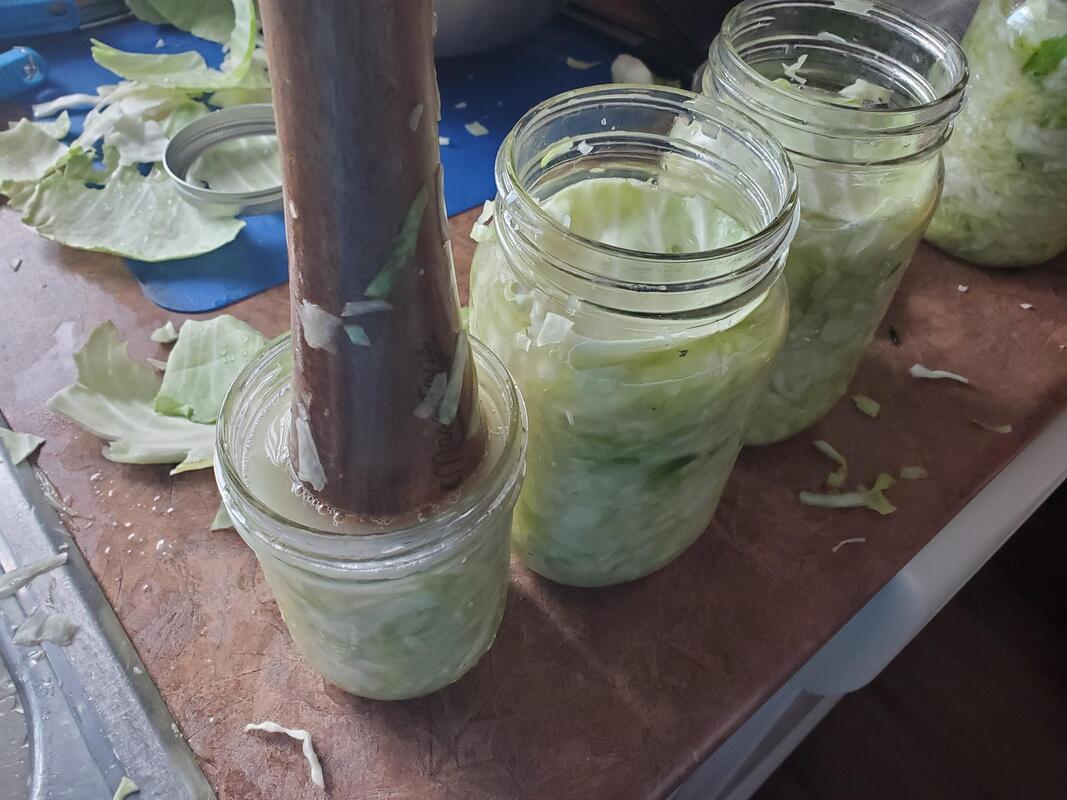 On top of the cabbage leaf, I add a glass weight that ensures everything is submerged (key to prevent anything from spoiling), a vented silicone cap, and a jar ring. After that, I tuck away the jars in a box in an out of the way spot. It's best to keep them in the dark. I leave them mostly unattended. They expel lactic acid (which makes the Ph drop) and CO2. It's important not to open the jars, so that the CO2 produced by fermentation gradually replaces all the air. During this time, bacteria that thrive in the salty brine environment take over. 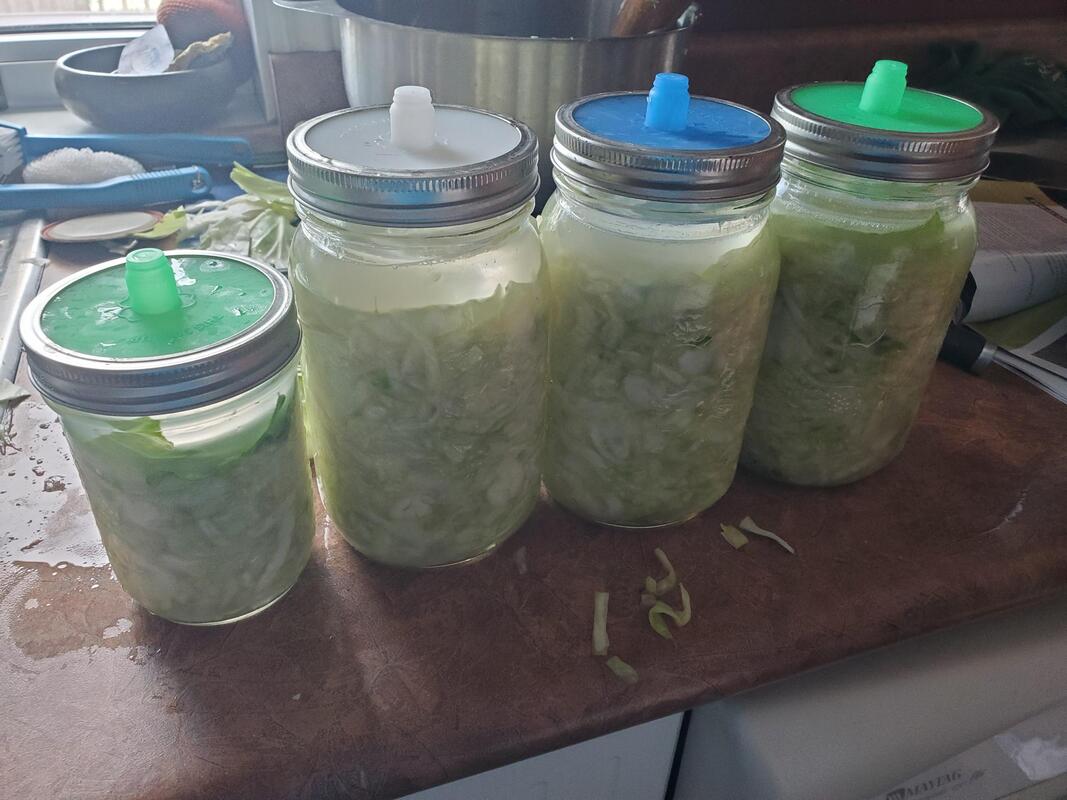 The amount of time needed for fermentation varies depending on temperature. My house is fairly cool so I let it ferment for about 5 weeks. It is interesting to see the CO2 bubbles and the color change. 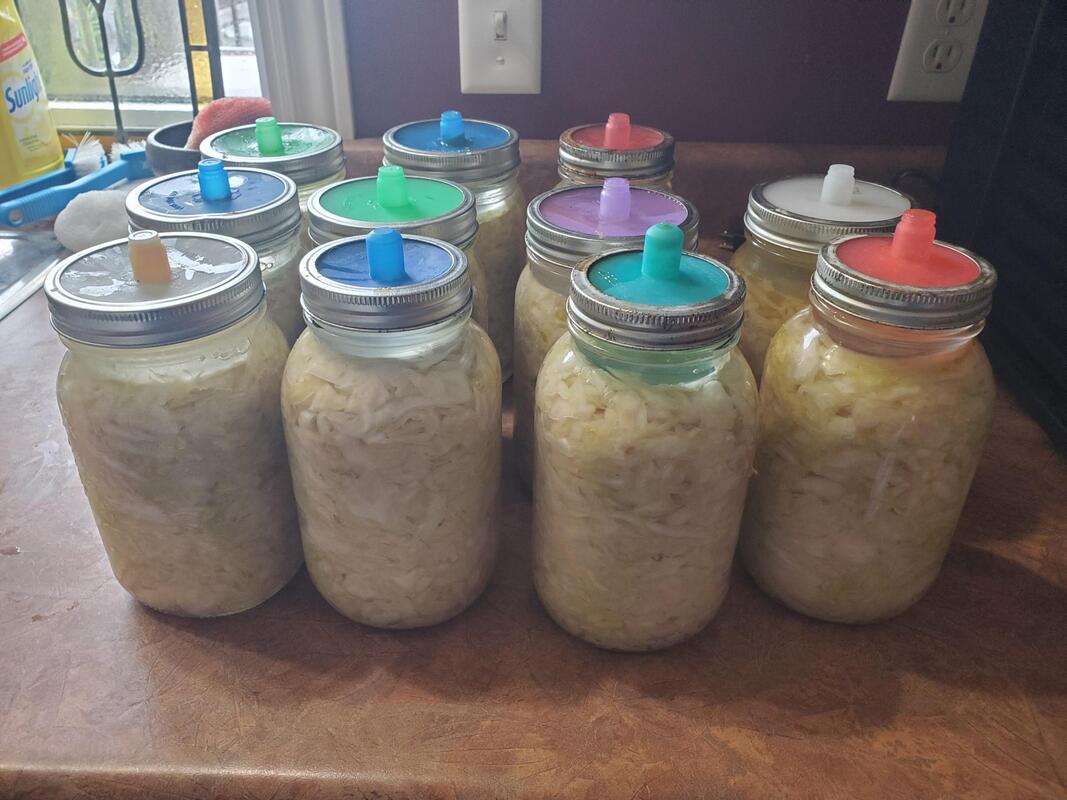 Once the fermentation is done, I remove the glass weights, do a bit of repacking (making sure all jars are topped up to 1/2 inch from the top, putting some in smaller jars so I can have smaller portions when needed, etc). I put on canning lids and pop them in the steam canner. I follow the NCHFP instructions for processing them in the canner. It's also possible to just put them in the fridge at this point but fridge space is always tight for me so if I can make it shelf stable, I do. 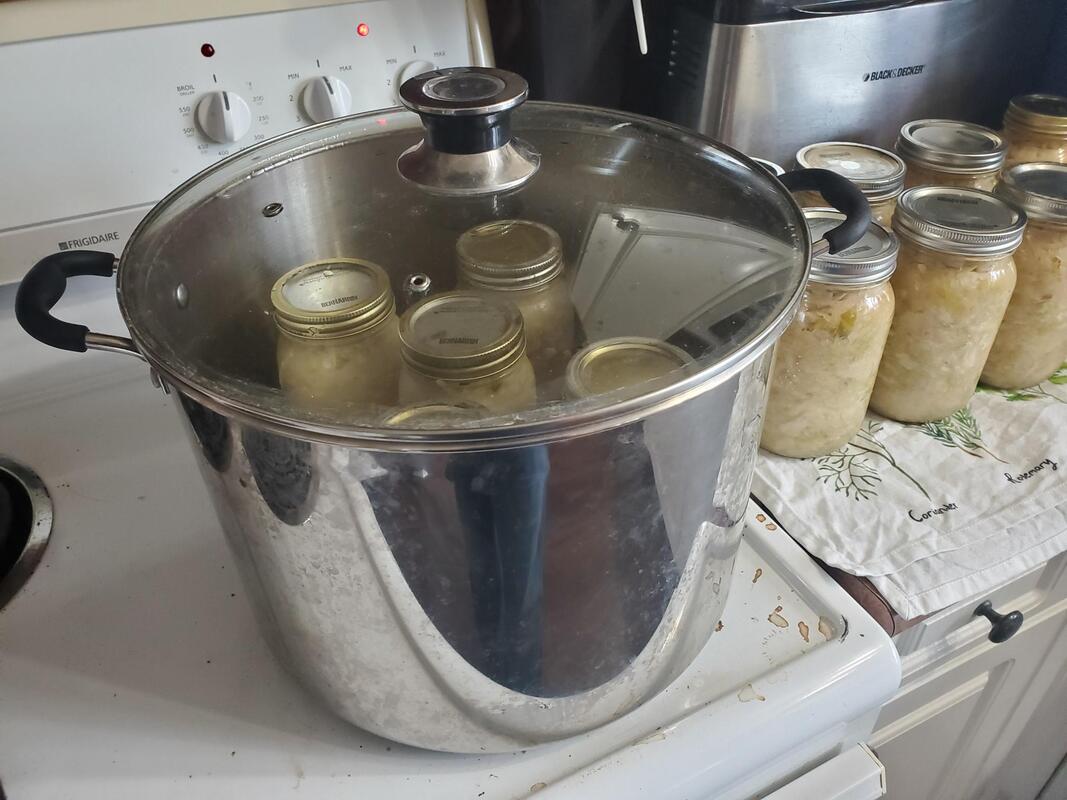 And it's done! Shelf stable sauerkraut ready to be put away. We'll use it as a side dish, in sandwiches, veggies dogs etc. 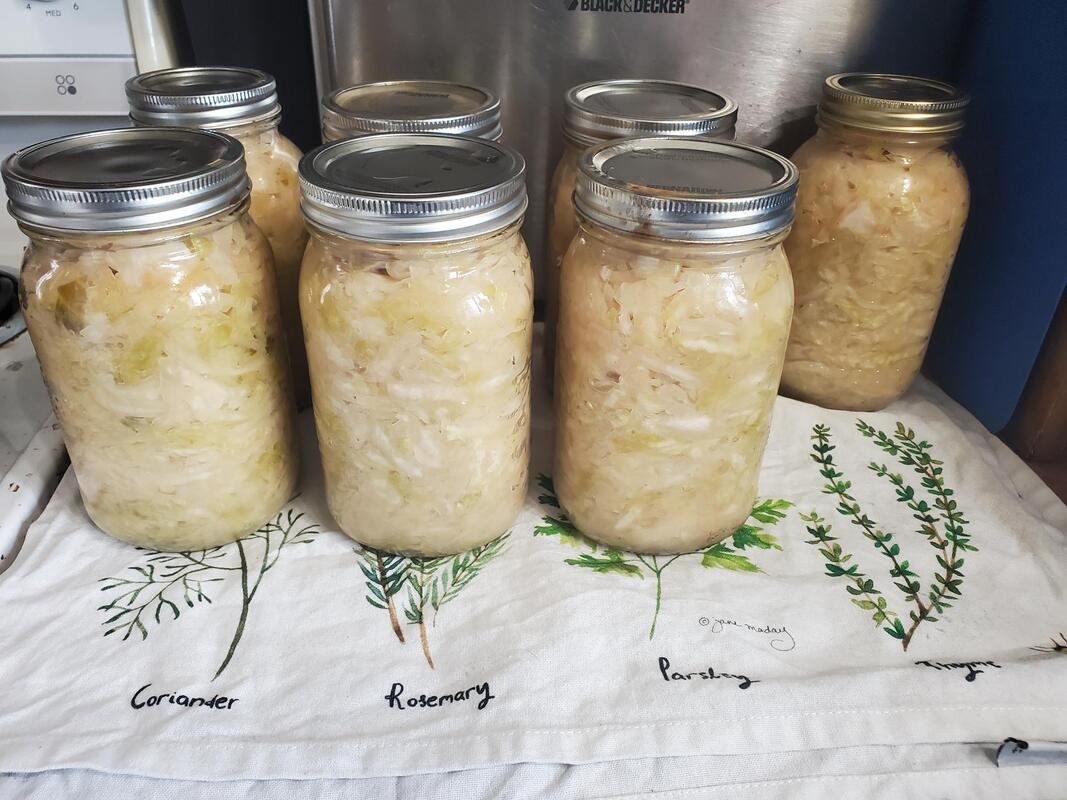 Tomatoes are the super star of many gardens, including mine. They are one of those vegetables that are SO much better grown in a home garden, compared to store bought. Eating garden tomatoes kind of ruined store bought tomatoes for me. So, I try to grow enough tomatoes to eat year round and to cover off most of our tomato product needs.
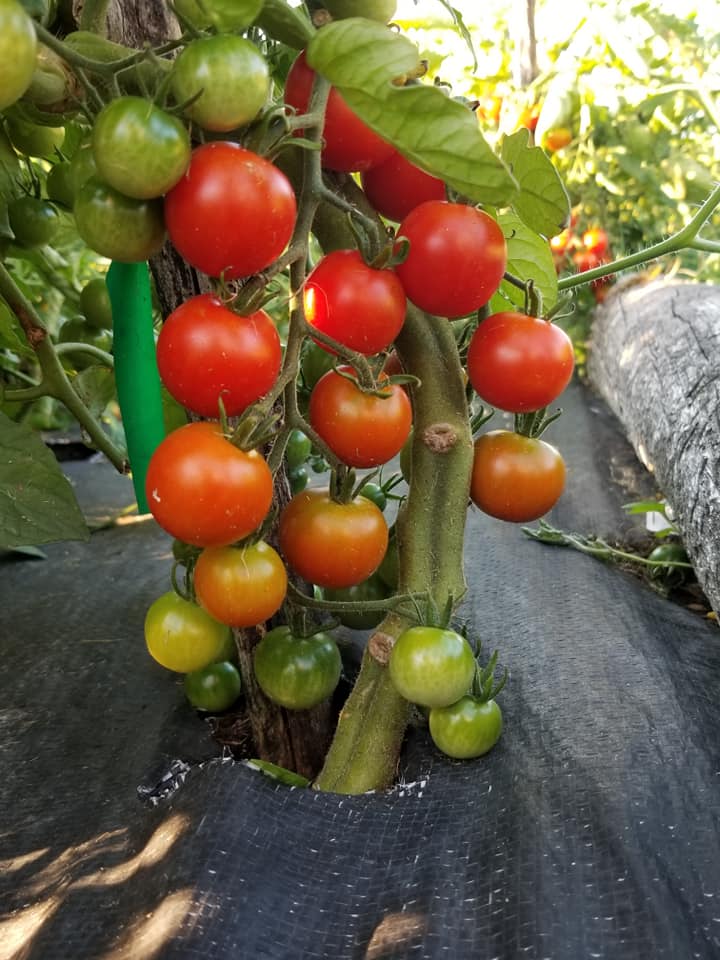
Generally in my garden, you will find about 4 cherry tomato plants and about 30ish regular tomato plants. I buy the cherry tomato plants as seedlings so that I can have 4 different varieties. I have a separate article on my top uses for cherry tomatoes - it's easy to get overwhelmed by them as peak times! In terms of regular tomato plants, I used to plant a few different kinds but lately I only plant one kind of paste tomato. I find that they are great to use for everyday tomatoes too so I don't bother planting a "slicing tomato" anymore. The advantage of paste tomatoes is that they are very fleshy - they don't have a lot of water/seed chambers, which means that you don't "lose" as much when you can them, and you don't have to reduce tomato sauce too much on the stove before canning it. My tomato of choice is the Roma. I usually order new Roma seeds every year from Vesey's. Unfortunately, tomatoes cross-pollinate, so I haven't been able to save seeds from year to year (I would get hybrid roma/cherry tomato plants if I did, as is often demonstrated by the "volunteer" seedlings that pop up everywhere around the garden). This year I tried San Marzano instead, but I think I'll go back to Roma. San Marzanos need a bit more time to grow, and I found I had a lower yield and smaller fruits than when I grow Roma. It may just have been an off year for tomatoes, but since I was always happy with Roma, I'll go back to them. A neat tip that I learned is that you can pick up tomatoes as soon as they "blush", that is, lose their shininess and start to have a hint of pink. There is no advantage to letting them ripen all the way on the plant - they won't be tastier. That's a common myth. You can ripen them indoors and they don't need any light to ripen. The advantage of doing that is that they are less likely to be attacked by a pest. I have noticed that ever since I started doing this, I have much less pest proliferation within my garden. Once a week I pick up all the tomatoes that have started to turn, regardless of what stage they are at. I can them in batches as they ripen in the house. Every year I prioritize what I make with my tomatoes. From highest priority to lowest priority, here is what I make with my tomatoes:
If I ever have more than needed for these four priorities, I would love to also make:
When frost starts to threaten the garden, I pick up all the green tomatoes and can those. I love canning:
 Cherry tomatoes are such a tasty treat. When the first cherry tomatoes of the season come in, I always think "wow, I could eat these all day". But before long, the numbers are overwhelming and I find myself desperately trying to offload them on everyone I know. Over the years I have come up with a few ways to deal with the excess during those weeks when there are so many that we can't keep up. 1. Eating them freshI always plant cherry tomatoes at the entrance to my garden so it's easy to grab a few to eat fresh. They are also great to put in salad (sliced in half) or to make an appetizer tray. I made this tray for my mom's birthday - it has a variety of cherry tomatoes, some fresh basil leaves, fresh mozzarella, a drizzle of olive oil and a drizzle of balsamic vinaigrette. 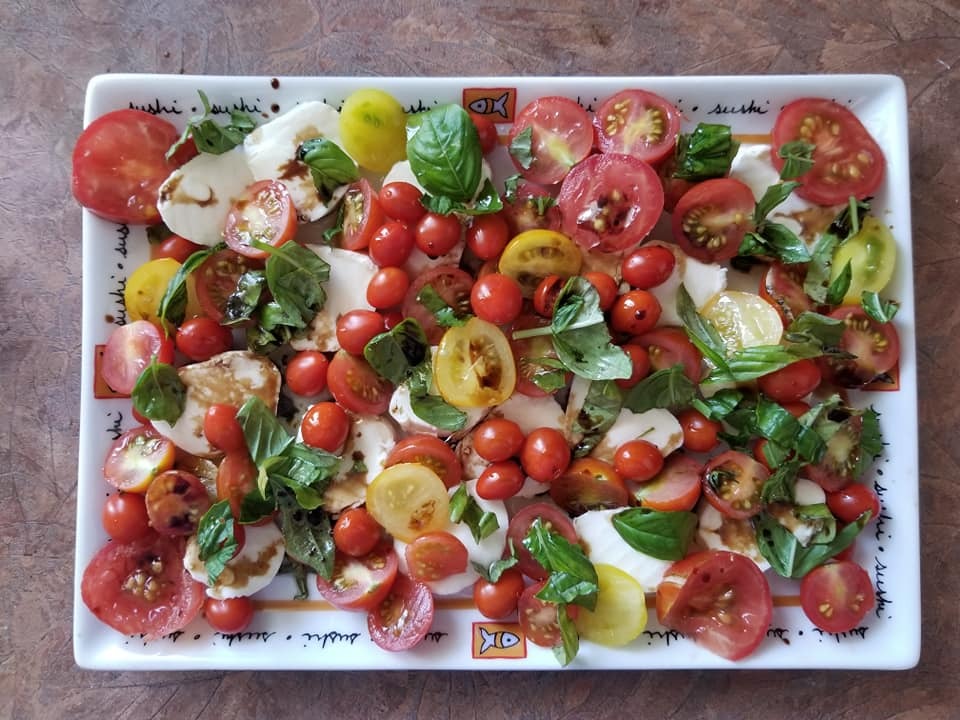 2. Fermented cherry tomatoesFermented cherry tomatoes are very easy to make. I ferment mine in water, salt and a bit of whey (byproduct of making ricotta or other cheese), however there are plenty of recipes online that don't use whey if you don't have access to it. I make them in quart mason jars and keep them in the fridge. They last several months (I have read 6 months) - this year we ran out in February. They make an excellent side dish or addition to salads. They have a slight fizz when you bite into them. 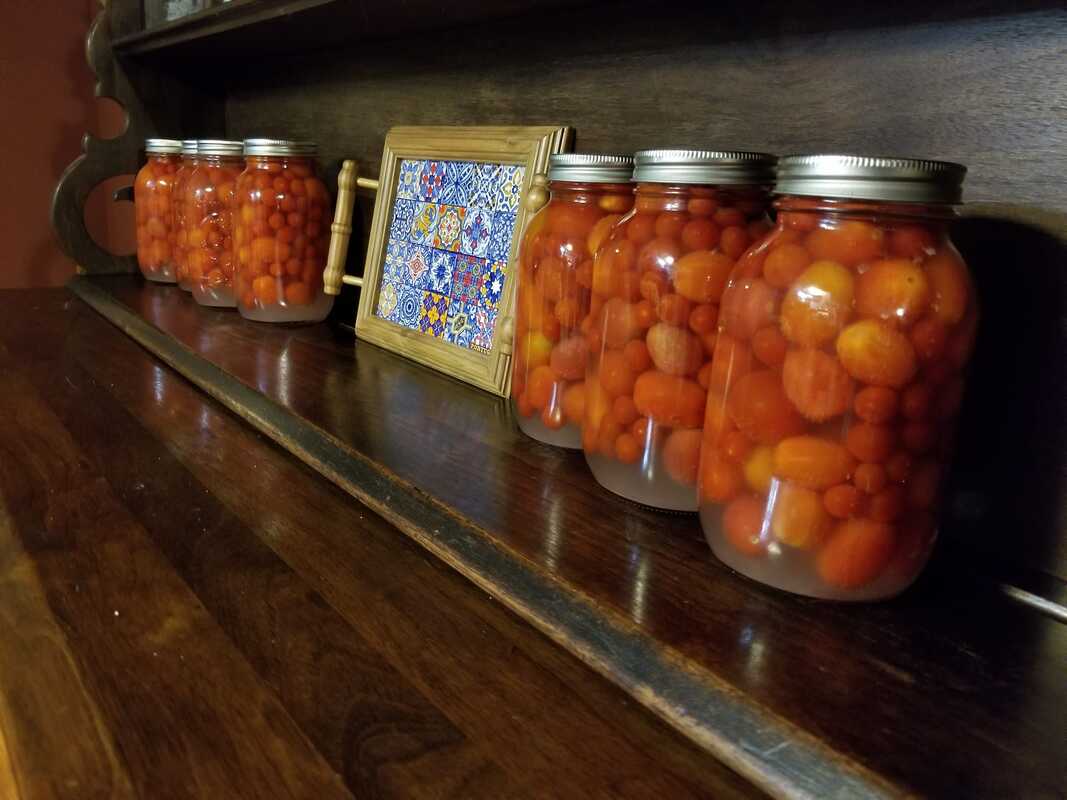 3. Tomates confitesTomates confites are tomatoes roasted in oil. They are SO good. I put them in mason jars, they will keep for a few weeks - if it's going to be longer than that, I freeze them in the mason jars. as a funfact, olive oil shrinks when it freezes, so you won't break your jars. Tomates confites is delicious when spread on baguette or crackers, or on a pesto pasta dish. Here is the recipe I use. 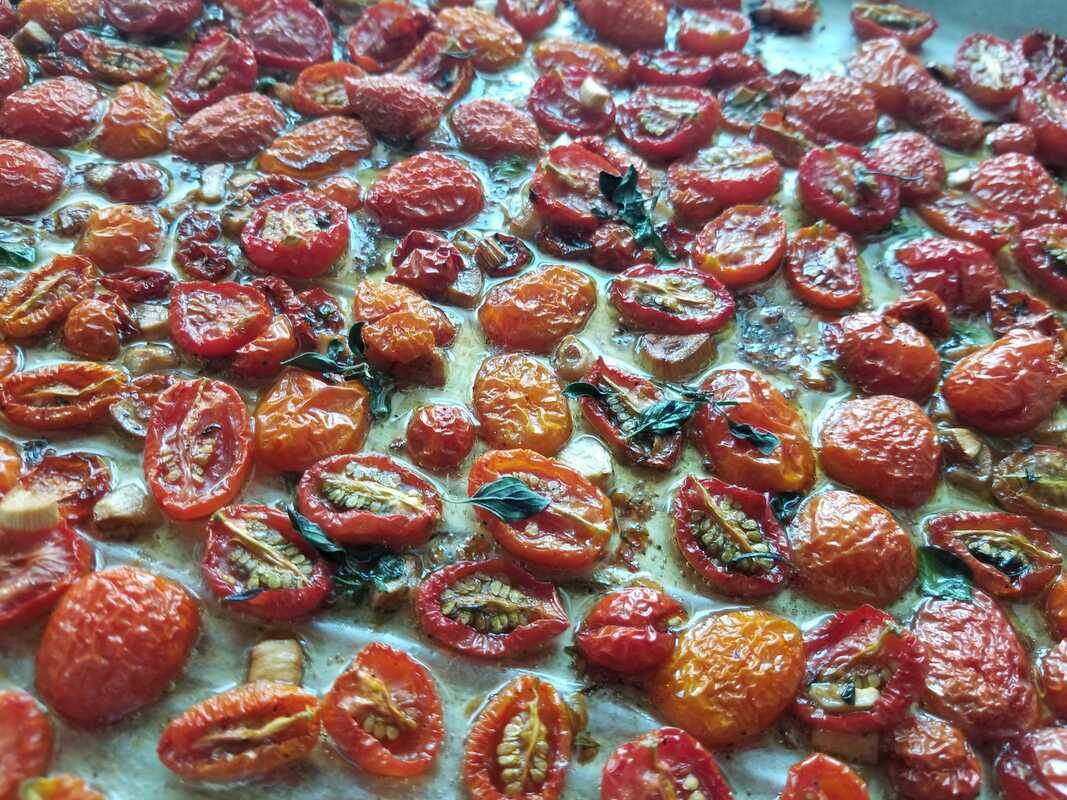 4. Creamy pasta sauceThis pasta sauce is very sweet and not acid. I usually make a big batch in the summertime when there is a bumper crop; I use part of it for supper that night with fresh pasta and freeze the other part for a wintertime supper (this recipe cannot be canned). Here is my recipe. 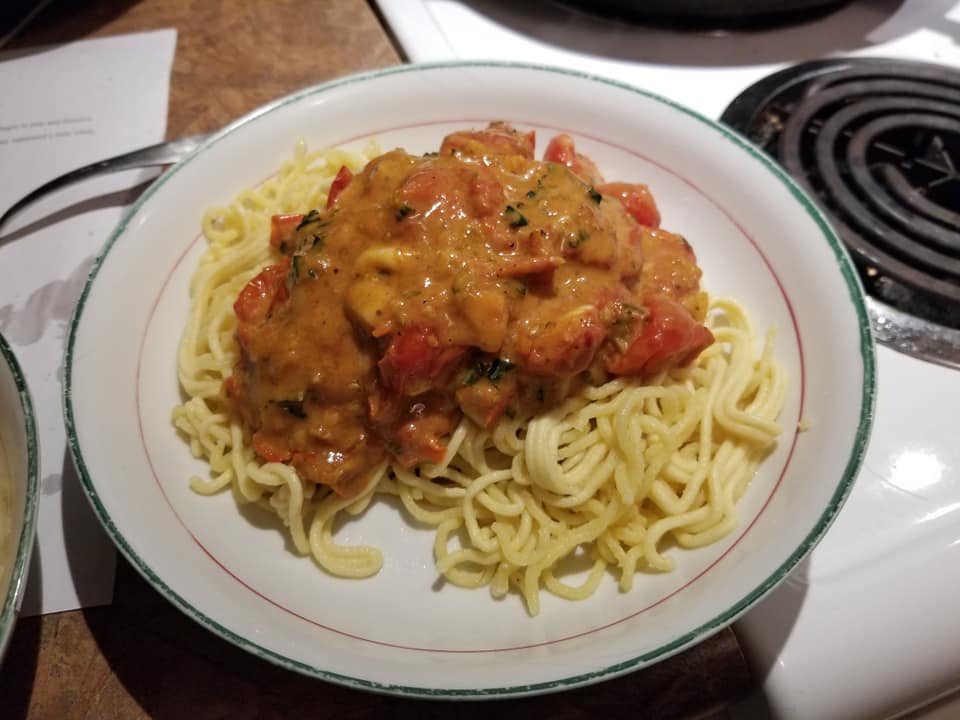 5. Canned "hot cherry bombs"Hot cherry bombs are pickled cherry tomatoes that taste a bit like bloody mary. They are a great side dish and would be a good tomato juice garnish. Here is the recipe I use, by Bernadette Grazioso, who runs the Facebook group "Canning and preserving with love" (which I highly recommend). 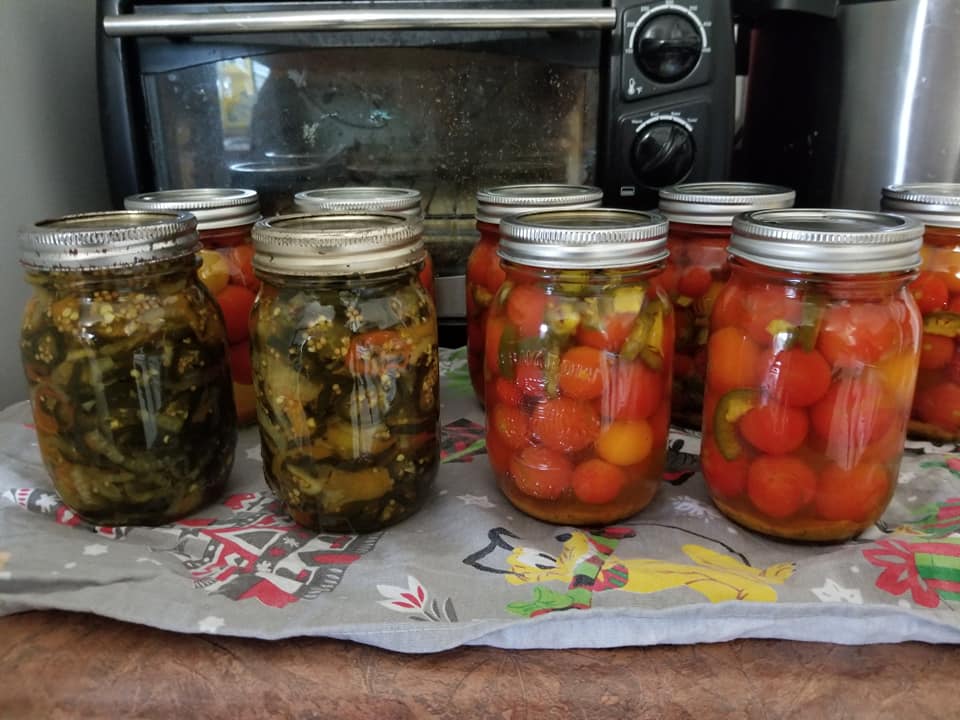  A few years ago I came across an interesting method of preserving carrots in the book "Root cellaring - Natural cold storage of fruits & vegetables" by Mike and Nancy Bubel - simply placing the carrots in sand. I have experimented with a few variations of this method with good success. I also use the same method for potatoes with great success. I tried with sweet potatoes and it didn't work. I may try other root vegetables such as turnips in the future. I usually store my carrots and potatoes in October and they stay well preserved until late April or May. At that time I replant any potatoes that are left. This is such an easy way to store these vegetables, it is my go-to for any that I will use from October to April. I can some as well for use in the summer.
Here is how I do it:
I have previously been hesitant to venture into Hydroponics. The pumps, algae etc seemed to be a source of many problems and expenses. However, going into winter, and with the rising cost of food, I started to miss having salad at every meal, and lettuce isn't exactly something that is easy to preserve. Looking into proprietary systems like Aerogarden was discouraging though. They seemed expensive and design to tie you down to a proprietary system, with special pods, non standard light bulbs, etc, and I didn't always hear good things about people who had used them. I almost abandoned my hydroponic dreams, until I stumbled onto the Kratky method, and now I'm a convert. The Kratky method is easy to do with household materials - no need for pumps, aerators, etc. It is a "set and forget" approach with the simplest possible materials. How is it different than typical hydroponics? The dilemma of hydroponics is that roots need to take in oxygen, water and nutrients. If you simply submerge roots in water, they won't be able to get oxygen properly (that's also why plants do poorly in soil that is saturated in water). Most hydroponic systems address this by using a pump that pumps air bubbles into the water. The pump is the most expensive part of the system as well as the most prone to failure. Instead of using that approach, the Kratky method ensures that part of the roots is submerged in water, and part is exposed to the air. When you install you seedling in its container, the roots should only be partially under water. At time goes by, two things happen simultaneously: the level of the water drops as it gets absorbed by the roots, and the roots grow longer and longer. The end result is that as the roots grow, a balance is kept between how much of the roots is submerged in water and how much is exposed to the air.  This approach cuts out a lot of the complexity and expense. The other appealing element of the Kratky method is that you never add any nutrients or other additives to the water as the plant grows - you just mix up the initial solution and leave it. You can use pretty much anything you have on hand to make your Kratky system. In my case, I used mason jars and soft drink bottles as the main containers and covered them with old mismatched socks to block out the light and prevent algae growth (some people use aluminum foil for this purpose). I used my 2D printer to print the little cups that hold the seedling - but you could use small yogurt containers with holes in them, for example. The initial solution needs to have nutrients added to it (I use Maxigrow), and be PH balanced (so you will need a PH test liquid and Ph+ or Ph-). Instructions on the Maxigrow inform you about quantities to use. I started seedling in soil and transplanted some to Kratky cups, and some to bigger soil pots. The seedlings in the Kratky method grew so much faster and became much bigger. It simply doesn't compare. Out of curiosity, Ray tried a few with normal fertilizer instead of Maxigrow and they did pretty well too. If you grow things that will flower or bear fruit, you may need different types of nutrients. But for greens, Maxigrow is sufficient and simple enough.  Starting the seedlings in soil 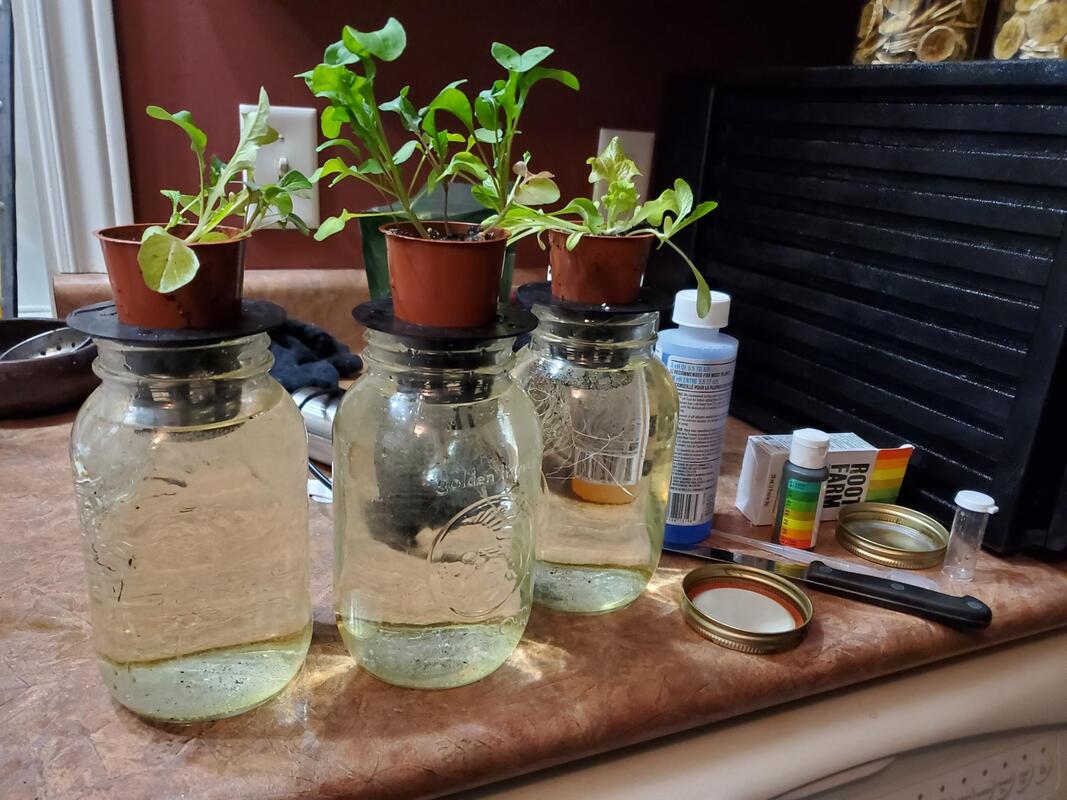 My Kratky setup - mason jars, 3d printed net cups, Root Farm Ph testing kit and Ph- liquid. I also use Maxigro nutrients (not shown) and I cover the jars with old socks (not shown). I leave the seedlings in their seedling cups for simplicity, I just make sure their roots are partially submerged. 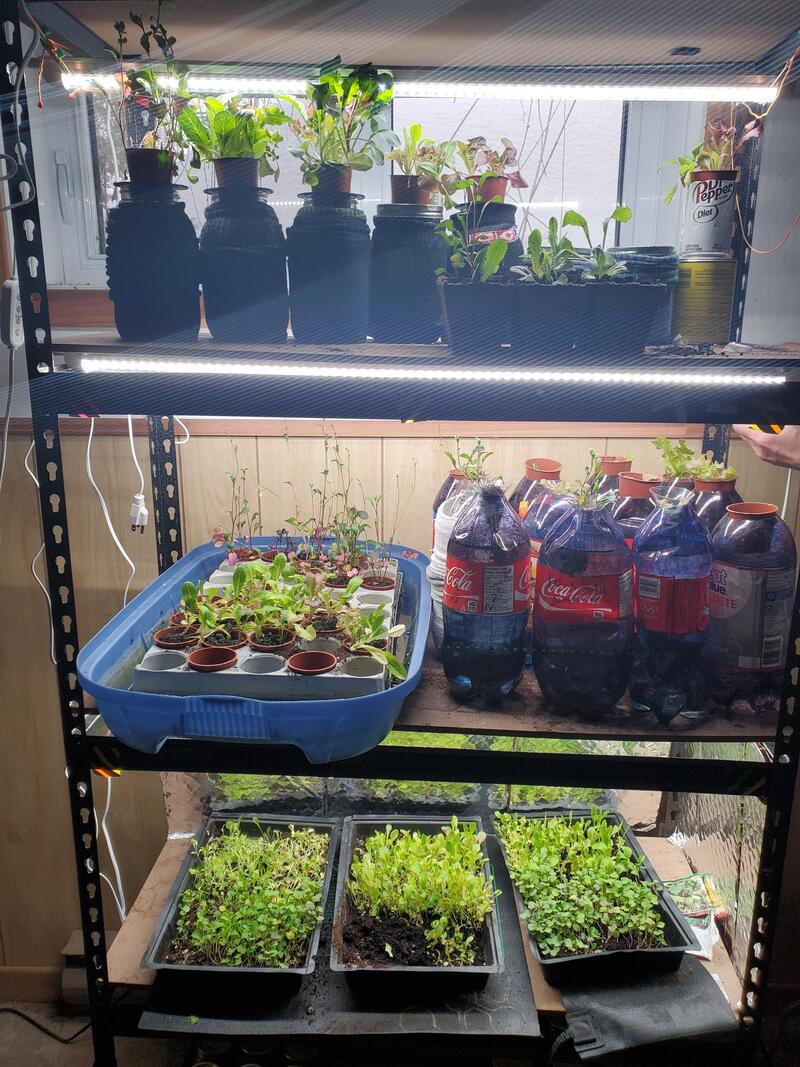 We tried different variations and compared soil vs hydroponics, it got a little bit out of hand. I loved that I could use my seedling starting shelves and lights. You can see we also grow microgreens on the bottom shelf. 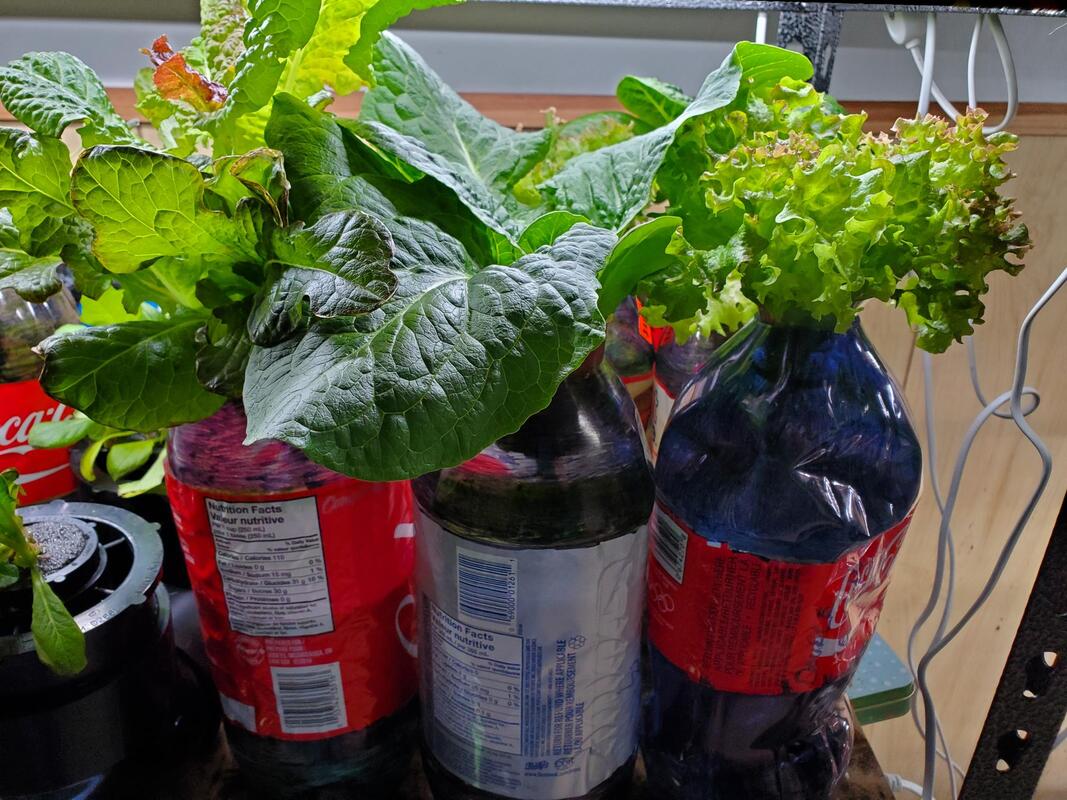 Beautiful hydroponic greens 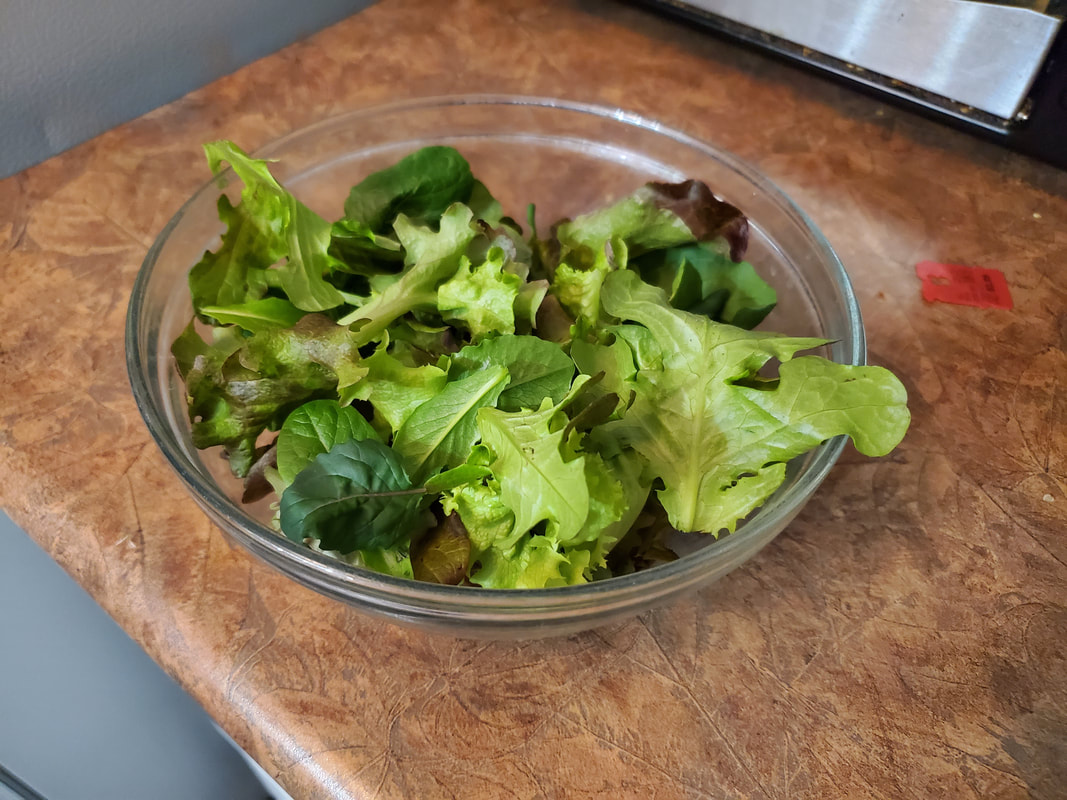 It was wonderful to have fresh salad in the wintertime.
|
About this blogThis is where I share my learnings and adventures in homesteading Archives
May 2024
Categories
All
|
 RSS Feed
