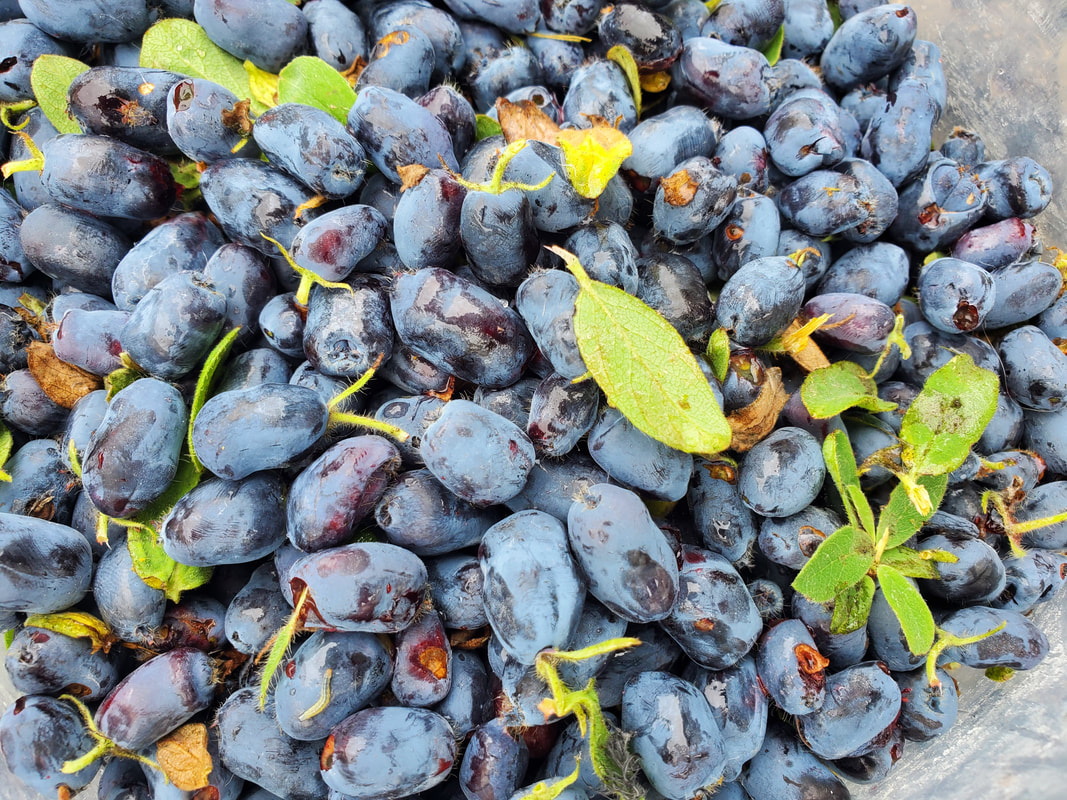
 Honeyberries are the most successful berry I have been able to grow in our area (we are in zone 5A). Honeyberries do very well in cooler climates - they are very hardy and even the flowers are frost resistant (to a point). The berries come very early - for us it's usually around mid-June. You need two plants from two different varieties in order to cross pollinate. I have a couple of Borealis (introduced by the University of Saskatchewan) and a couple of Indigo Gem. They both originally come from Canadian Tire as 5 gallon plants. Honeyberries look like elongated blueberries. They are sweet and a little tangy. They are high in vitamin A and C, antioxidants, and lots of other good stuff. When honeyberries turn blue, they still need another 2-3 weeks before they are ready to be harvested. During that 3 weeks, I found that birds consistently ate all the berries. We were never able to harvest our honeyberries until we invested in bird netting that we simply drape over the row of bushes, and tuck at their base. Bird netting works like a charm, but, as a downside it is possible for birds to get caught in it, so we keep a close eye on it (which is easy since it's right outside our front door and my office window). We have freed a few birds from it over the years, with no casualties. I can usually tell the honeyberries are ready to harvest when they come off the branches very easily, or I notice some are falling to the ground. At that point the flesh is red/purple and the berries are sweet. Another tell-tale sign is that the U-pick farm down the street starts to advertise theirs as ready to pick :) I hand-pick my berries, although I have read that some people shake the bushes into a kiddie pool or over cardboard - my bushes are too close together. It's quite time consuming. It takes me about 15 minutes to pick 1 liter. We eat as many as we can fresh (great on ice cream or in a smoothie). I freeze the rest in 2 cup portions in Food Saver bags. When they thaw, they release a lot of juice. I pour that juice off into a mason jar and we use it to make fizzy drinks with our Soda stream, and I use the berries in baking. My favorite recipe to make is fruit crisp - a mix of honeyberries and pears is great in that recipe. Honey berry flavour is intense and I find the pear balances it out nicely.
0 Comments
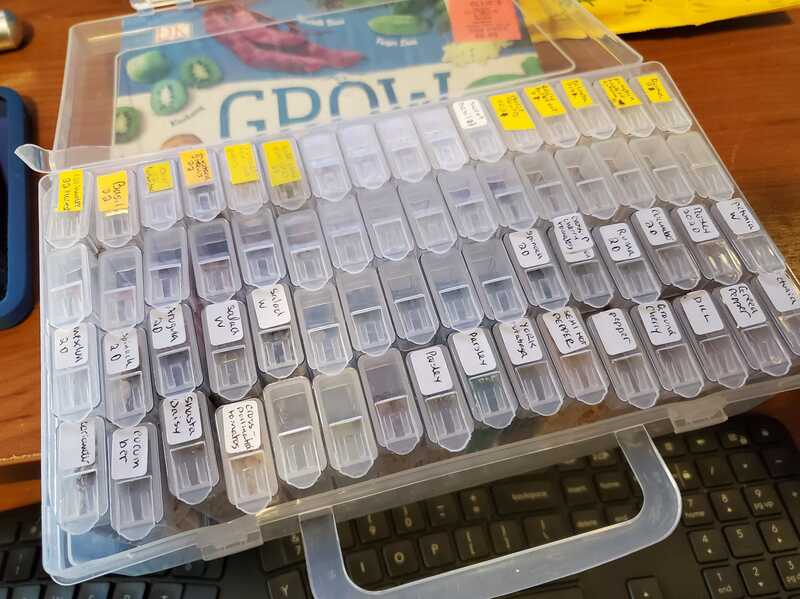 Seed saving is a great sustainability skill to learn and pretty easy. But where should you put all your seeds? For small seeds, I really like my little seed suitcase, pictured above. It's sold as a bead organizer (I found it on amazon). I write the year and variety on each little container. It's very handy to bring to a seed swap, too. Bigger seed go in takeout containers or ziploc bags
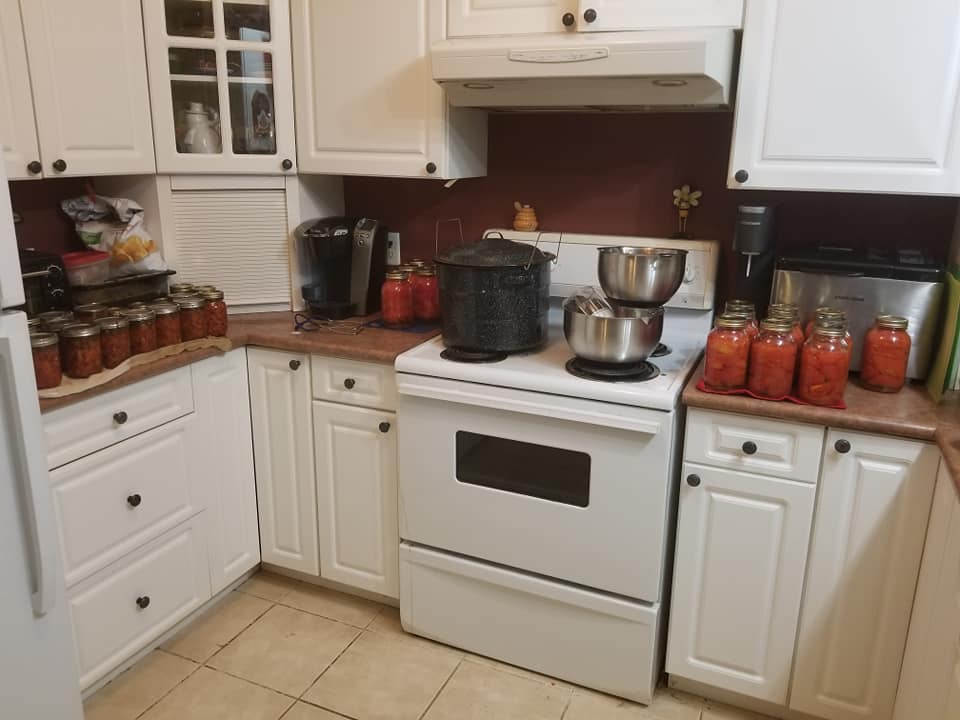
In my opinion, canning is a must if you are serious about growing your own food. Canning is a bit of science, and it's important to understand safe canning techniques. Many of the techniques that our ancestors used are now understood to have limitations that often lead to spoiled food and occasionally to health risks. I remember my grandmother's canned strawberries and they are a part of why I can now - but I don't follow her techniques now that we have access to more foolproof, safety tested approaches. There are three safe canning approaches - water bath canning, steam canning and pressure canning. This blog post will give an overview of each approach and will also enumerate a few techniques that aren't considered safe or foolproof anymore. Finally I'll give a few of my favorite resources for recipes. Water bath canningWater bath canning is the most traditional canning technique. It is a good one to start with because you probably already have everything needed. Water bath canning consists in bringing a very large pot of water to boil, then completely submerging the mason jars in this water for a prescribed amount of time. It is safe and effective for foods that have a high acidity (for example pickles, tomato based products with a bit of lemon juice added, jellies and jams, condiments, sweets). Pros:
Cons:
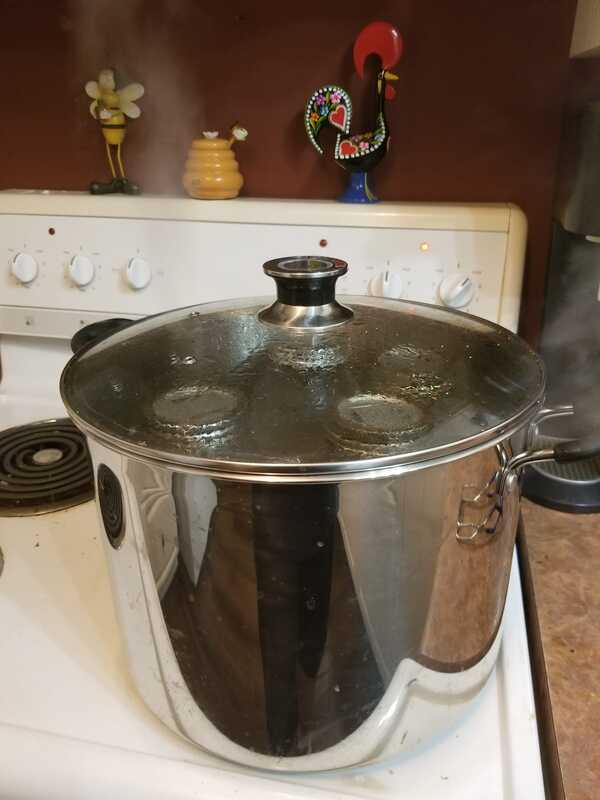
 My water bath canner (on the left on the stove), the classic, inexpensive one you can get at big box stores. Any big pot will do. Steam canningSteam canning is a more recently studied type of canning. You need a special steam canner, which sometimes has a built in gauge. The canner isn't air tight. You put a small amount of water at the bottom. The jars are placed on a rack above the water. Once the pot is full of steam (and the gauge is in the proper zone), you start a timer and keep the jars in this steamy environment for the prescribed amount of time. Most water bath canning recipes can be accomplished using steam canning - the only exception is recipes with a very long sterilization time (generally quotes as more than 45 minutes), because your canner may run out of water as the steam escapes. Steam canning is an old technique but it was only recently studied scientifically and proven to be safe. Pros:
Cons:
 My steam canner. It's a Harvest Guard with a gauge. I appreciate having the gauge and clear lid. Pressure canningPressure canning is the only proven safe canning method for low acid foods including things like non-pickled vegetables, soups, meat, fish, broth, etc. It requires a special pressure canner. In Canada, the most readily available is the 23 quart Presto brand pressure canner. If you eat meat, it's a must - as a vegetarian, I find it very handy too. Pressure canning can be a bit intimidating for some, but, the manual is very clear so there is no reason to be intimidated. If you live in Canada, it will be hard to find a place to calibrate your pressure gauge, but you can write to Presto and they will send you a 3-piece weighted gauge that does not require calibration. Pros:
Cons:
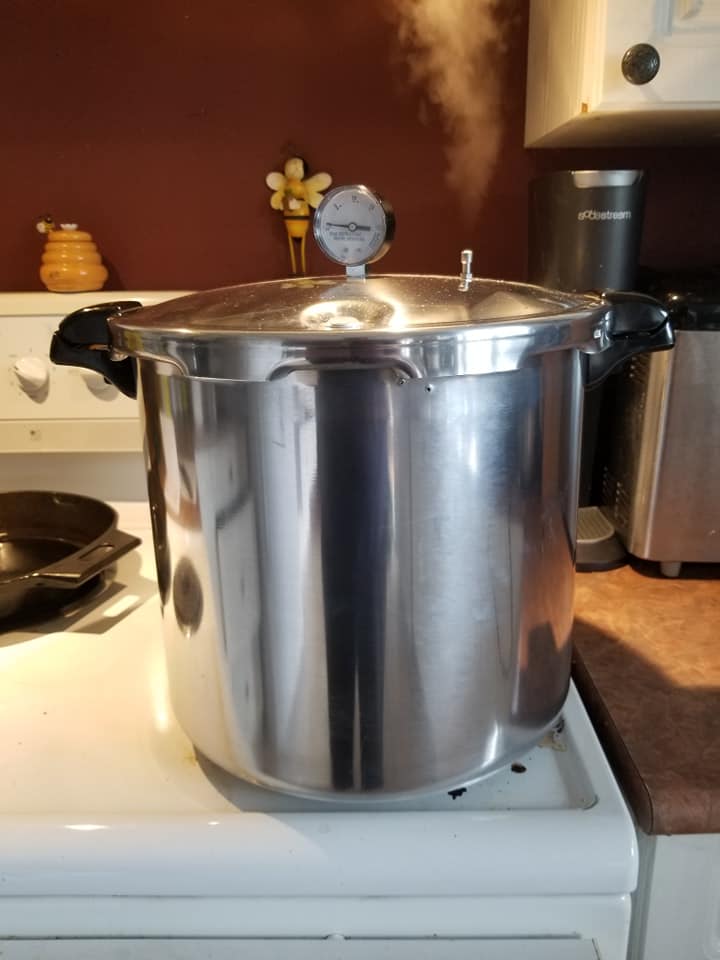 My presto 23 quart pressure canner with a weighted gauge, the best option in Canada. In the picture, the weight hasn't been put on yet (it's in the venting stage) Canning methods that haven't been proven safeMany canning methods used traditionally, internationally, or otherwise, have not been studied scientifically. Personally, I choose not to use these methods. There is a risk of adverse health effect (or even death) with all of them. Furthermore, even if you don't get sick or die, you risk your food spoiling and growing and canning food is too much work to take a chance, in my opinion. Some of the methods that you may encounter that haven't been proven safe include:
My favorite resources for safe canningI learned to can using the pick your own website. It is full of easy to follow recipes and the recipes follow safe practices.
The National Center for Home Food Preservation (US based) has very detailed and extensive recipes. Most are pretty basic and unimaginative but they cover a lot of staples. Recent canning books by Ball or Bernardin (the Canadian brand of Ball) generally adhere to safe canning practices. The Facebook group "Canning and preserving with love" has many knowledgeable admins and a considerable repertoire or safe canning recipes The website created by Vincent le canneux, in French, has safe recipes. Vincent used scientific protocols to test his recipes. The Facebook group "Conserves Maison, Cannage, hommage à Vincent le canneux", in French, has many knowledgeable admins. Tentatively I would say that Ricardo's recipes generally appear safe. Some books and resources to steer clear of include books by The Canning Diva, Miss Conserves (French), and Canning Rebels Facebook groups. These all encourage techniques that aren't proven safe. 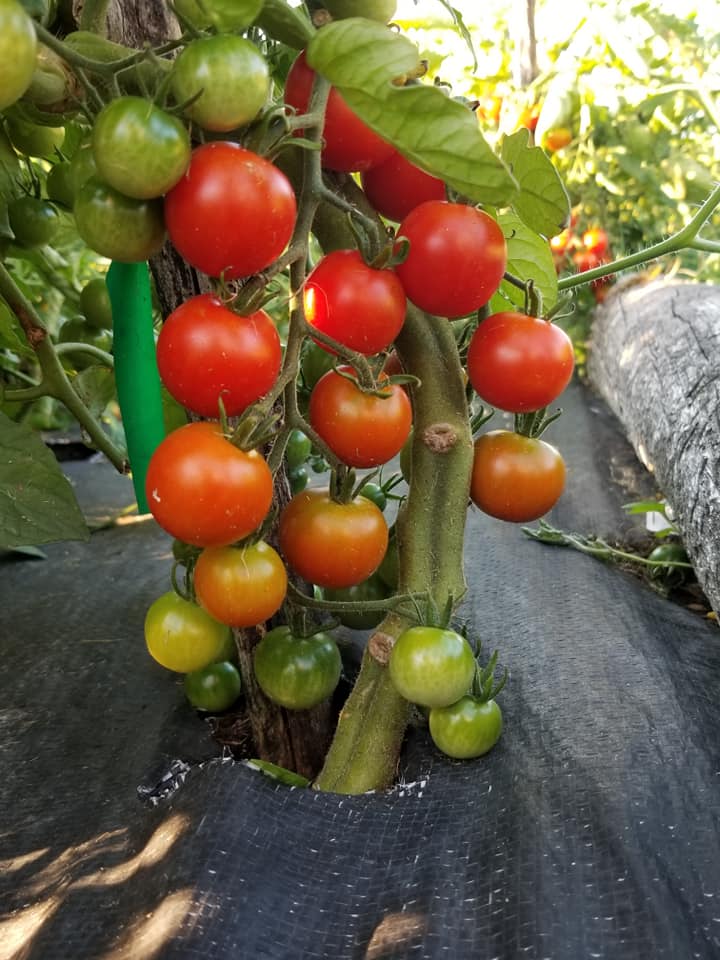 Cherry tomatoes are such a tasty treat. When the first cherry tomatoes of the season come in, I always think "wow, I could eat these all day". But before long, the numbers are overwhelming and I find myself desperately trying to offload them on everyone I know. Over the years I have come up with a few ways to deal with the excess during those weeks when there are so many that we can't keep up. 1. Eating them freshI always plant cherry tomatoes at the entrance to my garden so it's easy to grab a few to eat fresh. They are also great to put in salad (sliced in half) or to make an appetizer tray. I made this tray for my mom's birthday - it has a variety of cherry tomatoes, some fresh basil leaves, fresh mozzarella, a drizzle of olive oil and a drizzle of balsamic vinaigrette. 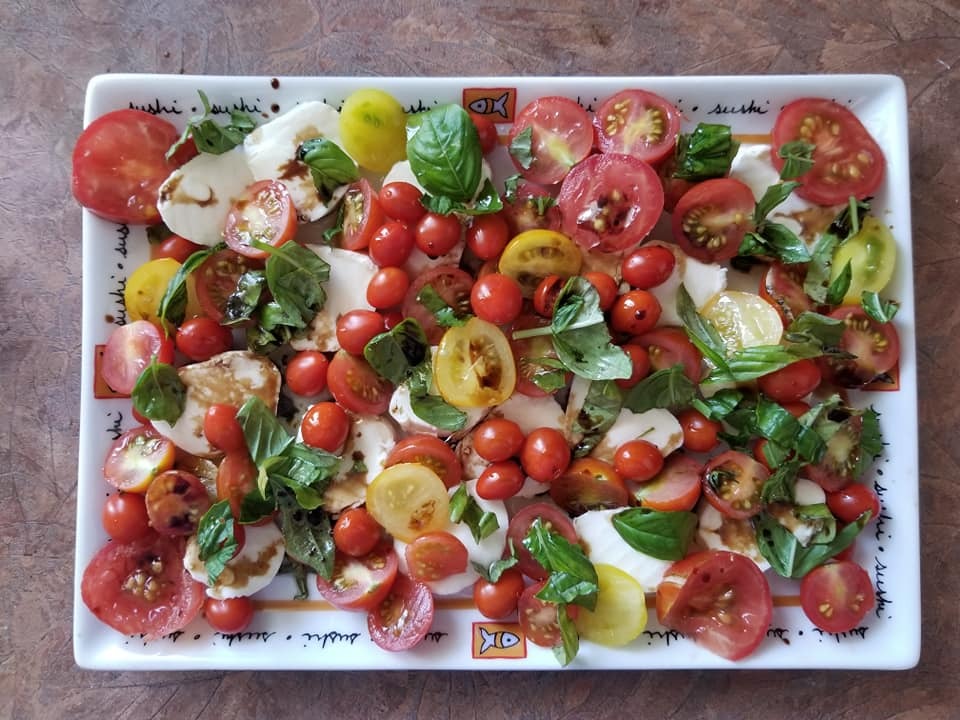 2. Fermented cherry tomatoesFermented cherry tomatoes are very easy to make. I ferment mine in water, salt and a bit of whey (byproduct of making ricotta or other cheese), however there are plenty of recipes online that don't use whey if you don't have access to it. I make them in quart mason jars and keep them in the fridge. They last several months (I have read 6 months) - this year we ran out in February. They make an excellent side dish or addition to salads. They have a slight fizz when you bite into them. 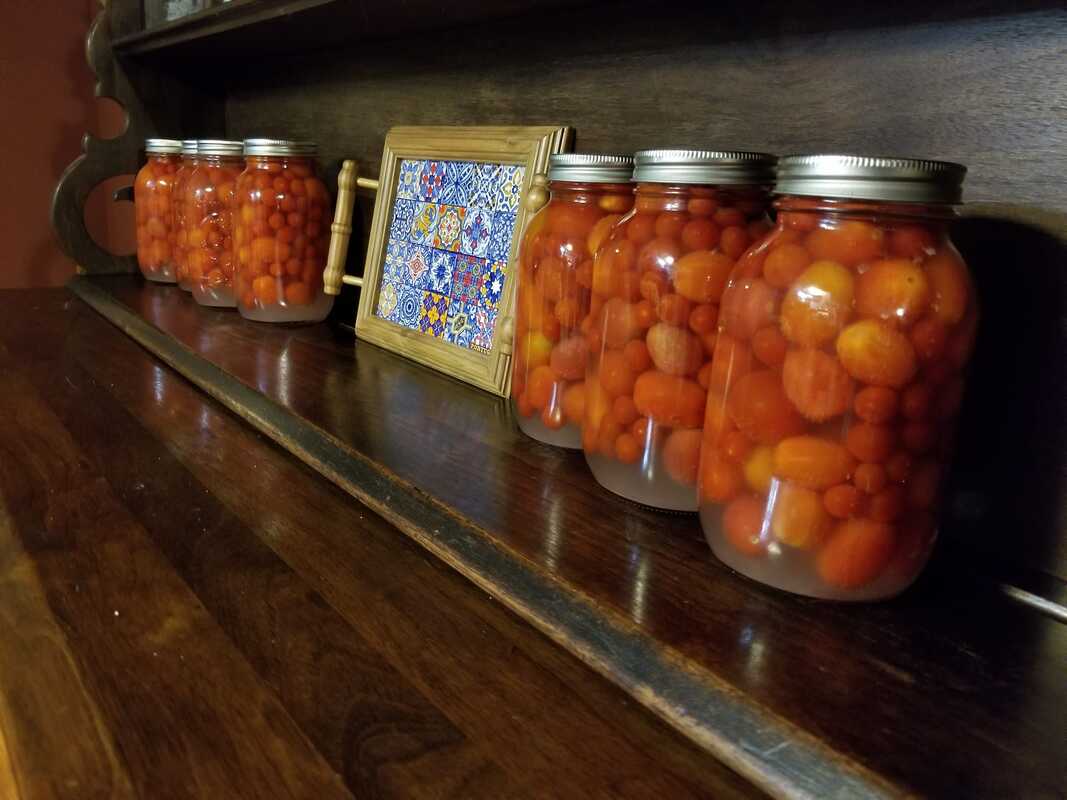 3. Tomates confitesTomates confites are tomatoes roasted in oil. They are SO good. I put them in mason jars, they will keep for a few weeks - if it's going to be longer than that, I freeze them in the mason jars. as a funfact, olive oil shrinks when it freezes, so you won't break your jars. Tomates confites is delicious when spread on baguette or crackers, or on a pesto pasta dish. Here is the recipe I use. 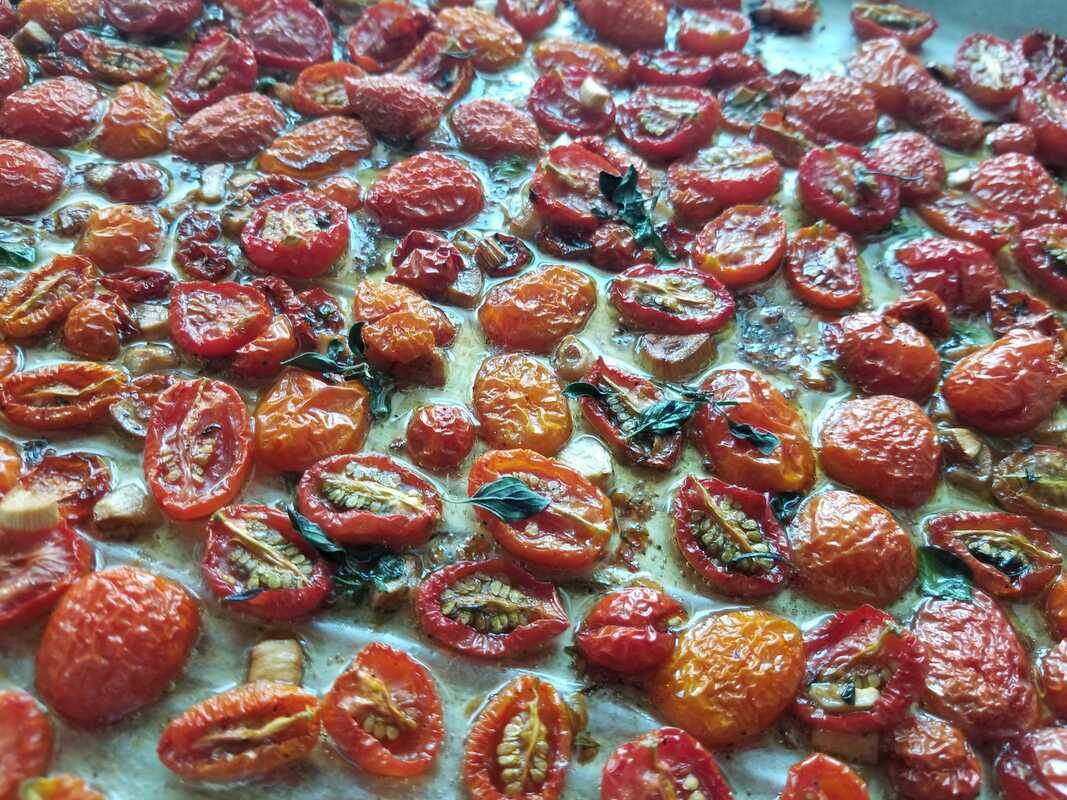 4. Creamy pasta sauceThis pasta sauce is very sweet and not acid. I usually make a big batch in the summertime when there is a bumper crop; I use part of it for supper that night with fresh pasta and freeze the other part for a wintertime supper (this recipe cannot be canned). Here is my recipe. 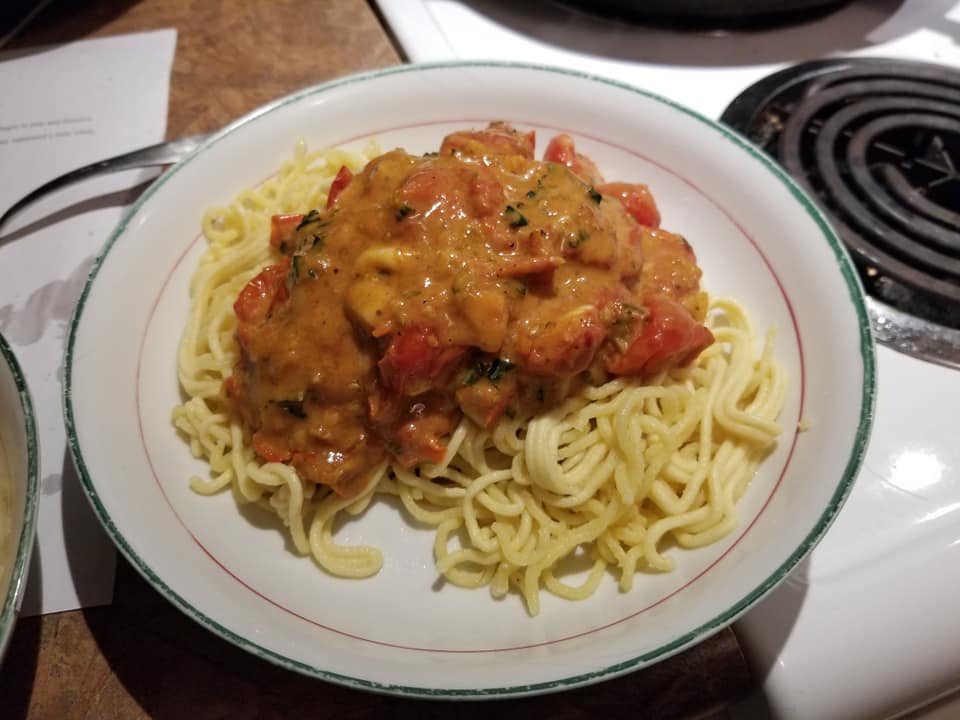 5. Canned "hot cherry bombs"Hot cherry bombs are pickled cherry tomatoes that taste a bit like bloody mary. They are a great side dish and would be a good tomato juice garnish. Here is the recipe I use, by Bernadette Grazioso, who runs the Facebook group "Canning and preserving with love" (which I highly recommend). 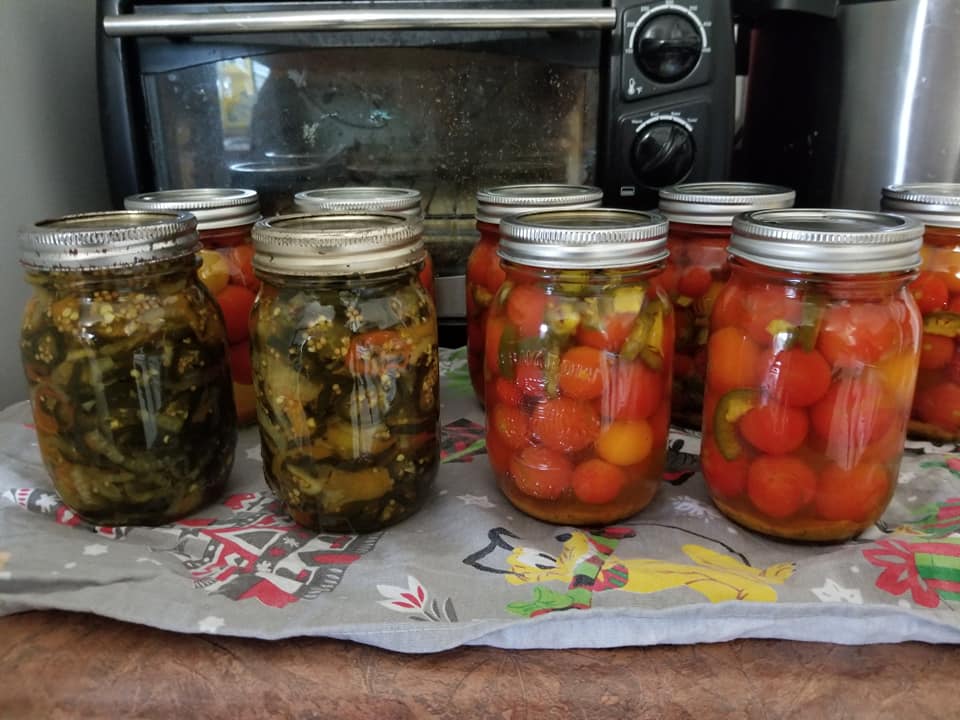  A few years ago I came across an interesting method of preserving carrots in the book "Root cellaring - Natural cold storage of fruits & vegetables" by Mike and Nancy Bubel - simply placing the carrots in sand. I have experimented with a few variations of this method with good success. I also use the same method for potatoes with great success. I tried with sweet potatoes and it didn't work. I may try other root vegetables such as turnips in the future. I usually store my carrots and potatoes in October and they stay well preserved until late April or May. At that time I replant any potatoes that are left. This is such an easy way to store these vegetables, it is my go-to for any that I will use from October to April. I can some as well for use in the summer.
Here is how I do it:
|
About this blogThis is where I share my learnings and adventures in homesteading Archives
May 2024
Categories
All
|
 RSS Feed
