|
Over the years I have worked to establish more perennial food plants on our property. They typically cost a little more upfront but having low-maintenance, recurring sources of food is great. In the process of writing this post, I realized we have over forty different perennial foods growing on our property - a mix of naturally occurring and purposefully introduced.
I have integrated these perennials plants in various places on the property, creating a bit of an edible landscape; but I also have a few dedicated perennial beds in a section of our property. I keep these beds separate from my main garden so that they don't interfere with crop rotation. Before I switched to a no-till approach, it was a also a concern that they would get in the way of rototilling. I'll provide a summary of the perennial foods we grow, in hopes that it will give you ideas if you live in a similar zone. Even though we live in zone 5, I tend to favor perennials that are rustic to zone 3, to ensure they are very rustic and survive our winters. Trees:
Berries and other small fruits:
Edible flowers:
Herbs:
Others:
Naturally occurring perennials (foraging - more details here)
Failures - things I might try again:
0 Comments
When we first moved here, I planted a few apples trees. They have become quite productive and on a good year yield the apple harvest is plentiful. Unfortunately, the pruning process has always been intimidating to me, so for the first 12 years or so, I didn't prune any of my trees. I could tell they were getting a little bit out of control, but I just didn't know where to start with it. I looked for information in books and online, but never felt confident. I mentioned this to many people in hopes someone could point me in the right direction... and finally it paid off as my friend Peggy from Good Food Garden, who similarly wanted to learn to prune her apple trees, got a small group together to learn this art from a local expert, Jeff Turner. After participating in this workshop, I can safely say that the best way to learn pruning is to learn in-person, from someone who knows what they are doing! After covering a little bit of theory, we headed outside and pruned Peggy's three apple trees, that were in a comparable state to mine. As the pruning process progressed, the pieces started to fall in place for me and I started to be able to make educated guesses about which branches needed to go. The next day, I pruned my apple and pear trees - I thought I better do it before I lost my nerve! Reflecting on the specific advice that Jeff gave, I realized some guiding principles:
Here are a few of the specific guidelines I used to prune my trees in support of the principles, thanks to Jeff's advice.
In terms of the process of pruning, we learned:
Obviously this isn't a how-to guide to pruning, but I hope that these guidelines give you a general sense of the process. Learning in-person from an expert was such an eye-opening experience, and I really encourage anyone seeking to learn the process of pruning, to try to learn from someone local to you.
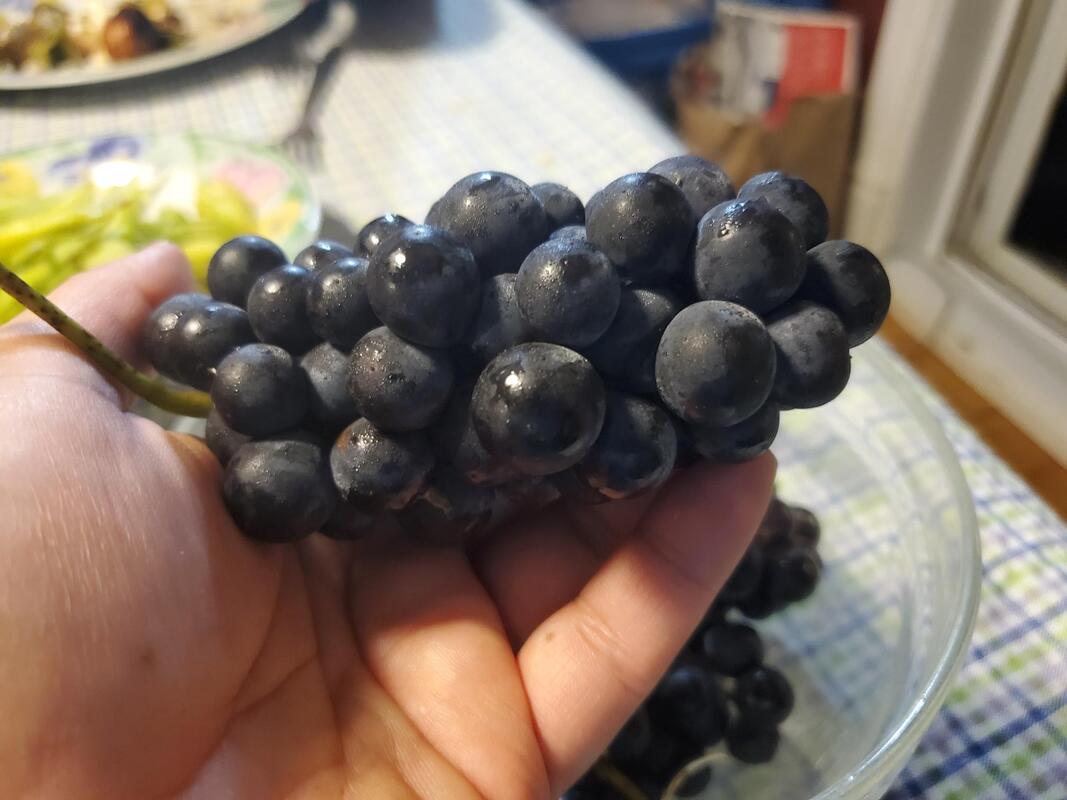 Some days when I'm feeling more philosophical, I think about how bigger sustainability concepts connect to our little homestead. For example, the circular economy is a big concept in sustainability. A circular economy is a production and consumption model within which all things are reused, recycled, repurposed as much as possible. Here are a bunch of real life case studies of circular economy. Closer to home, I couldn't help but think that our recent grape harvest was like a little model of a circular economy. When we harvested grapes this year, we made very good use of everything we harvested... anything that was a byproduct of an operation became something else that was useful. Nothing went into the garbage. Here's a little diagram of how it played out. 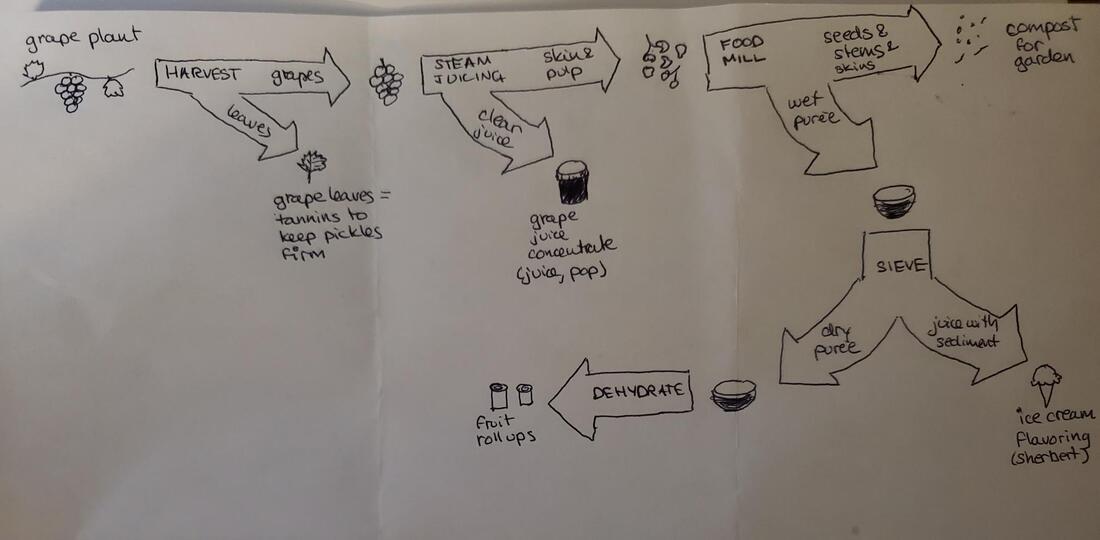 This is the tastiest kind of circular economy! Flip through to see some of the products we got from our delicious Concord grapes. Fruit leather (fruit roll-ups) is a great snack or dessert that makes good use of the pulp that is leftover from processing fruit for various recipes such as jelly, juice, etc. It satisfies a sweet craving. It's a snack we like to bring on biking or kayaking trips and when camping. A couple of days ago I made grape fruit leather. I started off with the pulp that was leftover from steam juicing grapes for grape juice - basically it was grapes that had popped and had most of the juice drain out. You can of course start with whole fruit too. The first step once you have your fruit or leftover pulp is to purée it. I use a handcrank food mill for that operation, which has the advantage of removing the fruit's skin and any seeds. Alternatively, you can just put everything in a blender. Ideally you are looking for applesauce consistency or dryer. If there seems to be excess liquid in it at this point, I would recommend straining it. Personally I would use the liquid I strain out for something like flavoring sparkling water from our sodastream or adding flavor to homemade ice cream. Once you have your purée, you spread it on parchment paper and put it in the dehydrator. I have a nice Excalibur dehydrator (it comes on sale on amazon once in a while). If you don't have a dehydrator, you can also dehydrate using an oven with the door ajar - I haven't tried that myself but it seems like many people do it that way. Your dehydrator will likely indicate the temperature to use (mine says 135F). Dehydrating fruit leather can take anywhere from 6 to 12 hours depending on your dehydrator, the consistency of the pulp, and the thickness (I recommend between 1/8 to 1/4 inch for the thickness of the layer of pulp). If you have a more basic dehydrator, you may have to rotate the trays during the process. It's best to monitor the process the first few times to get an idea of the timing that works for your setup. I like to start mine just before bedtime as it takes at least overnight. After waking up, if the process isn't done, I can keep an eye on things. The leather should be pliable and be easy to peel off of the parchment paper without falling apart. Once it's ready, I use scissors to cut it into strips and I roll up the strips. I store them in a mason jar in the fridge. They do okay at room temperature for a while which makes them a good camping or biking snack. 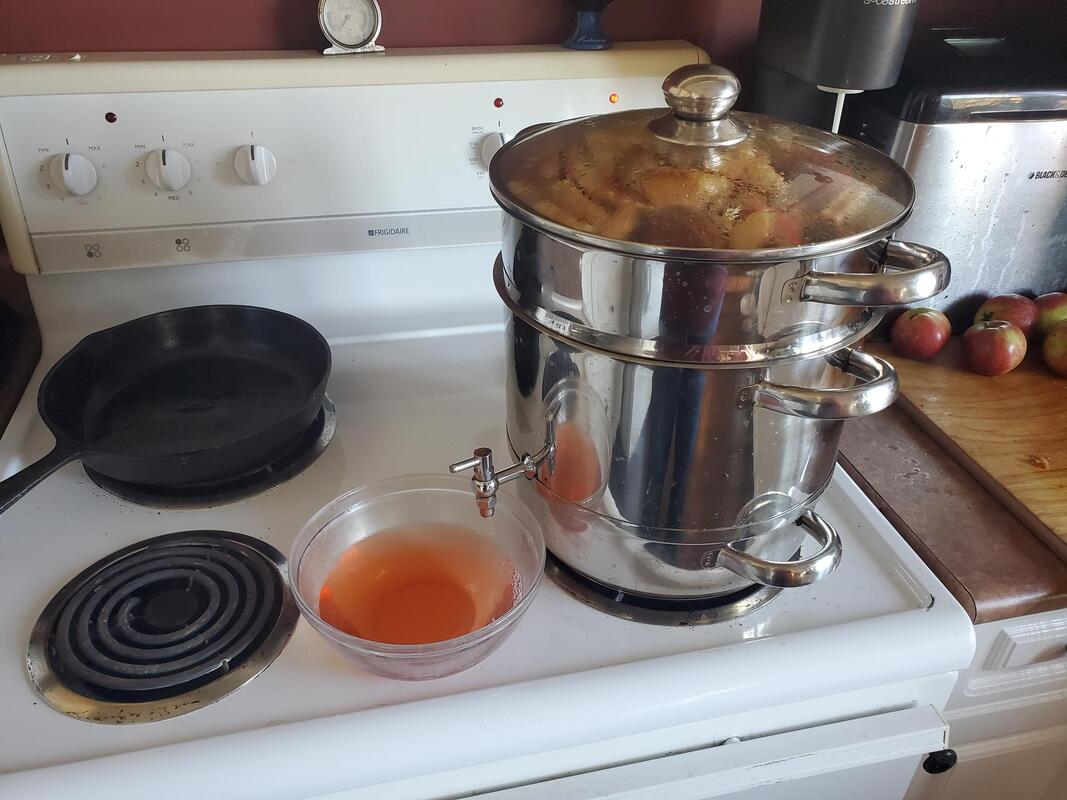 Originally I did all my juicing with an electric juicer. A couple years ago though, after our apple trees really came onto their own, my electric juicer died (the motor burned up). After doing some online research into what a more robust model might be, I realized that a steam juicer might be better suited to the homesteading lifestyle. Electric juicers seem to be better suited for making a couple glasses of juice here and there, whereas a steam juicer seems better equipped for handling large quantities of fruit. There is a third option which is a juicing press but I haven't looked into it seriously (I am not sure I want to dedicate the space to it). This is my first year using my steam juicer, and so far, so good. A steam juicer is made to run on the stovetop and it has three components:
It takes a couple of hours to extract the juice from the fruit. It's not a labour intensive process, but you do have to be around to occasionally drain off the juice and refill the bottom pan. It's most convenient to run a batch on a day where you are doing something else in the kitchen (not a problem at this time of year). So far, we made grape juice from our concord grapes, which I canned in quart jars. It is concentrated, we'll dilute it what we drink it. We also made apple juice which Ray is preparing for hard cider as I type. A steam juicer is really nice when paired up with a dehydrator. Once the juice is extracted from the fruit, you'll be left with pulp in the colander. We ran the pulp through a food mill (to purée it) and spread the purée onto dehydrator trays. This made delicious fruit leather. 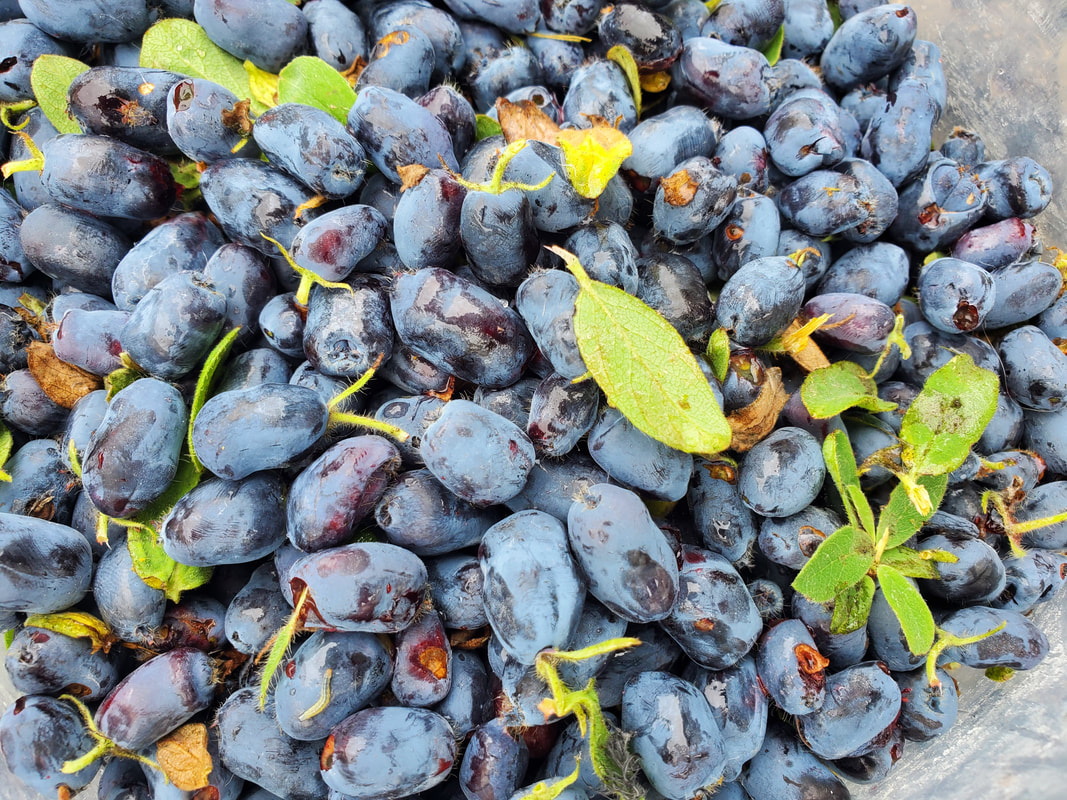 Honeyberries are the most successful berry I have been able to grow in our area (we are in zone 5A). Honeyberries do very well in cooler climates - they are very hardy and even the flowers are frost resistant (to a point). The berries come very early - for us it's usually around mid-June. You need two plants from two different varieties in order to cross pollinate. I have a couple of Borealis (introduced by the University of Saskatchewan) and a couple of Indigo Gem. They both originally come from Canadian Tire as 5 gallon plants. Honeyberries look like elongated blueberries. They are sweet and a little tangy. They are high in vitamin A and C, antioxidants, and lots of other good stuff. When honeyberries turn blue, they still need another 2-3 weeks before they are ready to be harvested. During that 3 weeks, I found that birds consistently ate all the berries. We were never able to harvest our honeyberries until we invested in bird netting that we simply drape over the row of bushes, and tuck at their base. Bird netting works like a charm, but, as a downside it is possible for birds to get caught in it, so we keep a close eye on it (which is easy since it's right outside our front door and my office window). We have freed a few birds from it over the years, with no casualties. I can usually tell the honeyberries are ready to harvest when they come off the branches very easily, or I notice some are falling to the ground. At that point the flesh is red/purple and the berries are sweet. Another tell-tale sign is that the U-pick farm down the street starts to advertise theirs as ready to pick :) I hand-pick my berries, although I have read that some people shake the bushes into a kiddie pool or over cardboard - my bushes are too close together. It's quite time consuming. It takes me about 15 minutes to pick 1 liter. We eat as many as we can fresh (great on ice cream or in a smoothie). I freeze the rest in 2 cup portions in Food Saver bags. When they thaw, they release a lot of juice. I pour that juice off into a mason jar and we use it to make fizzy drinks with our Soda stream, and I use the berries in baking. My favorite recipe to make is fruit crisp - a mix of honeyberries and pears is great in that recipe. Honey berry flavour is intense and I find the pear balances it out nicely. Ground cherries didn't seem popular until a couple of years ago, but they've long been a favorite at our place. I grow the Aunt Molly variety although this year I will try a Peruvian variety as well. The taste is a bit hard to describe but it is a mild, sweet, slightly tangy taste like super mild sweet pineapple maybe? Ground cherries grow in husks, in a bush that hugs the ground and spreads out. They are very robust and we don't water them - once the seedlings are in the ground, we just let them be until harvest time. They fall off the bush before maturity. We plant them over fabric mulch - this makes harvesting much easier. We just raise the sprawling branches up and sweep all the ground cherries to the side to pick them up. We bring bucketfuls inside and they mature inside their husks. Once they are an orangey yellow, without any green hue, they are ready to eat. Ground cherries are about as sensitive to frost as tomatoes, definitely cover them or bring them in before the first frost. The seeds are very easy to save, Just put a few ground cherries in water in a blender or squish them by hand, scoop out the seeds and dry them. We love to snack on them as is. When we have an abundance, a few of the recipes I like to make with them include:
Unfortunately since ground cherries weren't as popular in the past, I haven't been able to find many safety tested canning recipes. I hope this changes soon... I often wish there existed more modern safe canning recipes. |
About this blogThis is where I share my learnings and adventures in homesteading Archives
May 2024
Categories
All
|


 RSS Feed
