|
I was first exposed to no-till gardening through the book "Le jardin vivrier", by Marie Thévard. The first few chapters invited me to consider how healthy soil is in a natural environment such as a forest, and to compare that beautiful, black, rich soil to frequently tilled agricultural soil. I had myself observed how rich and loamy the soil is in our forest - in fact I was often tempted to dig some out to amend the clay soil in my gardens. The forest soil is alive - full of microorganisms. It it light and fluffy, drains well, leaves space of oxygen. When you sift through it, you find thriving fungi, worms, insects, mosses, and many micro-organisms we cannot see. Every year, it becomes more healthy, as leaves fall and decompose into a rich hummus, and plants decompose over the winter. All sizes of plants thrive in this soil, without intervention. Without watering or fertilizing. The forest soil is almost always moist and alive. In contrast, when I look at the agricultural fields that surround us, they look like a desert - hard, cracked clay that requires huge amounts labor and additives to extract a crop from them. The forest doesn't extract - it nurtures. And that is what I wanted to do with my garden. 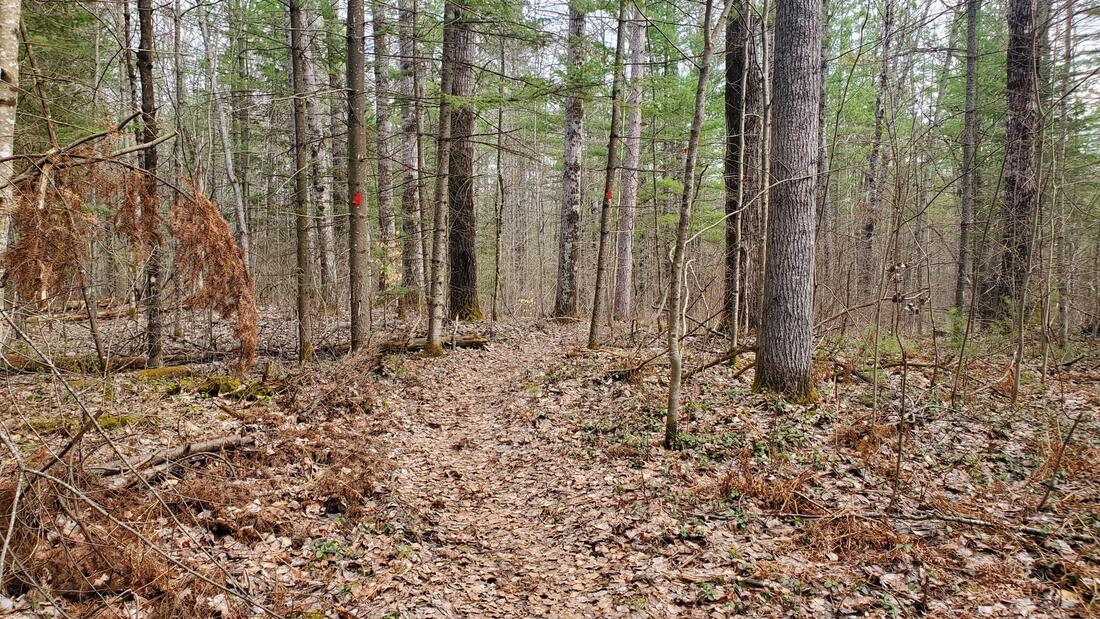 A no-till approach means drawing inspiration from the forest's nurturing and passive approach as much as possible. To avoid disrupting the layered ecosystem of micro-organisms in the soil, you never turn over the soil (bye-bye, rototiller). You also keep layering organic matter onto the soil, keeping it completely covered at almost all times. This organic matter, or mulch, serves several purposes:
It makes so much sense. And I always hated fighting with my rototiller so I was easily convinced. Going back to the time when I was reading all these revelations, I had already been using mulch in my garden in the form of landscape fabric. It had saved me hours of weeding, and I still don't hate it - I think it's a decent option for some scenarios. However, I was getting frustrated about a few aspects of it. First of all, it locks you into a certain planting pattern (wherever the holes are), so it was limiting my ability to do proper crop rotations. Secondly, it doesn't last forever and I hated the expense and waste it created. Thirdly, it's not very conducive to planting very tightly planted crops - you can't realistically make a hole every 5 centimeters. And finally, I now realized that it hadn't been doing anything to improve soil health.  The first year after reading this book, I decided to convert part of my garden to a no-till approach. Fabric mulch had never worked well for corn, because of how tightly spaced the seeds are. So, I decided to use lawn clippings to mulch my corn patch. The second year, I stopped replacing any sections of landscape fabric - whenever a section was too torn or degraded to use, I put down natural mulch instead. I used dried weeds, lawn clippings, and dried leaves. Even the occasional cowpot. Whenever I harvested vegetables, I removed any "extra parts" such as corn husks, carrot leaves, and the external leaves of cabbages, and dumped them right there and then as mulch - I started to see anything that was removed from the garden as a loss of nutrients, and it made sense to limit that loss. In the fall I left all plant matter, such as tomato stalks, to decompose into the soil. 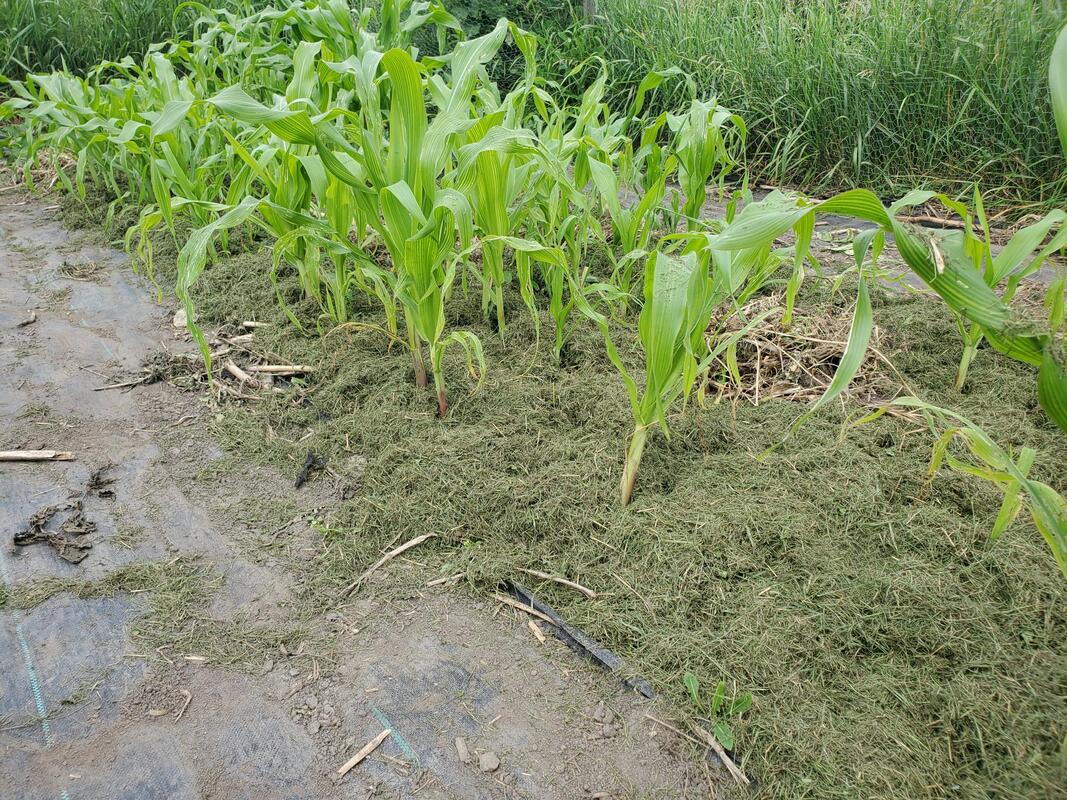 By that time, I started to notice a difference in the soil that was getting covered by natural mulch. It was becoming fluffier, it was well drained, and it was SO full of worms. It became easier to plant in - no more brick-hard clay in the spring, no temptation to till it to "fluff it up" or till under weeds that had gotten out of control. By last year, I felt ready to fully convert my garden fully to natural mulch, the last step towards no-till. The main obstacle that worried me was efficiently gathering up sufficient amounts of plant matter. During my earlier years of experimenting with natural mulch, I had been raking lawn clippings into the lawn tractor trailer, but that is time consuming. I solved that problem by purchasing a second hand yardsweeper - a passive lawn tractor attachment with brushes that fling lawn clippings into a little canvas trailer. This makes it much easier to pick up the clippings. I also started to "steal" people's bags of raked leaves and pine needles in the fall and spring. 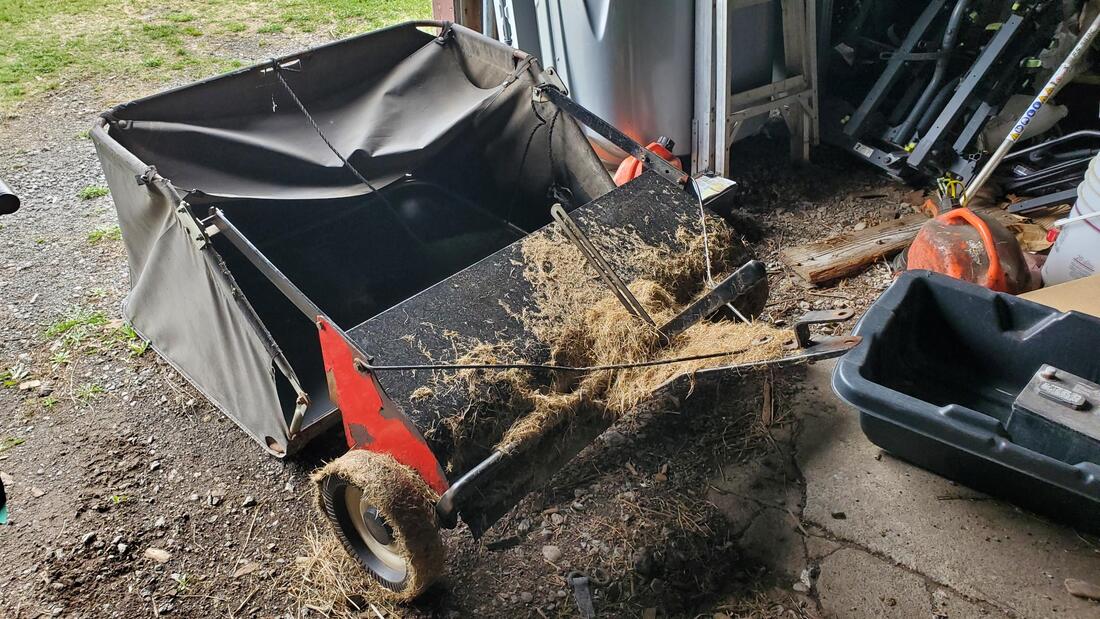 Last fall, when I "closed up" my garden for the season, I took out all remaining landscape fabric. I dumped bags of leaves on each row - I just packed as many bags as I could every time I took a drive through a residential neighborhood. On top of the leaves, I put whatever I could find, such as weeds, branches, corn stalks, etc - keep the leaves from blowing away. I also used lawn clippings. When spring came around, I was greeted by a vibrant soil that had been protected throughout the winter. Very few weeds pierced through the mulch, and the ones that did were easy to remove. I was able to weed my entire garden (30 x 60 feet) in about twenty minutes, and I only had to do it once. Normally, even with the fabric mulch, I had to spend a significant amount of time on several rounds of weeding in the spring. I also noticed that the soil hadn't compacted over the winter and during spring rains. It stayed fluffy and aerated, with lots of worms. 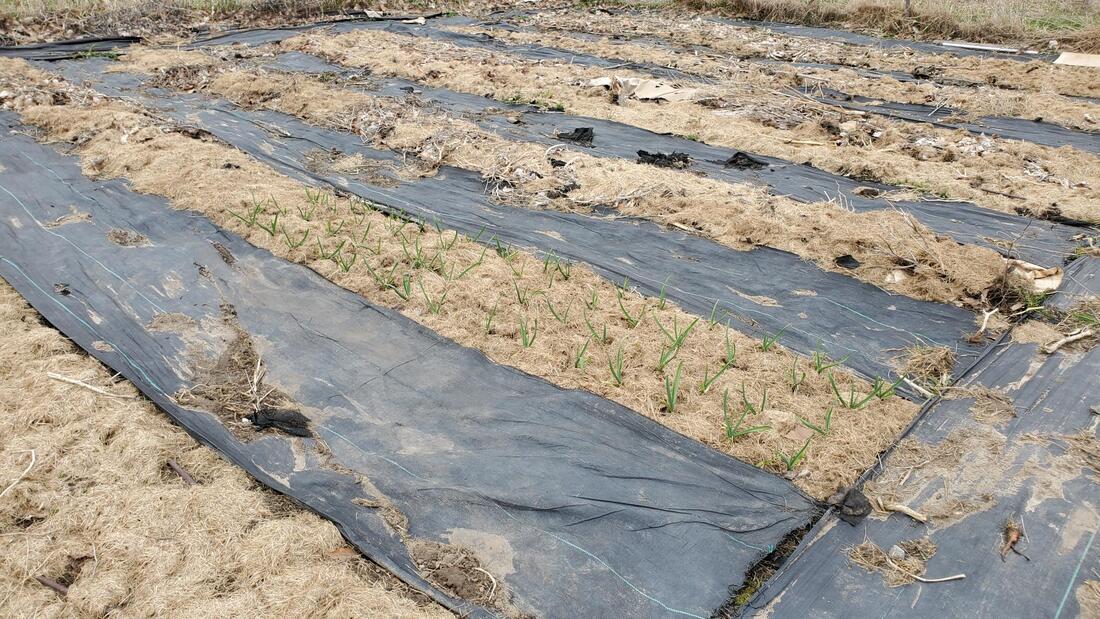 The mulch I had put did decompose significantly over the spring, and I had to apply another thick coat this week (mid-May). I put another layer of leaves, and a layer of lawn clippings on top (to prevent the leaves from blowing away). 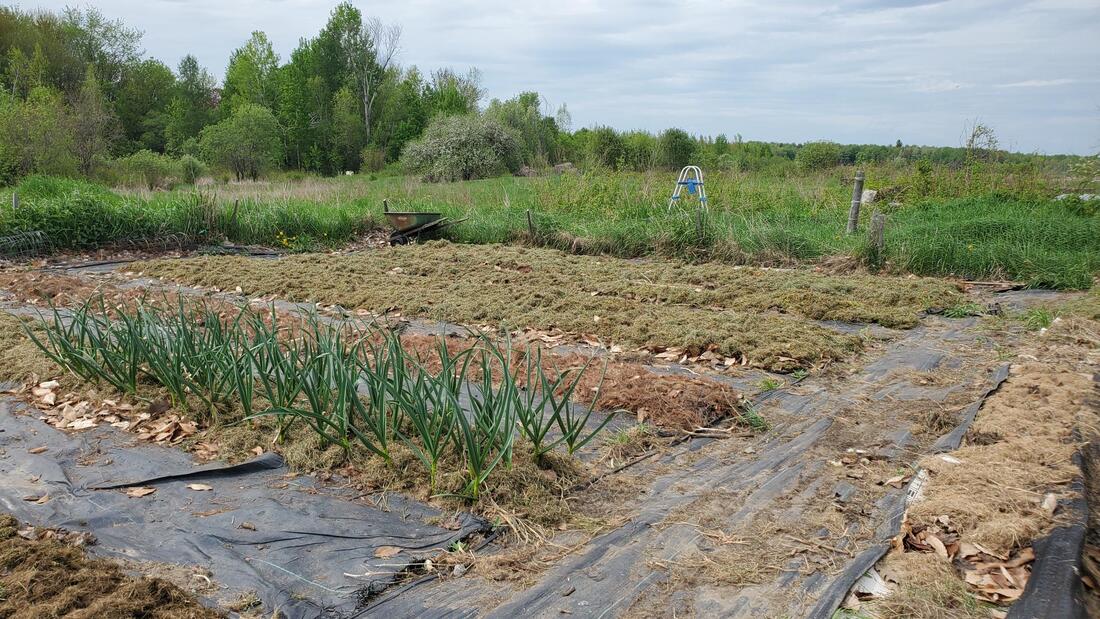 I've now planted my hardiest seedlings, for example onions, potatoes, parsley, and greens. It's been a pleasure to plant them in the natural mulch, compared to fabric mulch. Just spread the mulch with my hori-hori knife, making a little nest for the seedling or seed. No more cutting out the landscape mulch with an x-acto or scissors for every seeds (savvier gardeners burn those holes through, but still). I am still a little nervous about keeping up with that amount of mulching. The yardsweeper makes it relatively easy to gather up lawn clippings and that should be enough throughout the summer. We shall see! Some considerations for going no-till
What can you use for natural mulch? Scientifically speaking, it's useful to know that some mulches add carbon to the soil (mostly dried/brown stuff - for example bark, cardboard, and sawdust) and some mulches add nitrogen (mostly green stuff such as lawn clippings, aged compost, weeds and hay). Leaves and branches occupy a bit of a middle ground. Ideally speaking, you could choose your mulch based on a soil test to determine if your soil needs more nitrogen or more carbon. In practice, in our area, nitrogen is typically what is most needed so I learn towards "green" mulches. A few other factors to take into consideration:
I also want to mention that although sawdust is fine, walnut sawdust or shavings should be avoided (it suppresses growth). And, finally,, to bust a myth - it is not true that pine needles make soil acid, so you shouldn't fear them for that reason. The real reason things don't grow around pines in that pine needles make a very dense mulch, and, pine trees have very shallow roots. I actually really like pine needles as mulch - they provide great coverage and they don't blow away in the wind. 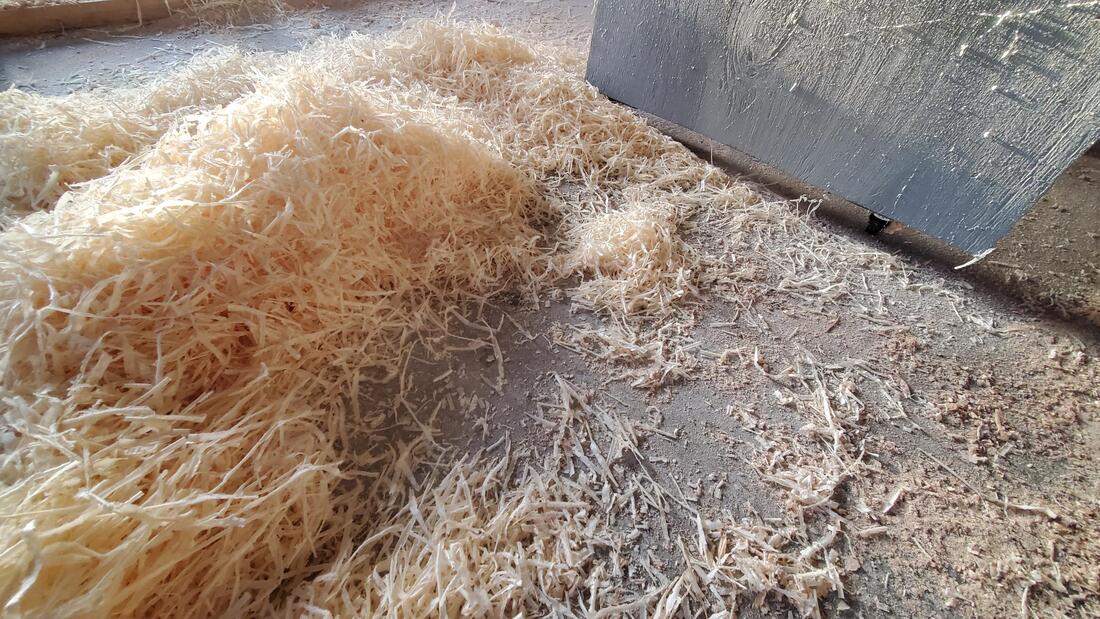 A word about the broadfork Finally, as you transition to a no-till approach, you may need to fluff your soil occasionally. For that I would recommend a broadfork. A broadfork fluffs the soil without turning it over. It leaves the microbiome of the soil intact. Eventually, as the soil becomes fluffier and fluffier, you won't need to broadfork it anymore, but, it is a good transition tool. 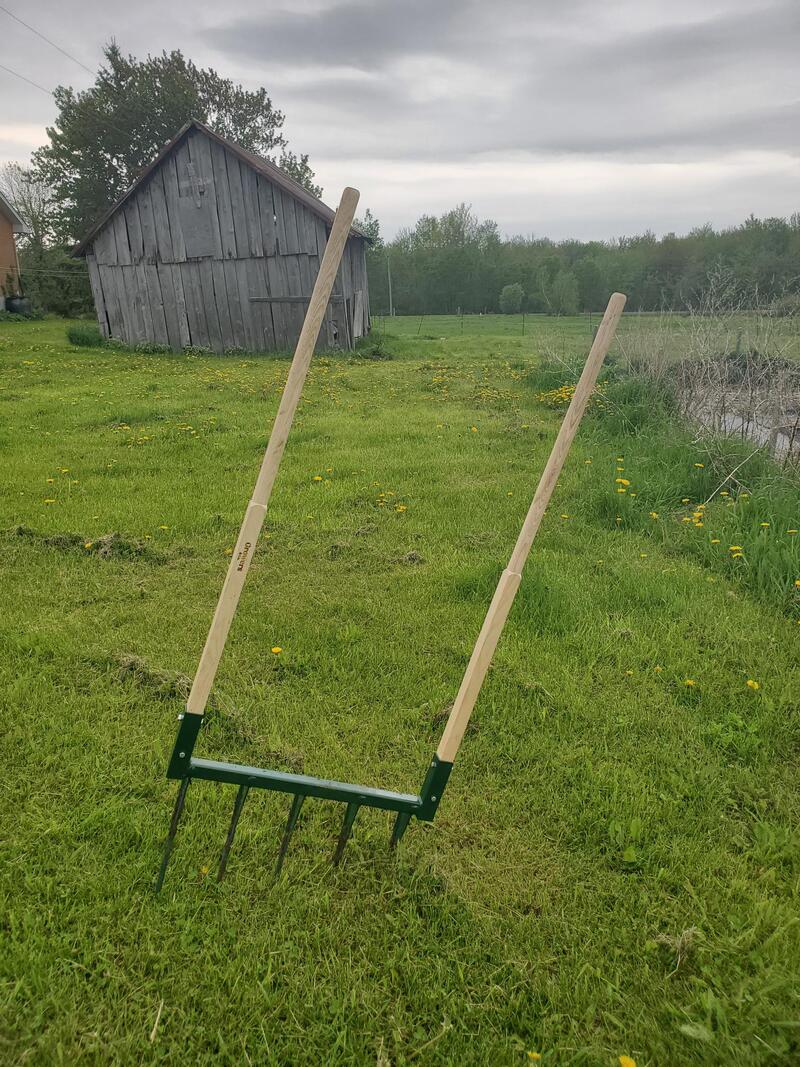 Setting up a new no-till garden bed
Most of my beds were converted from tilled beds to no-till. That means that originally, I dug up the sod and tilled it. However, it's also possible to create new no-till beds in your lawn, without tilling it even once. I am trying that for the first time and I will write a separate blog post about my experience once I am a little further along with it.
0 Comments
Over the years I have worked to establish more perennial food plants on our property. They typically cost a little more upfront but having low-maintenance, recurring sources of food is great. In the process of writing this post, I realized we have over forty different perennial foods growing on our property - a mix of naturally occurring and purposefully introduced.
I have integrated these perennials plants in various places on the property, creating a bit of an edible landscape; but I also have a few dedicated perennial beds in a section of our property. I keep these beds separate from my main garden so that they don't interfere with crop rotation. Before I switched to a no-till approach, it was a also a concern that they would get in the way of rototilling. I'll provide a summary of the perennial foods we grow, in hopes that it will give you ideas if you live in a similar zone. Even though we live in zone 5, I tend to favor perennials that are rustic to zone 3, to ensure they are very rustic and survive our winters. Trees:
Berries and other small fruits:
Edible flowers:
Herbs:
Others:
Naturally occurring perennials (foraging - more details here)
Failures - things I might try again:
This year I am growing onions from seed for the first time, after many years of using onion sets. Part of my motivation is cost, but I also read in Le Jardin Vivrier that onions from seed tend to store better. Here is the approach I am taking based on the principles of no-dig, intense planting. I started my onion seeds in a tray. I planted them very densely in rows. I didn't thin them. I trimmed them a couple of times to keep them around 6-10cm long. The trimmed ends are very fragrant and I used them in my cooking. 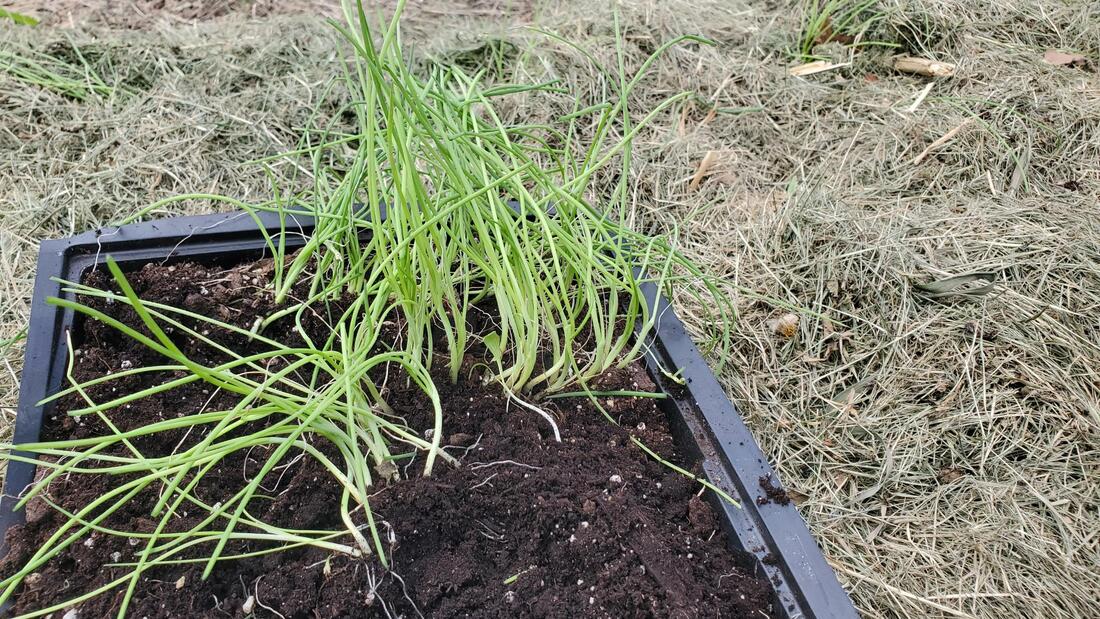 Once it was transplanting time, I trimmed them once more to around 6cm, and loosened the soil in the tray. It was easy to pull out the tiny onion seedlings and untangle them. 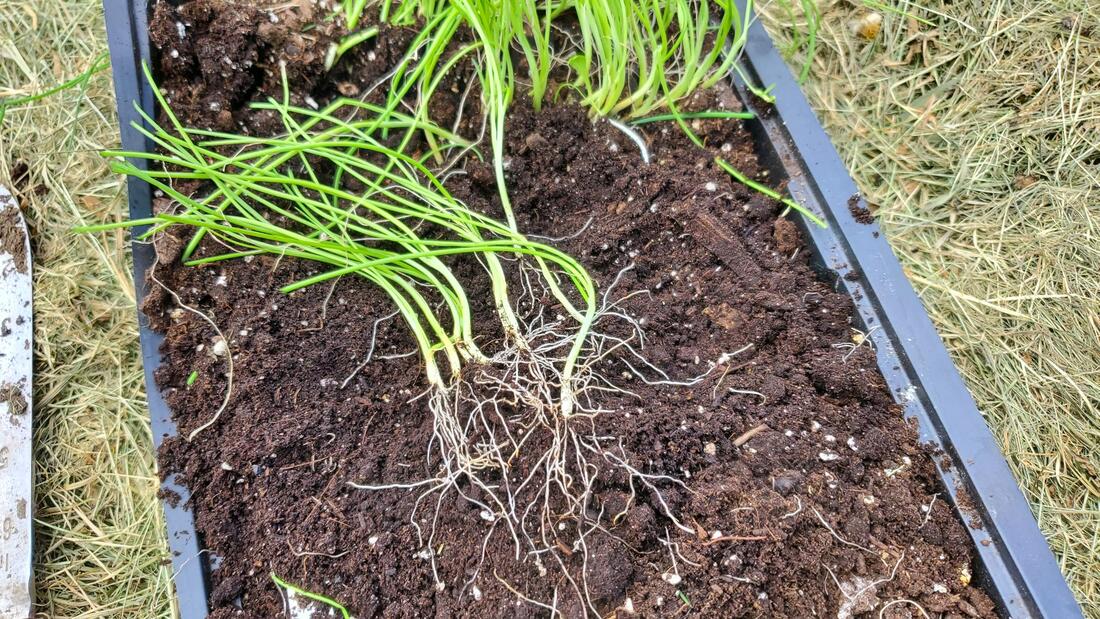 I grabbed 3-4 onion seedlings at a time 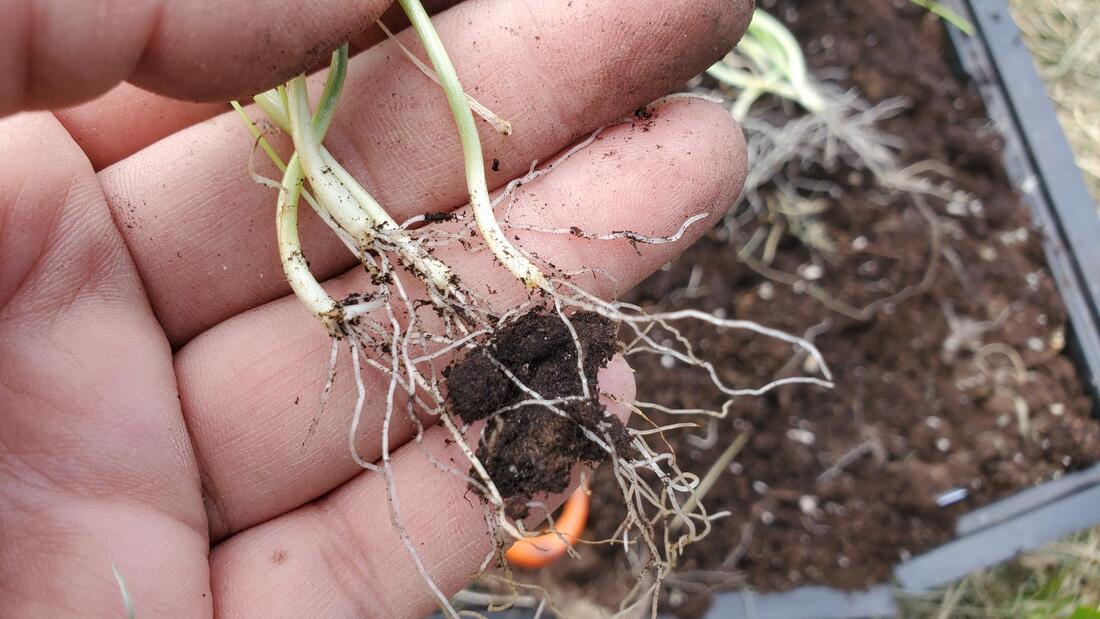 My garden surface was already loose soil (if it had not been loose I would have used the broadfork to loosen it). I had recently replenished the mulch covering it, with a layer of leaves and a layer of grass clippings. I used my hori hori knife to spread the mulch apart and make a small hole. I placed the 4 seedlings in the hole, making sure not to cover them above the split in their leaves. I packed the soil around them a bit. The reason I put 4 onions per hole is that they will naturally push each other apart as they grow. In many cases I will harvest one per hole as a "green onion" early in the season, and maybe even another one to cook as a young onion, but they'd be fine left together to maturity, too. 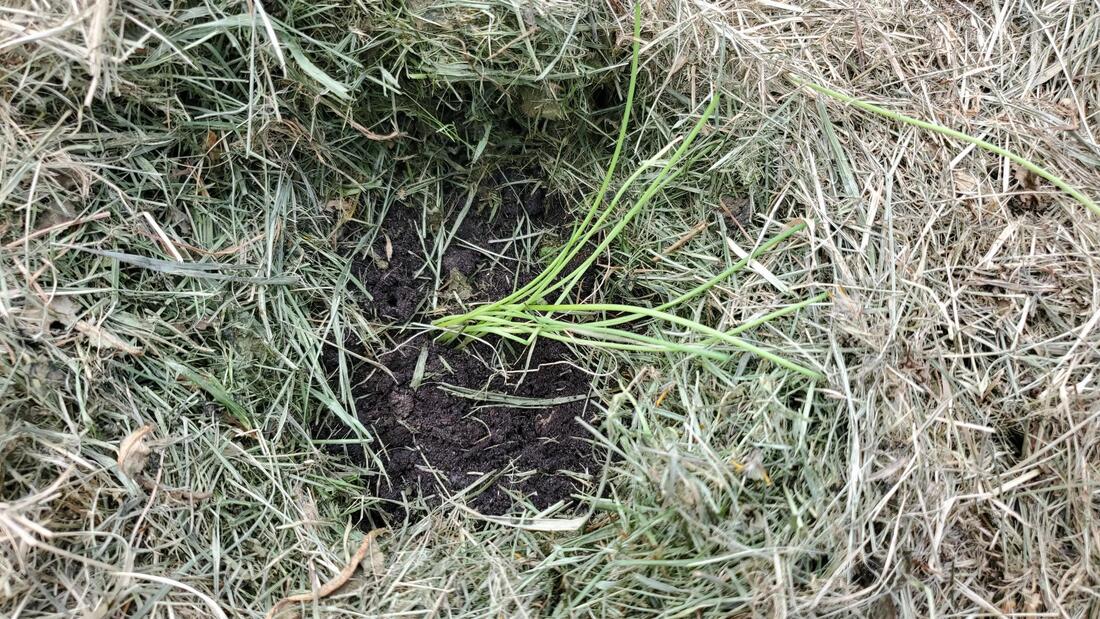 I used a distance of 8 inches between each 4-pack of onions. Even this densely packed, since onions have such skinny leaves, they won't shade the soil and weeds, so it will be important to keep a thick layer of mulch in between the onions, all summer long. I planted my onion sets the same way. In total, I have about 300 onions planted. They are one of those things that we never seem to have enough of! One of my favorite uses is French onion soup, which I pressure can.  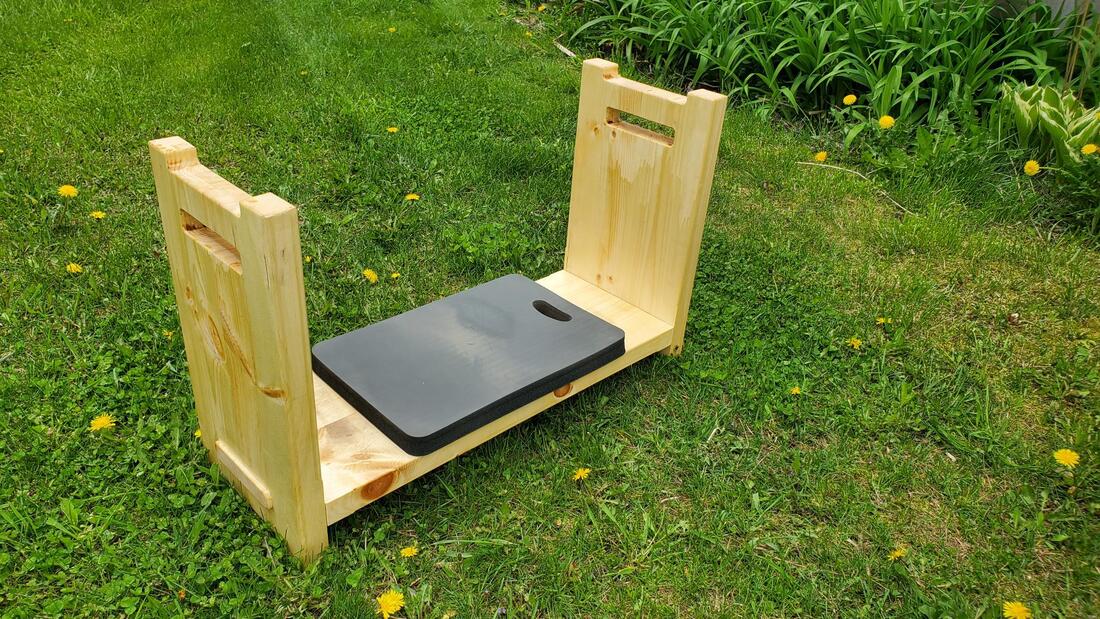 Woodworking skills and tools come in handy in the day to day. My latest project was making a gardening bench, which is mostly used while kneeling but also for sitting. It makes it more comfortable to kneel, saves my pants from the worse of the dirt and scuffs, and makes the repetitive up and down motions easier when it comes to long days of working along rows. The design I decided on has a few bonus features as well - it makes it easier to move all my tools as I go down a row, and if I flip it upside down it's a nice stool from which I can complete the "admiration phase" of my work or take a little break. My design was inspired by commercial products such as this one. Materials needed:
To create my design, I experimented a bit with stacks of books to see what was a comfortable height for kneeling, how high I wanted the handles to be (to assist with getting up repeatedly), and how wide I wanted the kneeler (I wanted a bit of extra space on each side to put down a tool if needed). I also experimented a bit to see what dimensions would work to fold my gardening bag over the top edge. I decided to use mortice and tenon joinery for strength. I could get 2 by 12 boards so I started by jointing and laminating pairs of 2 x 6 boards cut to size. I planed and jointed them. Then I used my router to carve out a mortice and handle in each vertical piece. I made the handle and mortice symmetrical, which made for an appealing design and simple router set up. 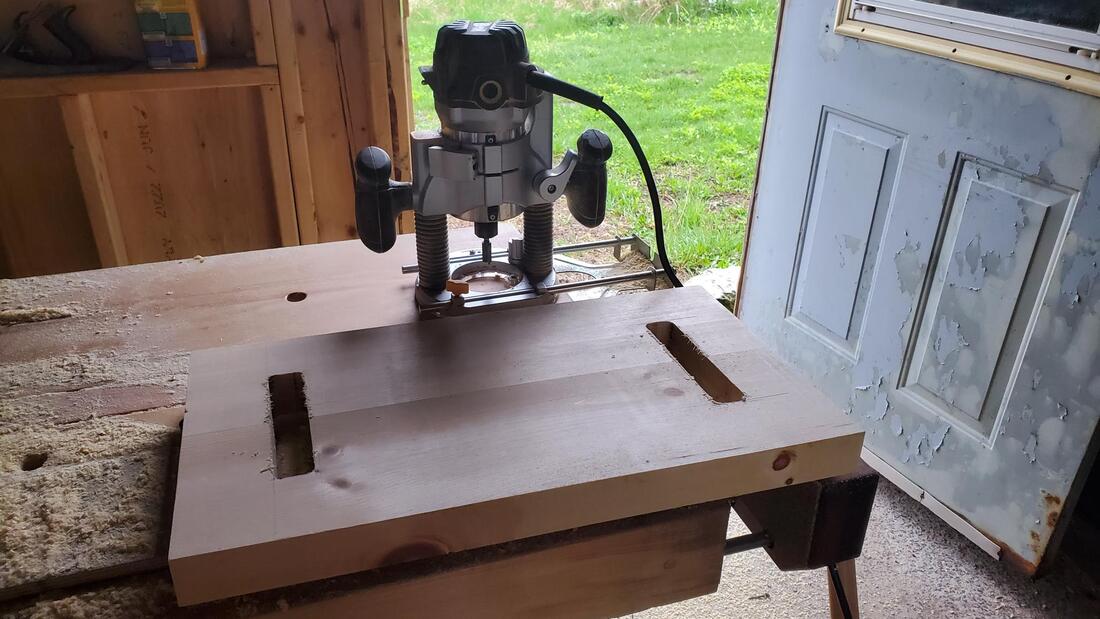 Next, I used my router table to carve out a notch at either end of the vertical board. This creates short little legs that make the bench more stable on uneven ground. As a bonus, once I started using the bench, I realized that they are great for hanging my hat or any tool with a loop. 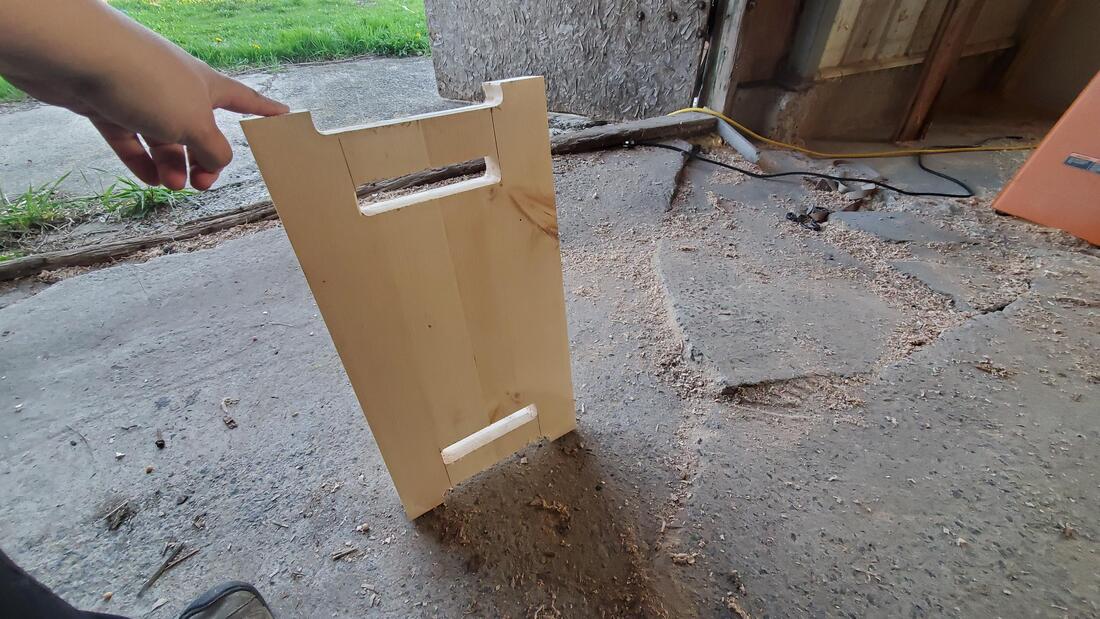 I While I was at the router table, I started to work on the tenons, at either end of the horizontal piece. I routed out material on both faces of the board, adjusting until it was the correct thickness to slip just right into the mortice. I used a handsaw on the two edges to complete the tenon, and chisels to round off the tenon and adjust the fit. I made the tenon a bit longer than needed, so it would stick out a bit, just as an aesthetic choice. 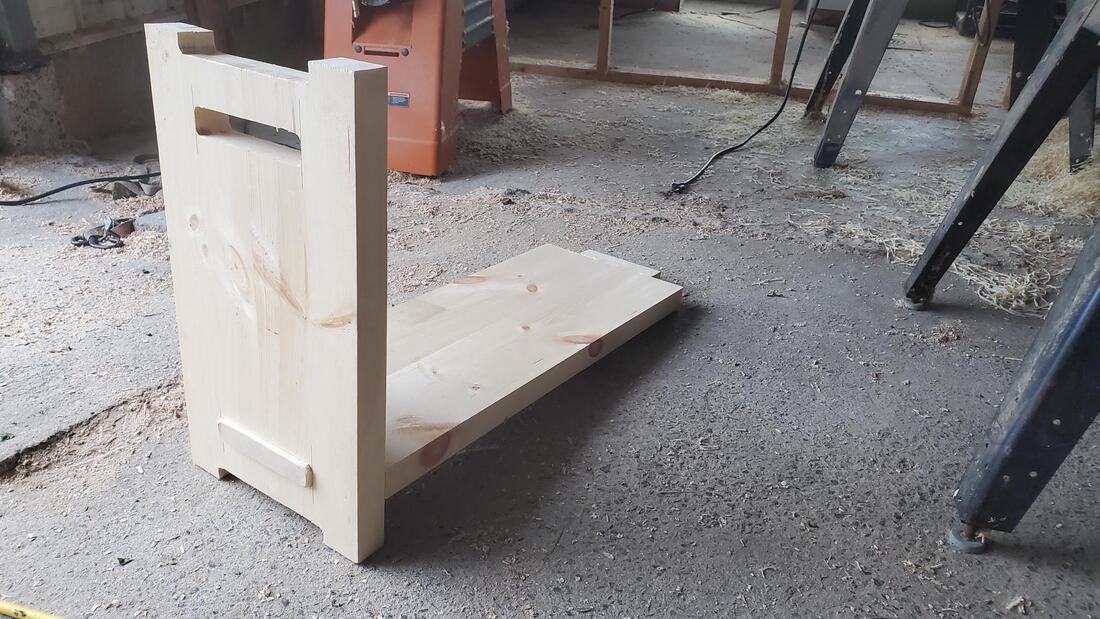 Then, I used a palm router and rasp to round the edges. I glued the mortice and tenon, and applied polyurethane finish. In the picture below, the bench is drying upside down, on some painters' pyramids that I 3D printed a while back. All that was left was gluing the foam on with contact cement. 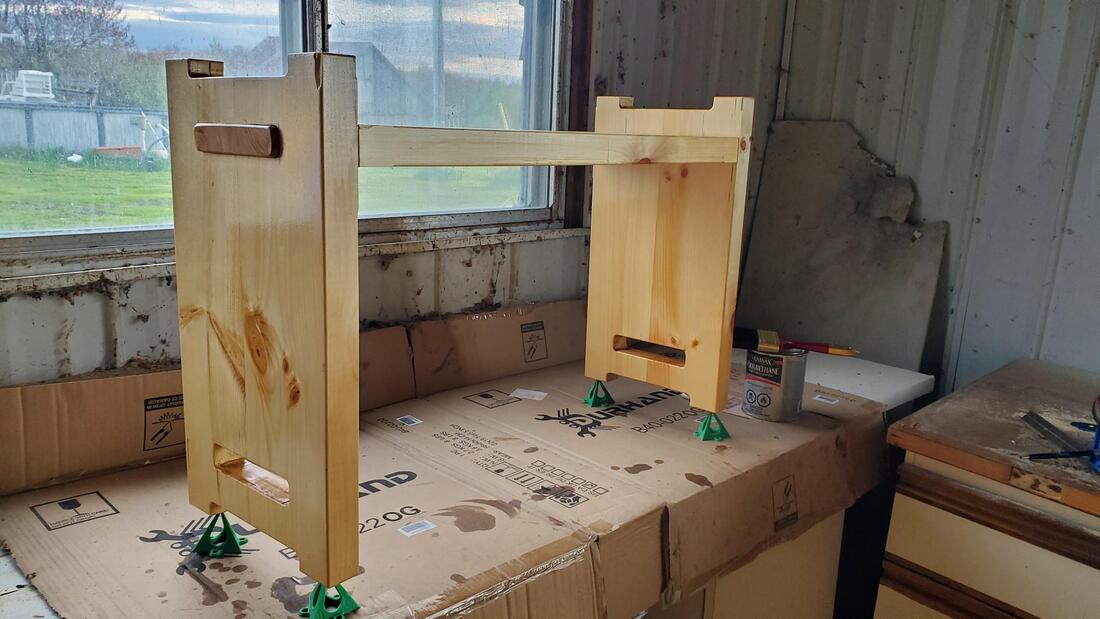 I had a chance to try out my kneeling bench yesterday while planting onions, and I love it. It is comfortable, less tiring, less muddy, and makes it easy to move all my tools along a row as I progress. The upside-down side definitely came in handy too. I love hooking my gardening bag on one end, and my hat on the other when I take it off to cool down a bit. Overall I am very happy with my design! It took about two half days to make, plus drying time. It was a lovely project to spend some time in one of my happy places, my workshop, listening to the rain falling on the tin roof. 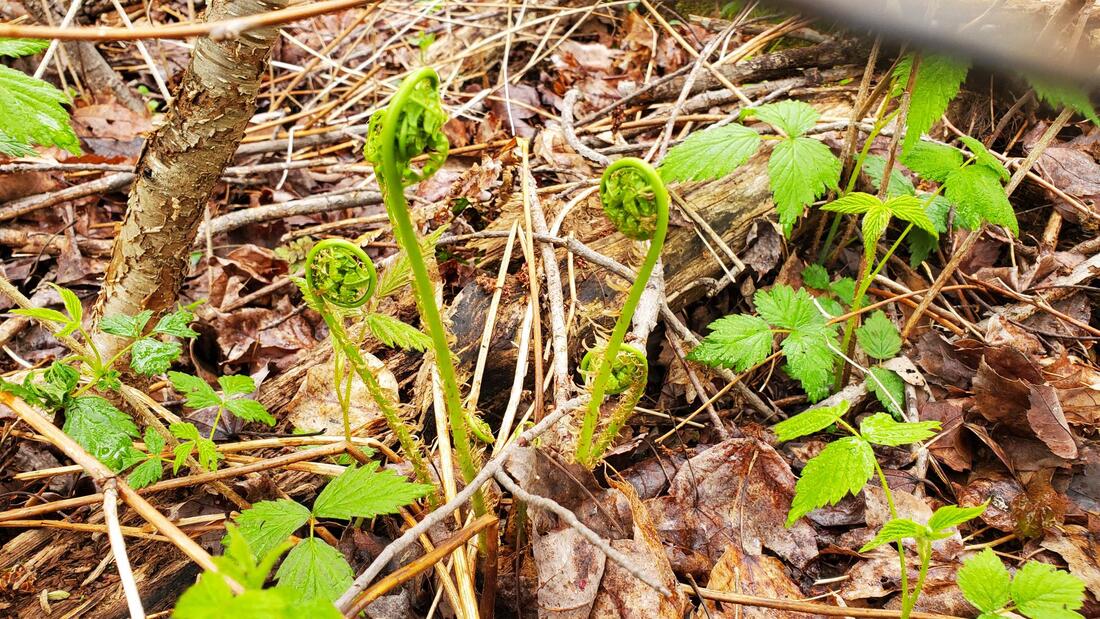 Fiddleheads are a great food to forage. They are very easy to identify around here, and come pretty early (early/mid-May this year where we live, in Eastern Ontario), right as nature wakes up and before I can get fresh greens from the garden. It might be easier to spot a nearby ostrich fern patch in the summer, and go back to harvest in the spring. We have lots in our forest. 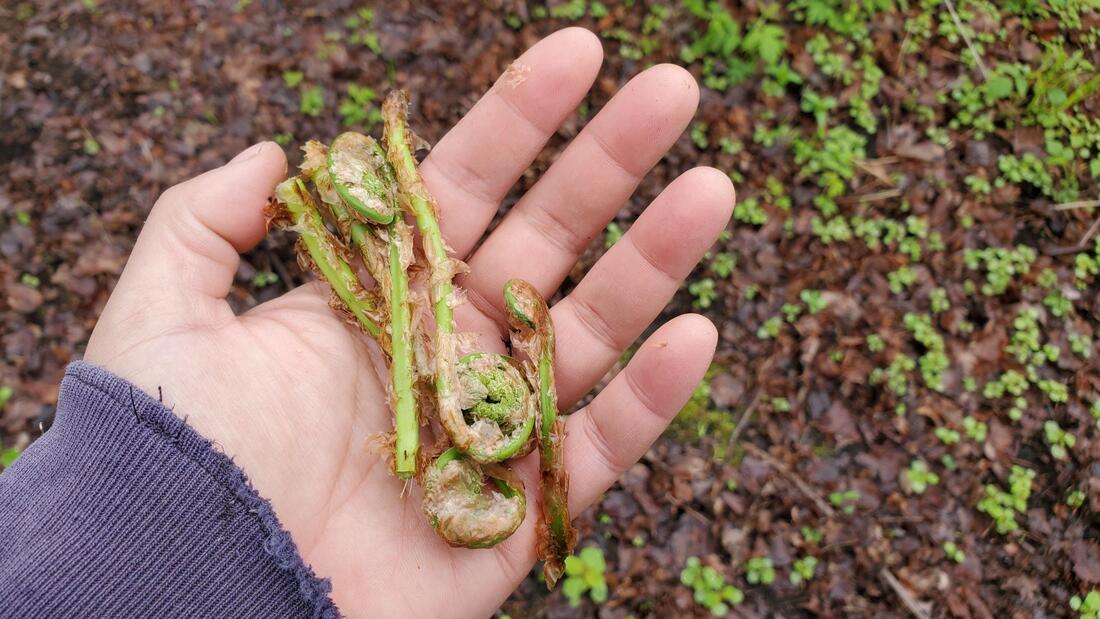 Fiddleheads are the early form of the Ostrich fern - one of two abundant ferns in our area, which also has a lot of Cinnamon fern. It's key to be able to distinguish between these two ferns, and luckily it's pretty easy. The first key characteristic of the ostrich fern is that is it covered with light brown / tan paper - as opposed to the white fuzz that covers the cinnamon fern. The second key characteristic is that its stem has a groove in it (a cross section would be U shaped like a tiny celery), as opposed to the cinnamon fern which doesn't. In the picture below, the ostrich fern is at the top and the cinnamon fern at the bottom.  I cut a couple of fiddleheads from each fern and leave the rest, to ensure a sustainable harvest. I cut them near the ground as the stem is quite good. Once at home, I sort through the fiddleheads to confirm identification, remove as much of the papery husk as I can (but it's fine if some stays), trim off the ends and wash them. I boil or steam them, then pan fry them in olive oil with garlic, salt, pepper. I add a little bit of lime juice. Delicious! 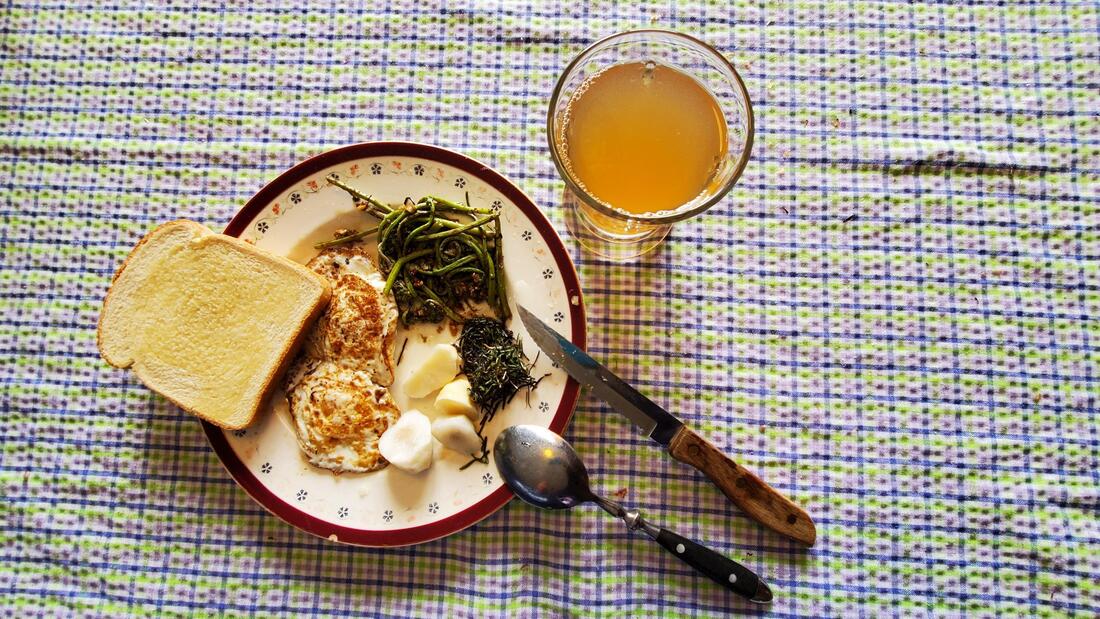 Delicious local lunch... harvested from our property: panfried fiddleheads, fermented sunchokes, the tops of my onion seedlings, which I trimmed yesterday, and hard apple cider; supplemented by guinea eggs from the neighbors |
About this blogThis is where I share my learnings and adventures in homesteading Archives
May 2024
Categories
All
|


 RSS Feed
