|
The first year I gardened, I quickly became overwhelmed by weeds. After a week away, it was hard to get back on top of things. I had read about the importance of mulching, but all that came to mind at the time was expensive bags of mulch at the nursery. I knew the cost would add up quickly based on the size of my garden and needing to add mulch over and over again. However, it was clear that I needed a solution. Starting the next year, and for many years since then, I have been using landscape fabric to control weeds. I lay it down along the rows, over my drip irrigation lines. I secure it with a generous amount of ground staples, rocks, and logs. Advantages of this method include:
I think this is a very decent approach to weed control and I definitely would never go back to not having any kind of mulch. However, I did find that this approach had some downsides:
Over the last couple of years, I have been experimenting with switching over my landscape fabric to natural mulch. I haven't given in to buying commercial mulch - I use whatever I can get my hands on for free. For example:
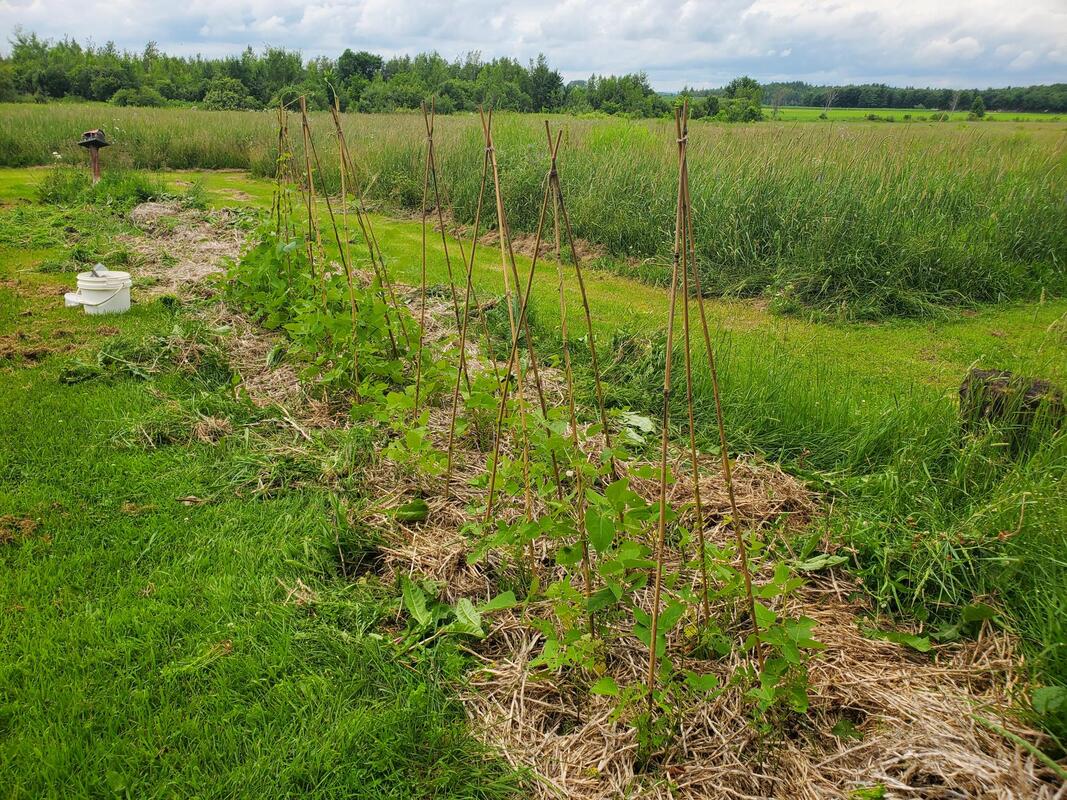
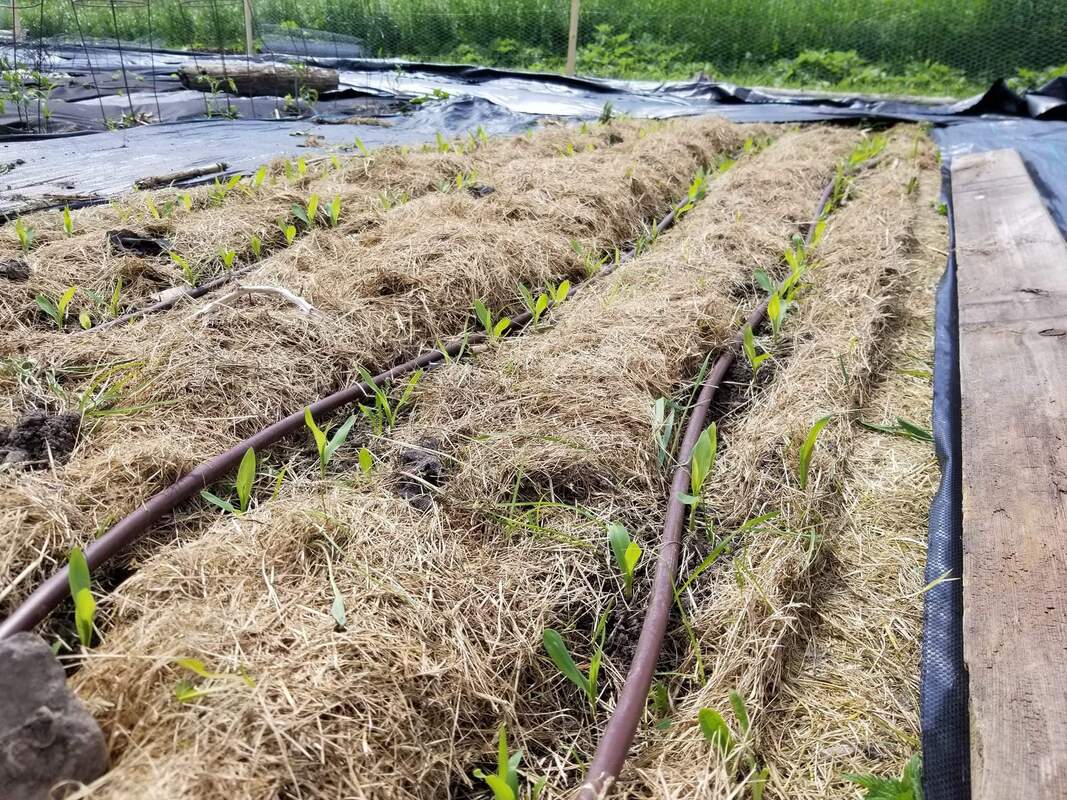
When mulching with natural materials, I make a pretty thick layer - about 4-6 inches. I keep an eye on it as it decomposes and replenish the low spots every time I mow the lawn or whenever it's needed. Weeds do pop up here and there but they are typically easy to pull. The mulch continuously decomposes, so it keeps enriching the soil. In the fall we put an extra generous layer of mulch that stays there through the winter. It keeps weeds down in the spring and I just pull off the extra when I plant, ready to be used as replenishment as needed. I still have fabric mulch in my main kitchen garden, but I don't use it in any new gardens and I am replacing it with natural mulch as it degrades. This is all part of the "no till / no dig" approach to gardening that I have been transitioning to. This biodegradable mulch composts in place and is making my soil better and better. The book that started me down this path is "Le jardin vivrier" by Marie Thévard. I also recently picked up "No-dig gardening" by Bella Linde and Lena Granefelt and "Building soil" by Elizabeth Murphy to learn more about the topic. One final tip. Years ago Ray decided to use some leftover construction paper as mulch. Not a good idea. It's waterproof so it doesn't let rain in, so you need to water a lot. And, now, 5 years into it, It's starting to fray in places and little bits of it are flaking off, I am afraid it may mix into the ground so we'll have to remove it. So be careful about using things such as this or tarps. Make sure whatever you use is biodegradable.
0 Comments
When I created my garden, I wanted to make sure that is would be okay for us to be away for occasional camping trips – so, I wanted some kind of automatic watering system. It took a few attempts, but I am finally happy with my irrigation system which consists of rain barrels, an on-demand pump, a valve on a timer, and drip emitter tubing. It was definitely a learning journey and I think it’s worth mentioning all the things that didn’t work, before I landed on my solution. What didn’t work:
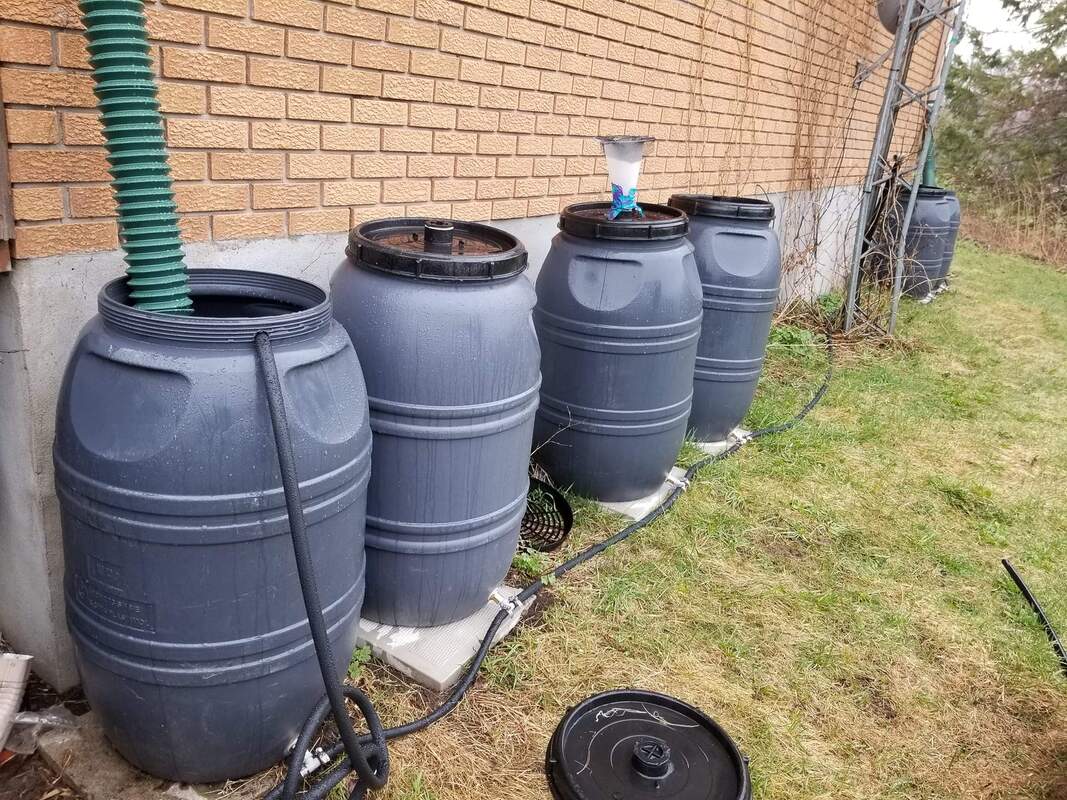
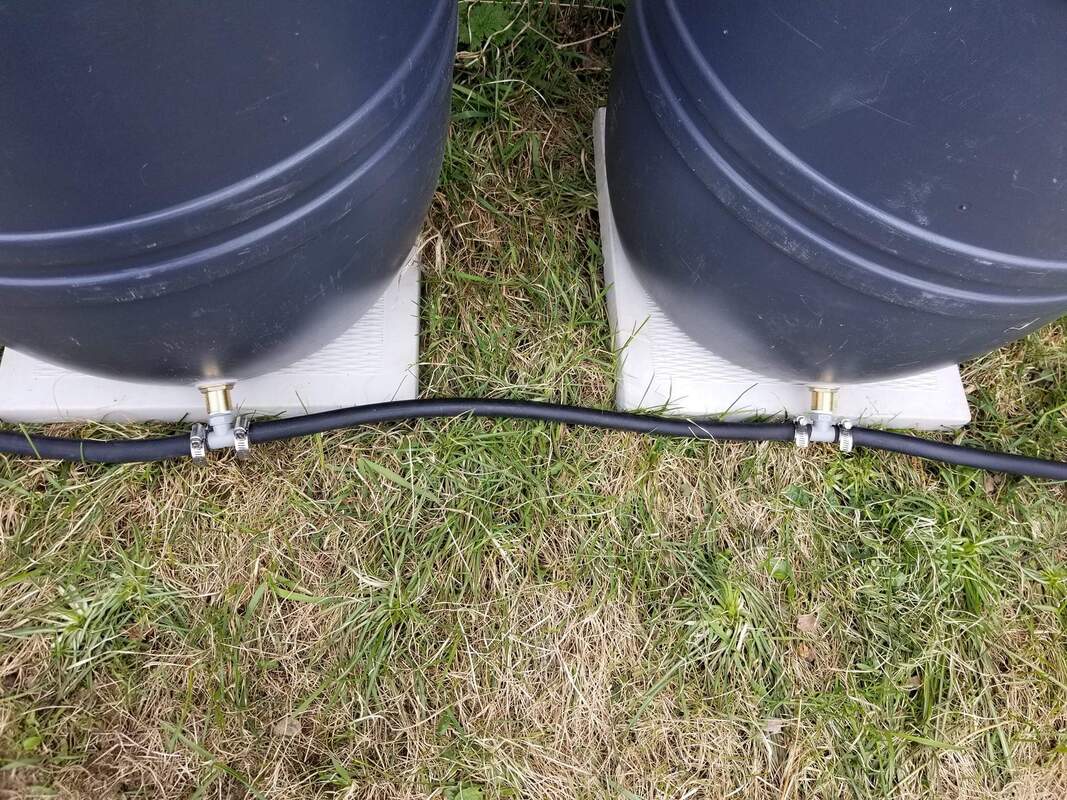
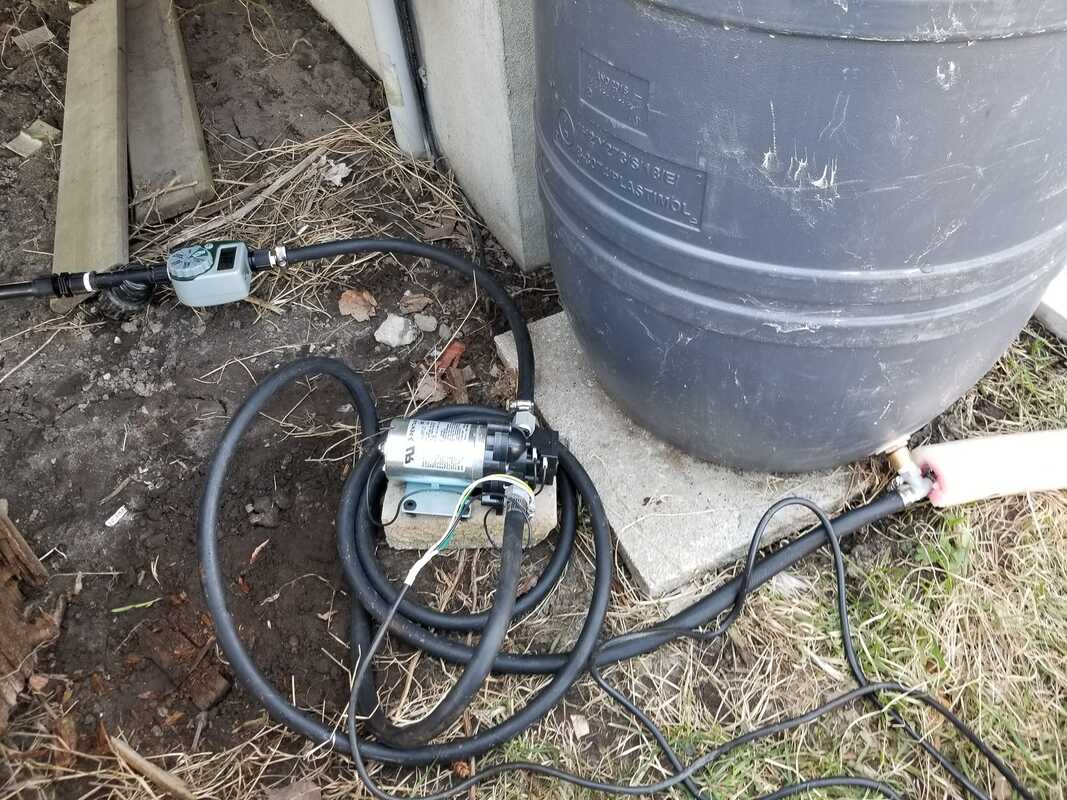
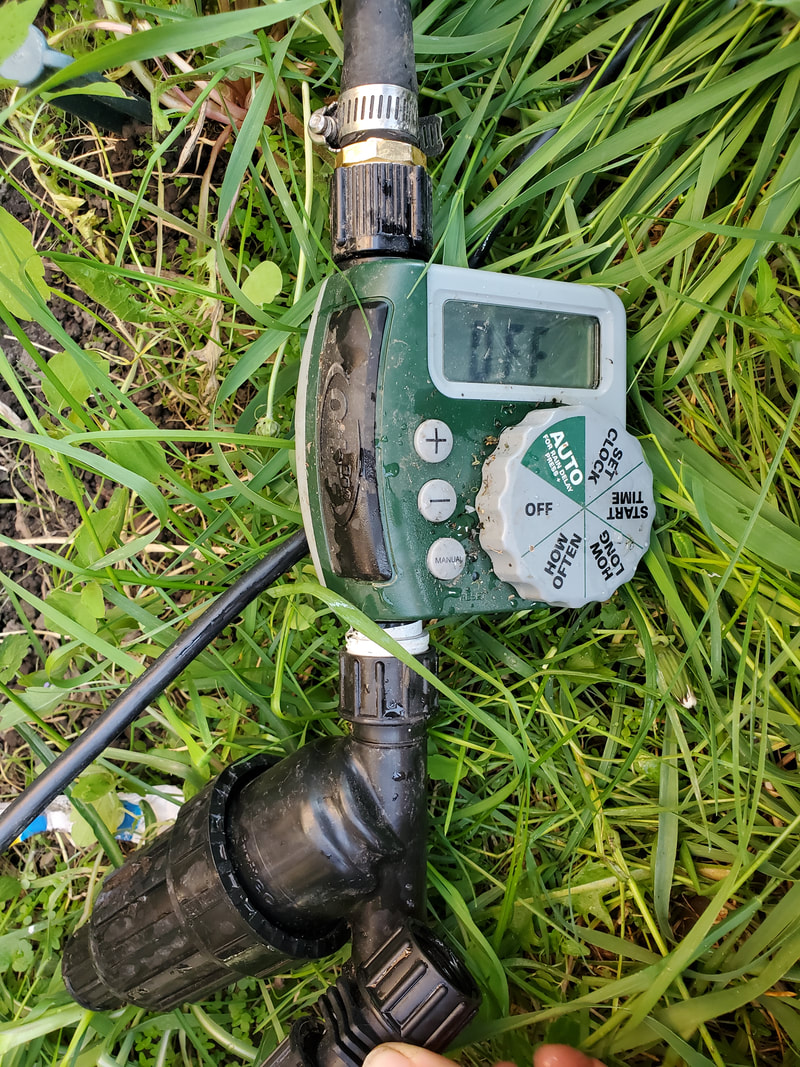
What worked: The inspiration for my current system was this youtube video. Once I realized that gravity feeding wouldn’t work, I knew that I needed some kind of pump and a way to turn it on and off. I figured that I had two choices to control the flow on a schedule. Either I could use a pump that turned on and off using a timer – that solution means that you need to switch 120 volts on and off, and that you need a pump that will actively shut off the flow of water when it’s powered off. The alternative is to have an on-demand pump that is always plugged in to 120V, and a separate in-line valve that opens and shuts on a schedule. I chose the latter solution because it avoided me having to switch 120V on and off (doable with a transformer but requires some electronics work) and because I already had a programmable hose valve from a prior experiment. Either approach could work depending on what you have on hand. Here is a diagram of my overall system: In this post, I will walk you through each of the parts of my system, from roof to garden. At the end I will give you some tips regarding sourcing the components and some lessons learned. Roof When choosing where to install your rain barrels, you’ll want a roof with the most surface area. It needs to be a roof with gutters and downspouts, of course. The more roof area feeds into the downspout(s) that you connect to your rain barrels, the better. In our case, we have a rectangular bungalow. The entire backside of the roof feeds into a single gutter and downspout; the front side is split between two downspouts because there is a peak in the roof over the front door. I connected two of the downspouts to my irrigation system (3/4 of the roof) and the third one fills stand-alone rain barrels that we use to hand water other plants (also a good backup if my irrigation system ever sprung a leak). Downspouts I cut off each downspout above the height of the rain barrels and attached a downspout diverter. I got these downspout diverters at Canadian Tire. Rain barrel daisy chain We purchased plastic barrels at a flea market. They had been used for food storage – olives, peaches, etc. They are much cheaper than “official rain barrels”. I use six barrels in a daisy chain – one downspout diverter feeds into the first barrel and the other one feeds into the sixth barrel. I made a hole in each barrel close to the bottom – the lower the hole is, the better, up to a certain point. If it’s too high, you will leave a lot of unused water at the bottom of the barrel. However, you don’t want it to be completely at the bottom because the debris from the roof will settle at the bottom and could potentially clog up your system. In each hole, I put in a threaded insert and a T connector with barbed ends. I connected all the barrels in a chain using pieces from a garden hose. The first garden hose I bought was on the cheap side and didn’t work out – it was not flexible enough to slip easily onto the T connectors, and it had a raised inside seam that made it difficult to get a good seal on the connectors. I ended up buying good quality flexible garden hose from Canadian tire (sold in bulk on a spool), they cut it to whatever length you need. To slip it onto the barbed ends of the T connectors, I softened the hose a bit with a heat gun. I put a hose clamp on top of it but that is probably overkill. On the first and last barrels of the daisy chain, the T connector has a free end. On the first barrel, I used a piece of hose to connect this to the pump. On the sixth barrel, I also connected a piece of hose; can be used to drain the barrels or fill a bucket. When it’s not in use I tuck it into the top of the barrel so that no water can escape. The pump The first rain barrel connects into the pump. The pump I chose is an on-demand pump. It is permanently plugged into a 120V outlet. On demand pumps have a diaphragm that detects a pressure differential between the inlet and outlet. If the pressure at the outlet drops, the pump turns on. In practice, what this means is that if the hose coming out of the pump is plugged shut, the pump doesn’t run; if the hose isn’t plugged up, the pump turns on. A pump like this is ideal for things like a garden hose terminated with a spray gun, or a hose with a valve on it. I can therefore control the pump by opening and closing a valve installed at the outlet. The important parameters for the pump are the flow and the pressure it creates. Those must match the parameters of the drip hose you have set up. They will depend on what hose you use and how much of it. They will be available from the manufacturer and you just need to make sure your pump and the hose are compatible. You can also think about a passive inline pressure or flow regulator if you need to. I protect the pump from the elements by putting it in a plastic “bowl” that is then covered by an overturned Rubbermaid bin. A bungee cord and two tent pegs hold this down. I ordered my pump from amazon. Water level detector For extra peace of mind, I added a floating water level detector (similar to what you would use for a sump pump). If the water level drops too much, it cuts off electricity to the pump. This way, the pump will never run dry. I chose a detector where the float moves up and down on a stick, rather than one that flip flops like most sump pump floats, to make sure it wasn’t impeded by the barrel walls. The valve I used a programmable garden hose timer valve that I had bought for a previous experiment. It is powered by a 9V battery. When we leave for a few days, I set it to run for 30 minutes every 2 days (I am still figuring out the best schedule but that is what it is for now). I usually program it to run in the evening so the water doesn’t evaporate before it soaks into the ground. The filter I have an inline filter right after the valve (the black device pictured above is the filter). I bought it with the rest of my irrigation line, from Irrigation direct which is a Canadian supplier. This helps catch any small debris so that it doesn’t clog up my lines. The main line The main line runs from the filter to the garden. It’s a polypropylene line from Irrigation direct. We have had many mishaps over the years involving the grass mower and hoses, so I buried the line underground. I use my rototiller to dig a trench, buried the line , and filled the trench back up roughly. Within a few months the grass had grown back. The line runs all the way down to my garden and the across the top of each row. The drip emitter lines Each garden row has one or two drip irrigation lines running down of it, depending on the spacing of the plants in that row. These irrigation lines are hooked up to the main line using a self-tapping T connector (very convenient). Each line also has a manual shut off valve so that I can turn certain rows on or off when only some rows need to be watered (for example if I only planted the old crops in the spring). Each row is terminated with a figure 8 stopper which basically folds the line onto itself. The drip lines aren’t anchored to the ground with ground staples, so I can easily move them out of the way when I fluff the earth in the spring, and I can easily adjust them around the plants. They mostly run under the mulch. Sourcing this equipment
I ordered all my irrigation-specific supplies (drip lines, polypropylene tube, connectors, filter, manual shut off valves) from Irrigation direct, which is a Canadian supplier. They have tutorials and lots of example setups on their website, which were very helpful to me when planning my setup. The more generic stuff (pump, garden hose, garden hose timer, downspout diverters, threaded inserts and connectors) are available on Amazon or at big box stores such as Canadian Tire and Home Depot – I shopped around for price and compatibility. The rain barrels are food grade barrels from a flea market. A note about hose connectors Figuring out the connectors to make all the different elements hook up to each other was a bit of a pain. Understanding existing threaded pipe standards was important in order to figure out what would screw into what and what kind of adapters I needed to get.
Winterizing To overwinter my system, I bring in the pump and garden timer before temperatures drop below freezing. For simplicity, I just cut off a few inches of hose on either side of the pump to disconnect it from the system, and in the spring, I took off that small bit of hose and used a heat gun to slip the barbed connectors inside the remaining hose. I empty the barrels and lay them down on their side (so that no water freezes inside the hoses or threaded inserts). They moved around a bit more than I would have liked due to wind, so next year I will probably stake them down using a rope and tent pegs. I didn’t bother blowing out the hoses – I figured they would empty themselves well enough through gravity. When I hooked everything back up in the spring, everything worked well right away. It’s a good idea to reinstall the rain barrels early in the spring, to fill them up with those spring showers. I installed them in early April. However, I only reinstalled the pump and timer in late May once I had planted my garden. Possible improvements I did get a bit of a hiccup when debris got sucked in from the bottom of the barrels and clogged up the timer, so I might look at some kind of pre-filtering provision. I could also consider adding a rain detector to avoid watering the garden when it has rained that day or the preceding day – I don’t worry about that since if it’s raining, the rain barrels are refilling anyways. Some garden hose timers come with this rain detector capability built in. I also think it would be nice to add a second line in between the pump and the timer, and hook it up to a garden hose with a spray gun, for occasional hand watering (right now, when I need to hand water, I just dip a watering can in the barrels). Finally, although I had plenty of water last summer and never emptied out my barrels completely, I will be monitoring to see if that is the case every summer. If I do bottom out, I could consider adding more barrels to my system to have a larger reserve. Spring showers filled up 6 barrels in no time and I am sure they would fill up many more. Concluding thoughts The irrigation system gives me peace of mind when we are going away, and it’s proven to be robust – I haven’t had any issues with leaks. It did not totally replace hand watering in the spring - I did find that I did some spot watering at the beginning of the season to get seeds germinating when not the entire garden was planted. I also find that since I use mulch everywhere, the watering needs of my garden are not that high. Even after several days of no rain and hot weather, if I put my hand in the soil under the mulch, I am surprised at how damp it is. So, I don’t run the irrigation system as much as I thought I would. It is useful when we are away for 3 days or more, but I don’t run it often if we are at home. If we didn’t travel and camp in the summer I would say an irrigation system may not be worth it, but I am glad I have it so that I don’t have to worry about the garden when we are away. |
About this blogThis is where I share my learnings and adventures in homesteading Archives
May 2024
Categories
All
|

 RSS Feed
