|
If you grow a larger amount of food and are striving towards self-sufficiency, having a good tracking and planning system is essential. You want to get a strong sense of how much of each product you use each year, and how much you need to plant in order to produce that quantity. Over the years I have improved my tracking and planning processes. In this post, I will share what a year-long cycle looks like. The central piece to my system is the inventory list posted on my fridge. Every preserved product is listed on it. It is organized in sections: side dishes (pickles, salsa and other), main meals (pasta sauces, vegetables), sweets (jam, fruits and other), drinks, and miscellaneous (including honey and maple syrup). Each item has spaces to keep up-to-date numbers of the remaining portions of each "format" of that item written in pencil (quart, pint, half pint, frozen portion, or other unit that makes sense for that type of food). Every time we open a jar or package, we erase and update the remaining numbers (I keep a pencil with a magnet taped to it on the fridge). Each product also has a space on the right where I recorded how many of that item we had going into the preceding fall. If we run out of something, I make a note of the date by which we ran out, so that I can estimate the shortfall. If something goes bad, I make a note of that date as well so that I can plan to use all of that product by that date the next year. The inventory list is my starting point for meal planning throughout the year. By having our starting and current numbers on my list, I have a sense of what we'll run out early and what we have a lot of. I plan my meals based on that. We mark off what we use on the inventory list as we go. 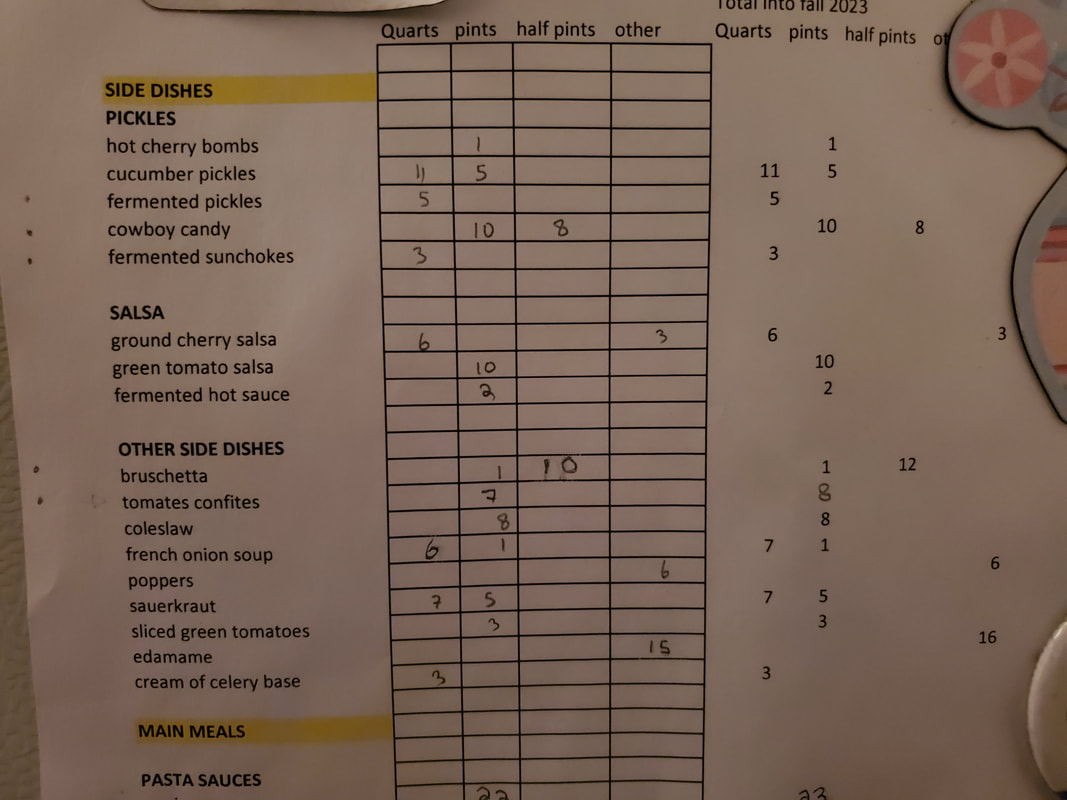 Let me walk you through what a one year cycle of tracking and planning looks like. Early August - annual inventory and estimate of annual usage At this time of year we are eating mostly fresh from the garden so my inventory won't fluctuate too much going into the fall. Just before canning season starts, I do a full inventory of the cellar, shelves and freezer, and I record of what I still have in stock from the previous year. It is a chance to correct for any instances where we forgot to update the inventory as we used products. I make a permanent record of this number in an excel sheet (see below). I compare this with the number I noted a year ago on this date, , and I calculate our yearly consumption: Annual consumption = (how many I had in early August last year) + (last year's production) - (how many are left) I sometimes adjust that number up or down based on whether I felt like we would have enjoyed more if we had more, or had to make an effort to incorporate that much in our meal planning. I then calculate how many of that product I want to preserve. Production goal = (Annual consumption) - (how many are left) + a bit of buffer Lately I have been thinking more about crop failures or how some summers, one crop will do very poorly. For example, last year all my cucumber plants were eaten by groundhogs before I fenced in the garden; this year, abundant rain led to poor tomato production; a few years ago an ill-timed frost killed all our apple blossoms. For this reason, for the most important products, I try to have two years' worth of stock, instead of one year's. 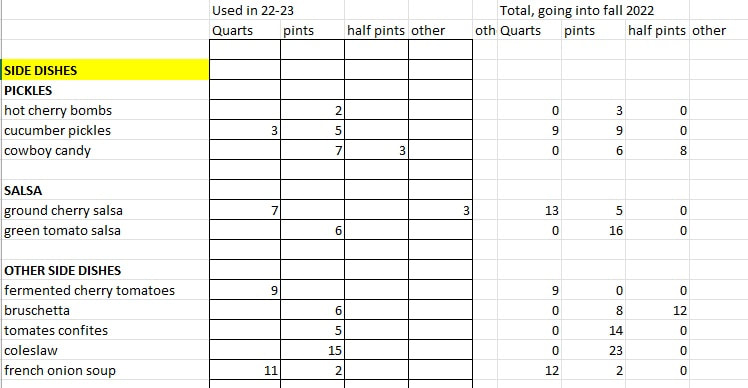 Early August - preserving plan At this point I'm just about to enter preserving season. I have a pretty good idea of how each crop is doing, and I know what my production goals for each product I want to preserve. Realistically, I won't be able to reach all those goals, so it's time to make priorities. At this point, I make a list organized by fruit/vegetable, listed from earliest to mature to latest to mature. For each item, I decide on my priorities and goals. For example, for tomatoes my first priority is to make sure we have a year's supply of canned whole tomatoes; my second priority is marinara sauce; any extra tomatoes after that can become tomato juice, bruschetta, bbq sauce etc. Each item has my production goal next to it. That list gets posted on my fridge and it becomes my to-do list. 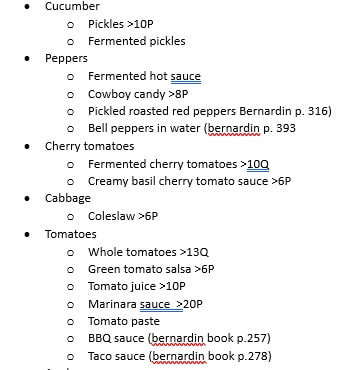 August-November - harvesting, preserving and seed saving During this period I do most of my preserving. Each week I look at what is next based on my preserving plan, and that helps me get organized in advance for my next task (making sure I have the correct spices, enough vinegar, that I have the right size jars etc). I record my completed batches on this sheet in pencil, and cross off items as I meet my production goals. If I exceed all my production goals for an item, I call up the local food bank and they pick up the extra produce. On the tail end of the harvest, I print out a new inventory list for the fridge. It has my new starting numbers (how many of each thing I have in stock, recorded permanently on the right side) and penciled-in current numbers on the left. At the point these are the same number, of course, but the penciled-in numbers will soon get erased an updated. During harvest season, I also engage in seed saving. I'll write a separate blog post about seed saving at some point but I mention it because it will come into play in the next step.  Early December - rough garden plan and seed order In late November/early December I get my seed order organized. I recap the year and decide what I won't try again next year and a few new things I would like to try. I also organize my saved seeds. At this point I make a rough plan in terms of how many of each item I want to plant in my garden next year. For example, if I had planted 20 tomato plants, but reached only half of my production goals for tomato-based products, I should consider having 40 tomato plants next year. After many years of experience, I can adjust that number a bit based on experience and whether I think this year was an outlier in terms of weather and pests, but it gives a great starting point. At this point it's okay to have just a rough plan. I just need to know how many seed packets to order. For each plant, I decide if I should start it from seed or purchase seedlings in the nursery. Usually, if I want just a small number of a certain plant, I will get it at the nursery (for example, most annual herbs, or cherry tomatoes because I prefer getting single plants of a few different varieties). Anything that I grow in quantity, I start from seed. I look at what seeds I have in stock. These could be leftovers from last year, or new seeds I saved from this harvest. I make an excel sheet with all the plants I am planning for, and for each one, I capture whether it will come from leftover seeds, saved seeds, purchased seeds, or be bought as a plant at the nursery. I shop around and place my seed orders based on this information. I also might also order a few plants online that are harder to find locally. 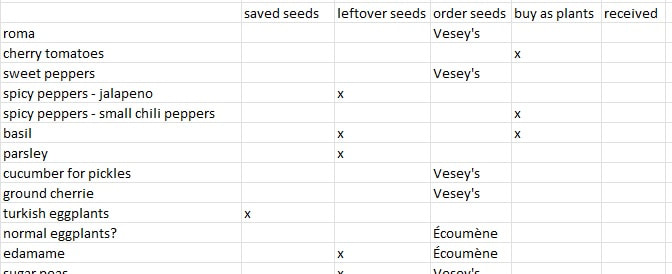 January- seedling planning By January I want to have a firmer plan. I use excel to make an aerial plan of my garden and plan out specifically how many of each plant I will have in the garden, and how much space that adds up to. I take into account crop rotation and the varying conditions in each part of the garden (soil type, wind exposure, irrigation lines, sun exposure...). Once I have that plan, I know how many seedlings I will want for the garden. 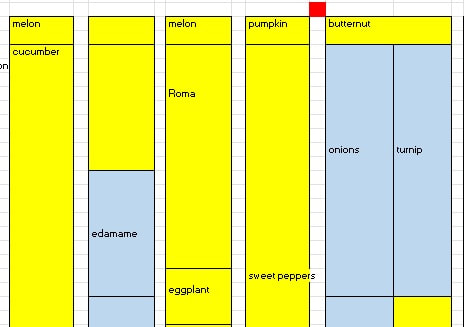 April-May starting seedlings Each year, in my garden notebook, I record how many seedlings of each type I start each year, and how many I transplant successfully in the garden. This way I know what percentage of extra seedlings I should start. This all needs to be balanced against the total amount of seedlings I can nurture given shelf space and lighting. For any tracking that happens in my seedling work area or in the garden, it works best for me to record things in my notebook, as opposed to on the computer.  May-June planting outdoors
In the process of transplanting to the garden, some changes will happen for sure. Some seedlings might have been less or more numerous than my plan, and I might get tempted by something extra at the nursery or pick up some unexpected seeds at a seed swap. I keep records of everything to help me plan next year. If any seedlings failed, at this point I decide whether it is worth getting replacement plants at the nursery. Conclusion This brings us to a full one year cycle. It took me a long time to refine my tracking system and I hope this information and the samples I provided will be useful for some of you. "How many tomato plants should I plant?" is such a common question online, but I've learned that the only person who can truly answer it is you, after careful tracking over the course of a year!
0 Comments
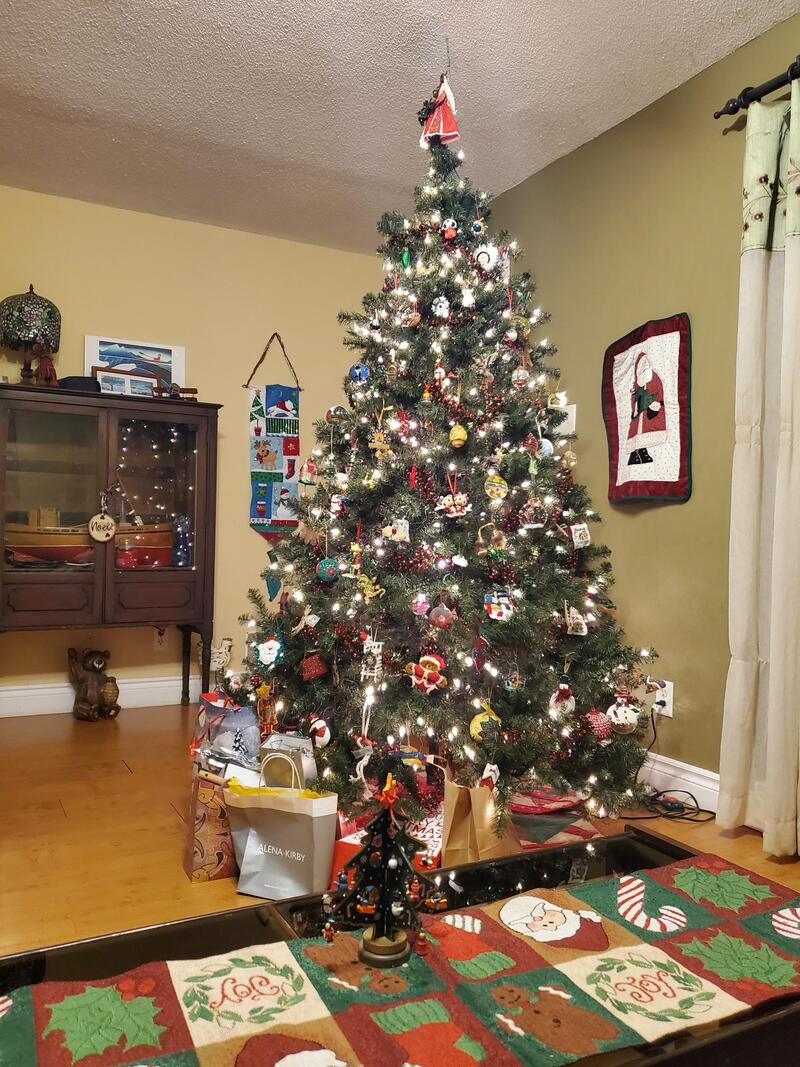 If you are like me at this time of year you might be googling things like "Christmas gifts for bakers" and "Best gifts for woodworkers", in search of inspiration. Well, let me save you some further googling in terms of the gardeners and homesteaders on your list! Here are some gift ideas they might appreciate.
If you are looking for a big ticket item, some ideas to consider would be a pressure canner, dehydrator, a worm farm, or a steam juicer (but make sure they have the space for these), or shelves and grow lights. I'm happy to help you find these things or answer questions if you are trying to surprise your favorite gardener 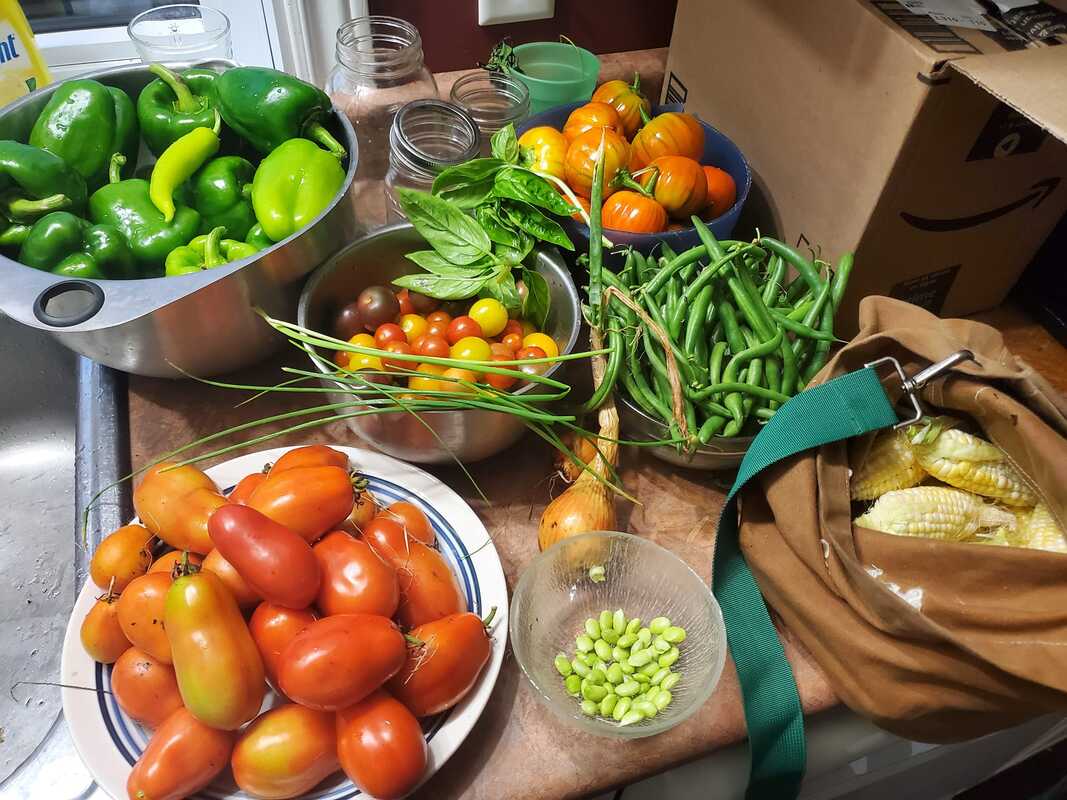 Last weekend was the first weekend for which I didn’t have a long list of gardening, harvesting, or preserving chores to pick from… feels strange! I did try to do a bit of weeding and spreading of compost but everything is frozen solid, so whatever wasn’t done, won’t be done. It’s a good time to kick back and do a retrospective.
At this time of year lots of people ask me “Was it a good gardening year?”, but it’s always a nuanced answer when it comes to polyculture. Most often, it’s a mix of winners or losers. A lot of that is dictated by weather, which this year was exceptionally rainy (so… much… rain…), a slow start due to skies hazy with wildfire smoke, and a very late first frost. Here’s a bit of a recap. Biggest winners of 2023:
Biggest losers of 2023:
So all in all there were lots of lessons learned, and I’m already excited about next year. To finish on a high note, I’ll mention that a highlight of the year has been writing this blog. It’s helping me reflect on my approach to gardening and it is a nice creative outlet. Thanks for reading (if anyone is reading!) After many years of canning, I started to venture out into fermentation as well. One of the new recipes I tried this year is sauerkraut. In this blog post I'll walk through the process I use. It's based on the NCHFP instructions. The first step is growing cabbage. Cabbage heads are huge so I usually just buy a few seedlings since I don't need too many. After picking the cabbage head, I take off the root and a few layers of outside leaves outdoors and compost them. 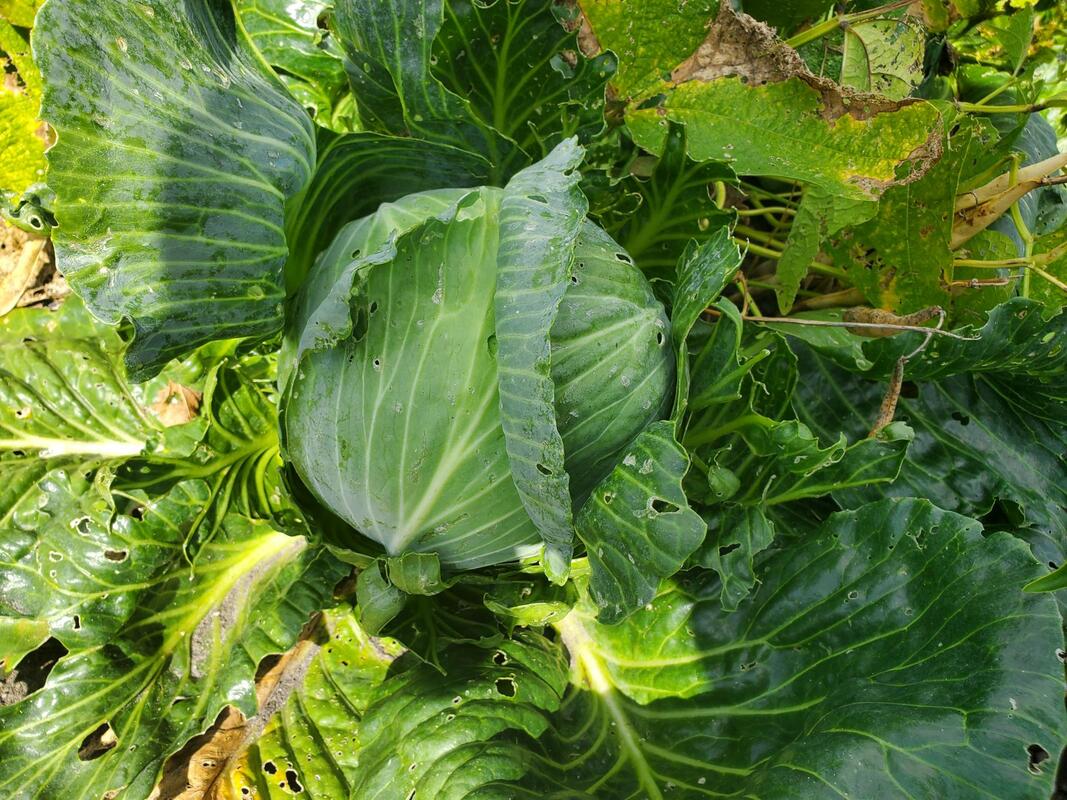 Once in the kitchen, I put the cabbage in the sink and wash and remove any outside leaves that are dirty. I set aside a few flat leaves for later, then I quarter the cabbage and start slicing it into the thinnest pieces that my patience allows. 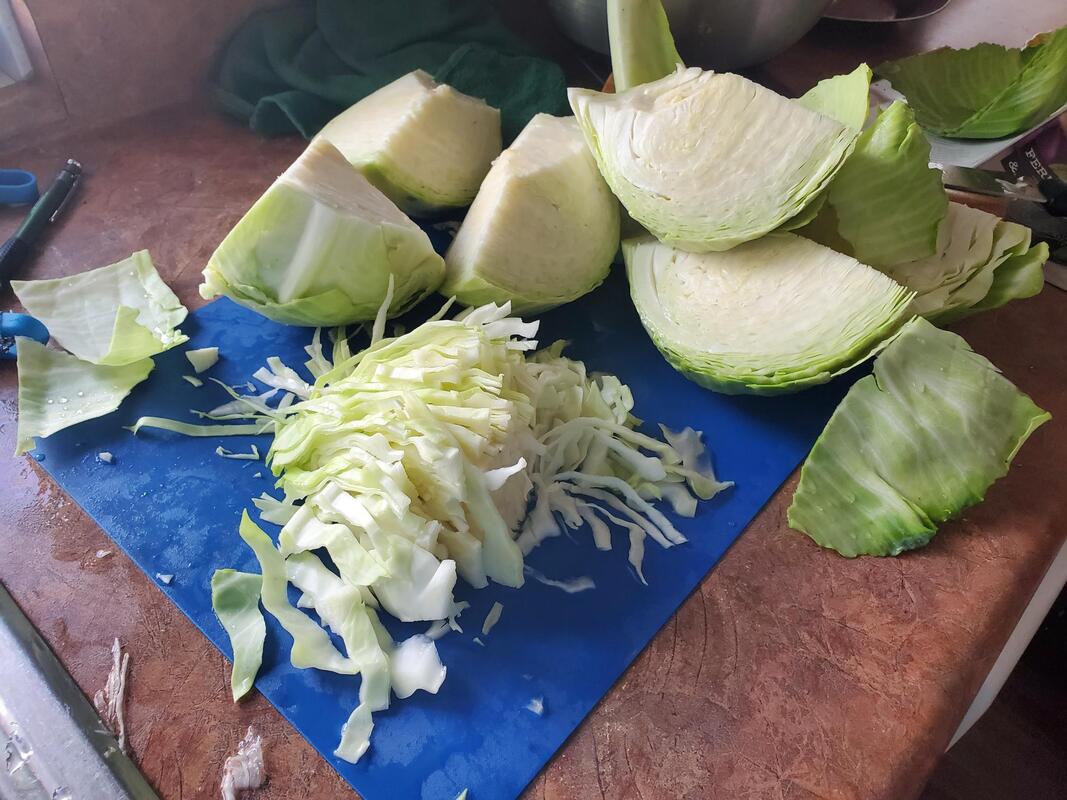 As I chop the cabbage, I dump it in a big pot and add canning salt. You need 3/4 cup of salt per 25 pounds of cabbage. I alternate layers of cabbage and sprinkled of salt. 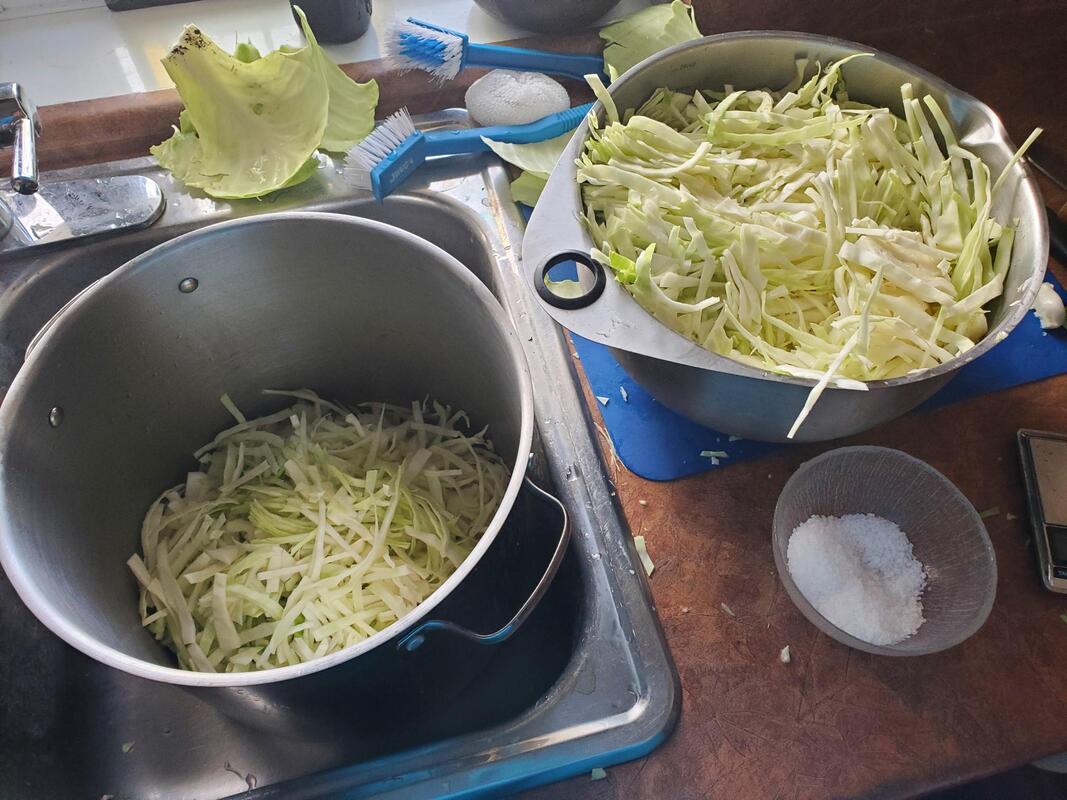 Then comes the fun (stress relieving) part. To tenderize the cabbage and help it release its juices, you have to massage it with your hands, and then pound it with a pestle of some kind. It is truly amazing how much the consistency of the cabbage changes, how much more compacted it becomes, and how much juice comes out of it. 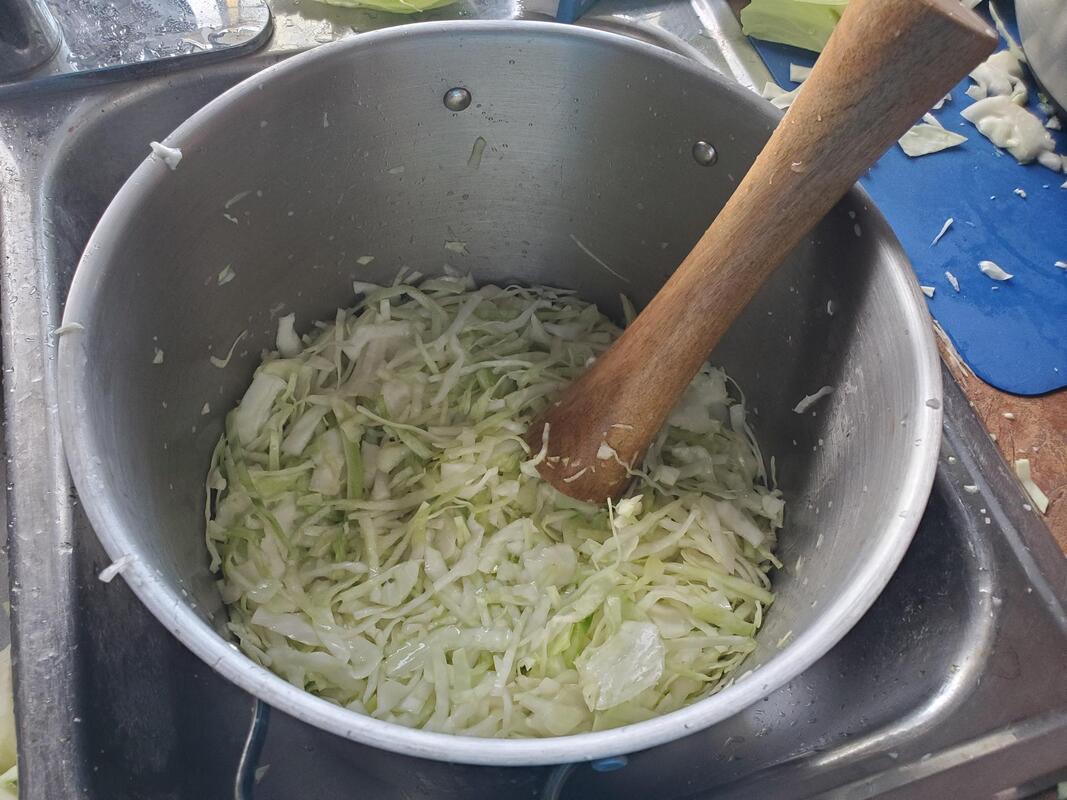 After a period of rest, I pack the cabbage in its juice in mason jars. Again, I use the pestle to make sure there aren't any air gaps. I cut circles out of the flat cabbage leaves I saved and put them on top of the cabbage and juice (you can see one in the middle jar in the picture below). 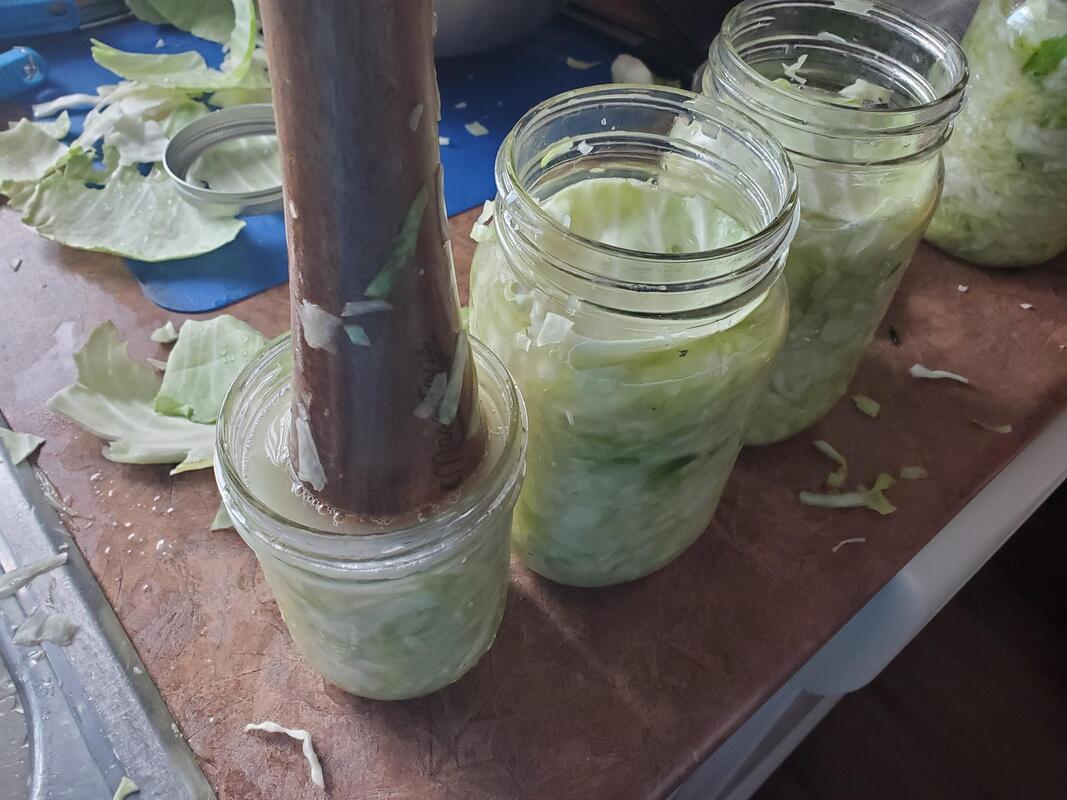 On top of the cabbage leaf, I add a glass weight that ensures everything is submerged (key to prevent anything from spoiling), a vented silicone cap, and a jar ring. After that, I tuck away the jars in a box in an out of the way spot. It's best to keep them in the dark. I leave them mostly unattended. They expel lactic acid (which makes the Ph drop) and CO2. It's important not to open the jars, so that the CO2 produced by fermentation gradually replaces all the air. During this time, bacteria that thrive in the salty brine environment take over. 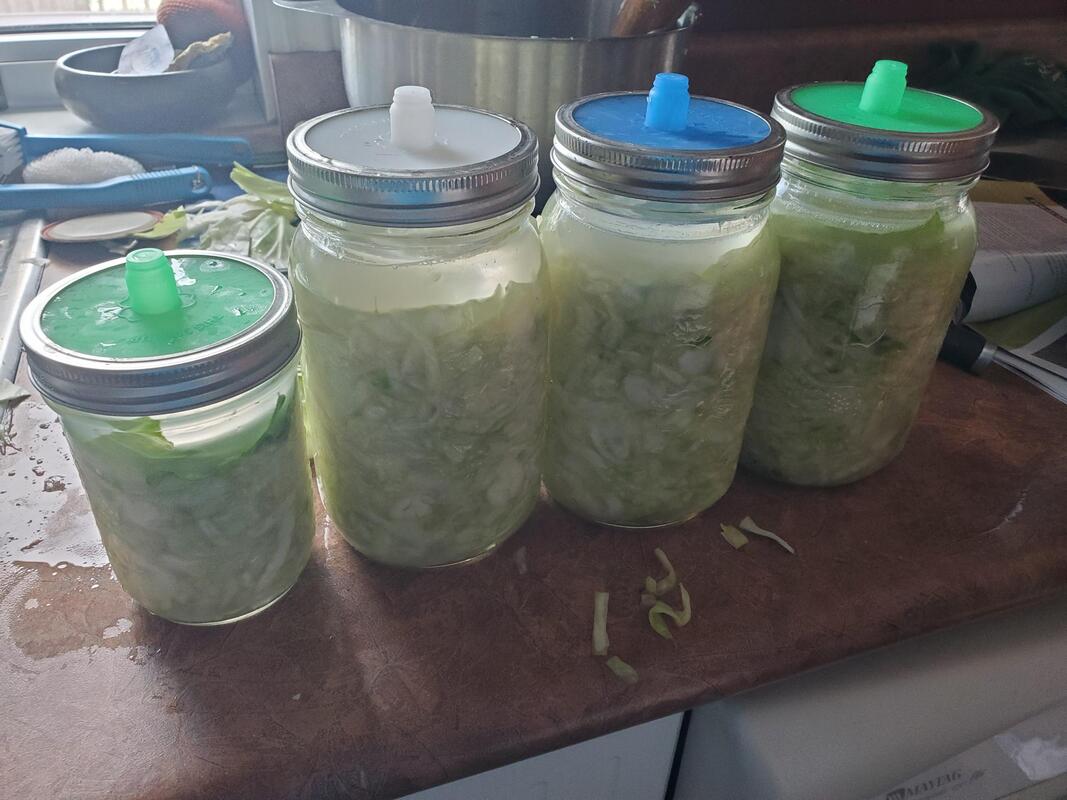 The amount of time needed for fermentation varies depending on temperature. My house is fairly cool so I let it ferment for about 5 weeks. It is interesting to see the CO2 bubbles and the color change. 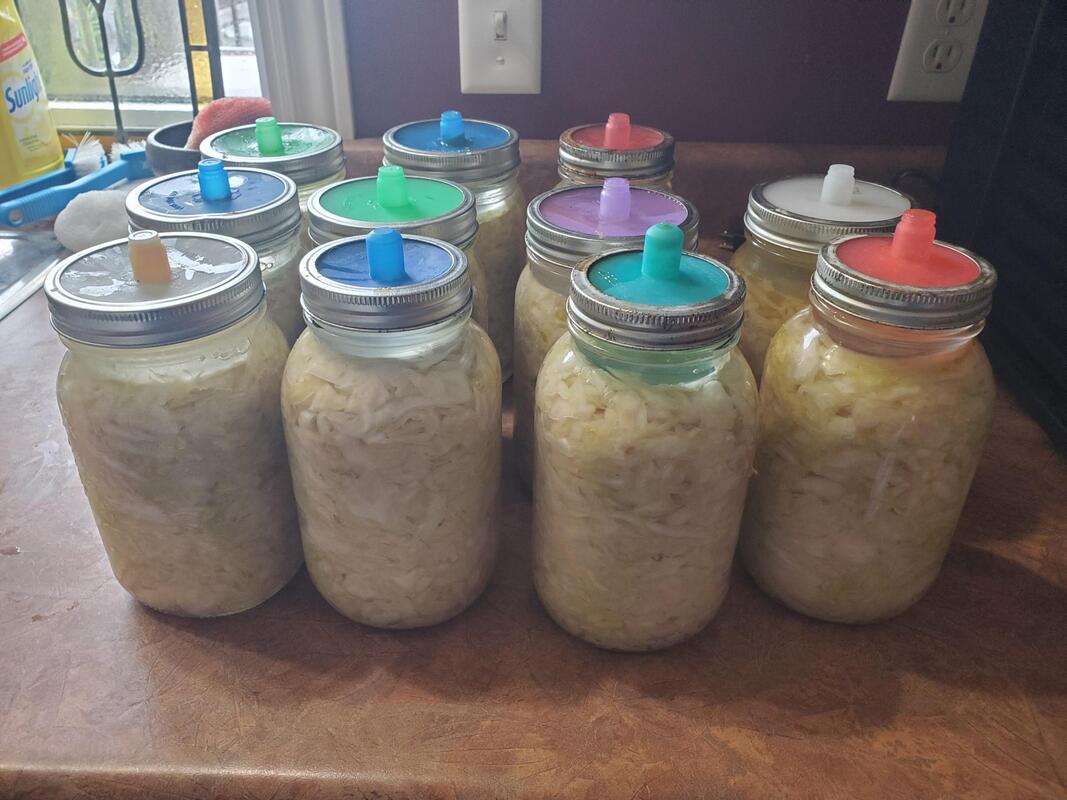 Once the fermentation is done, I remove the glass weights, do a bit of repacking (making sure all jars are topped up to 1/2 inch from the top, putting some in smaller jars so I can have smaller portions when needed, etc). I put on canning lids and pop them in the steam canner. I follow the NCHFP instructions for processing them in the canner. It's also possible to just put them in the fridge at this point but fridge space is always tight for me so if I can make it shelf stable, I do. 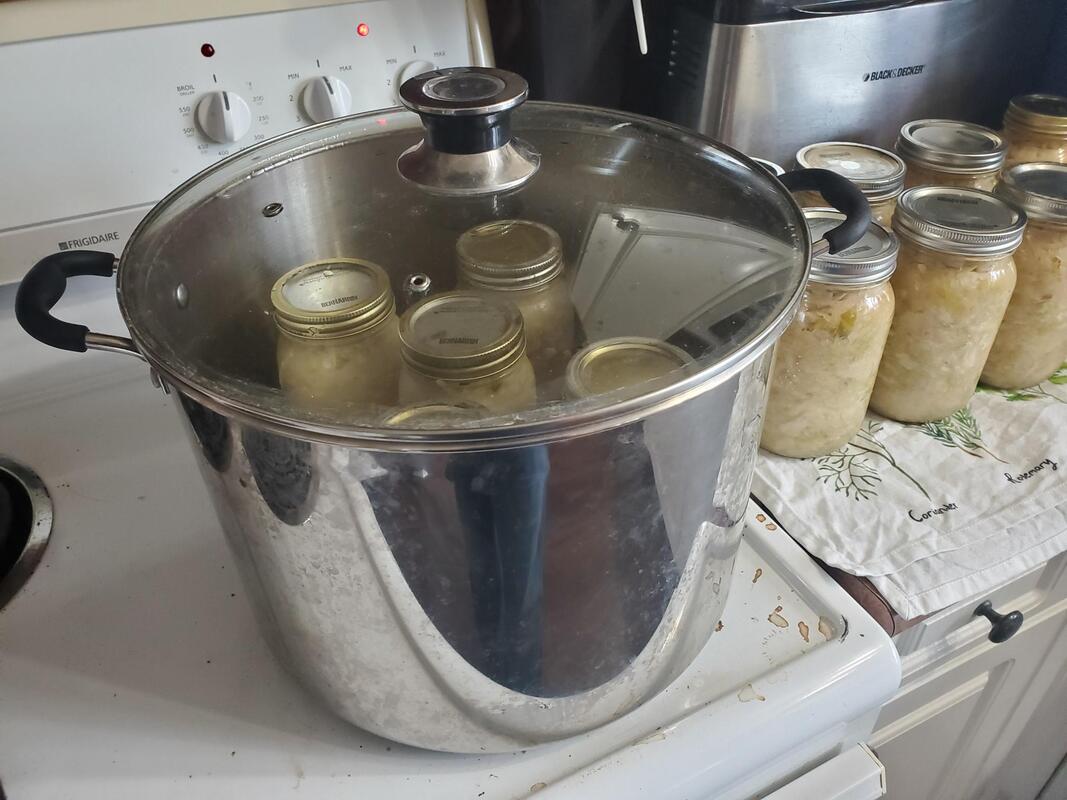 And it's done! Shelf stable sauerkraut ready to be put away. We'll use it as a side dish, in sandwiches, veggies dogs etc. 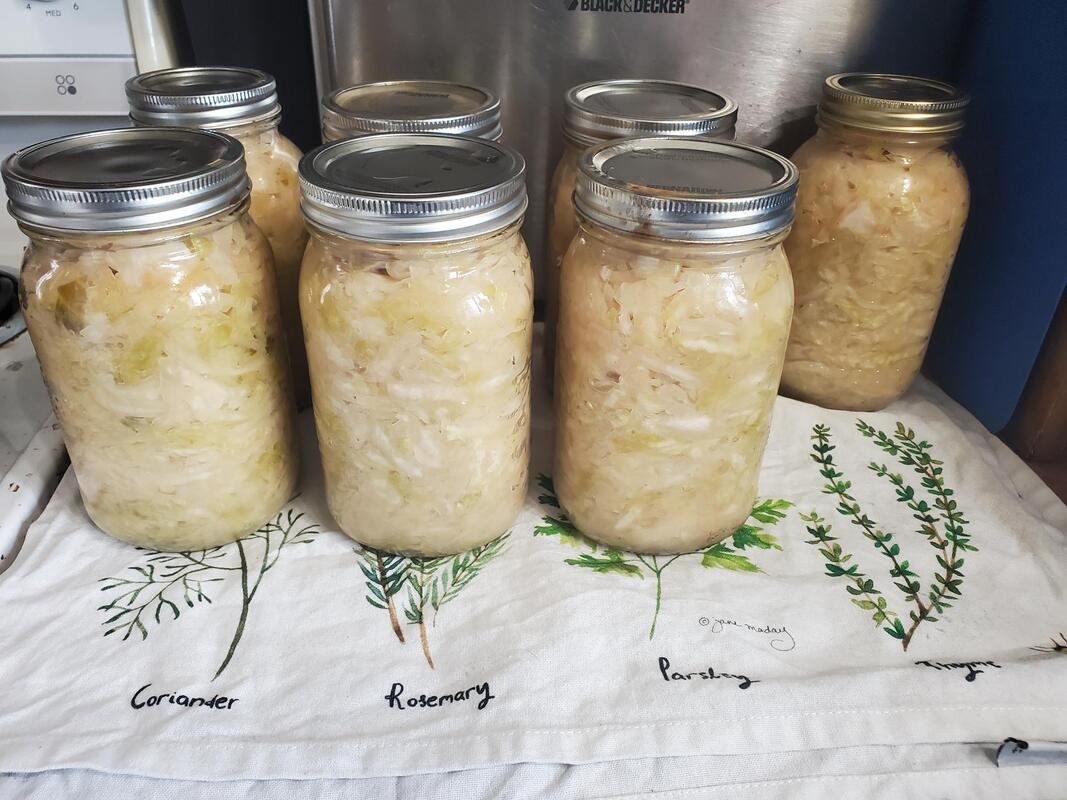 Tomatoes are the super star of many gardens, including mine. They are one of those vegetables that are SO much better grown in a home garden, compared to store bought. Eating garden tomatoes kind of ruined store bought tomatoes for me. So, I try to grow enough tomatoes to eat year round and to cover off most of our tomato product needs.
Generally in my garden, you will find about 4 cherry tomato plants and about 30ish regular tomato plants. I buy the cherry tomato plants as seedlings so that I can have 4 different varieties. I have a separate article on my top uses for cherry tomatoes - it's easy to get overwhelmed by them as peak times! In terms of regular tomato plants, I used to plant a few different kinds but lately I only plant one kind of paste tomato. I find that they are great to use for everyday tomatoes too so I don't bother planting a "slicing tomato" anymore. The advantage of paste tomatoes is that they are very fleshy - they don't have a lot of water/seed chambers, which means that you don't "lose" as much when you can them, and you don't have to reduce tomato sauce too much on the stove before canning it. My tomato of choice is the Roma. I usually order new Roma seeds every year from Vesey's. Unfortunately, tomatoes cross-pollinate, so I haven't been able to save seeds from year to year (I would get hybrid roma/cherry tomato plants if I did, as is often demonstrated by the "volunteer" seedlings that pop up everywhere around the garden). This year I tried San Marzano instead, but I think I'll go back to Roma. San Marzanos need a bit more time to grow, and I found I had a lower yield and smaller fruits than when I grow Roma. It may just have been an off year for tomatoes, but since I was always happy with Roma, I'll go back to them. A neat tip that I learned is that you can pick up tomatoes as soon as they "blush", that is, lose their shininess and start to have a hint of pink. There is no advantage to letting them ripen all the way on the plant - they won't be tastier. That's a common myth. You can ripen them indoors and they don't need any light to ripen. The advantage of doing that is that they are less likely to be attacked by a pest. I have noticed that ever since I started doing this, I have much less pest proliferation within my garden. Once a week I pick up all the tomatoes that have started to turn, regardless of what stage they are at. I can them in batches as they ripen in the house. Every year I prioritize what I make with my tomatoes. From highest priority to lowest priority, here is what I make with my tomatoes:
If I ever have more than needed for these four priorities, I would love to also make:
When frost starts to threaten the garden, I pick up all the green tomatoes and can those. I love canning:
Water bath or steam canning can only be used for high acidity foods such as pickles, jellies, salsa, and tomato based products (see my summary of modern canning methods). For anything else, such as meat, fish, seafood, and low-acid vegetables, a pressure canner is the only safety tested way to can. I am sure that the ability to can meat ups the value proposition for any meat eating household - but my husband is vegetarian and I am mostly vegetarian (I occasionally, but increasingly rarely eat fish and seafood), so I wasn't very sure that a pressure canner was worth it for us. After all, most low-acid foods, although they cannot be water bath canned, can be preserved in other ways, for example freezing, drying or cellaring.
That being said, it's now been about 3 years of using a pressure canner, and I am very glad I have it. I do think it is a little bit less essential for a vegetarian household but it is still very useful. Every year, my freezer is totally full, so it is quite helpful to have an alternative when it comes to storing vegetables. Otherwise I wouldn't have enough space. It also allows for a few shortcuts in terms of food prep since pressure canned vegetables are already diced and cooked in the jar. Here are the main ways in which our mostly vegetarian household uses pressure canning:
In the future I might can corn (if I ever get more than we can eat fresh), sweet potato (it's hard to get slips here but they grow quite well), and kidney beans (for convenience - they store dry quite easily though). Some water bath recipes can also be done with the pressure canner and may take less time, but I haven't found that to be worth it. Once you count the pressurizing/depressurizing time it's not always worth it (especially now that I've replaced my water bath canner with a steam canner, which heats up much quicker). Usually, foods done in the pressure canner will be more mushy than those done in the steam canner, which can be a disadvantage (for example with whole tomatoes). There are also some people in Quebec who have described a method for using a pressure canner as a steam canner - if you follow that train of thought, I would say a pressure canner would be totally worth it since you would only need that one vessel in order to do all types of canning. But I have a small hesitation in terms of whether I feel like the method was sufficiently demonstrated to be equivalent. It is not accepted by US canning experts as far as I know. So, all in all, I've found pressure canning pretty useful especially in the soup department, to free up some freezer space, and for food prep convenience (having veggies already diced and cooked). All this is probably not as life changing as for someone who consumes meat, but it's been worth it for us. Shortly after we moved here, I planted a few fruit trees. I remember how far away the the estimated 3-5 years to maturity sounded, but before I knew it, we started getting lots of fruit. Not all the trees I planted made it...some could blame the harsh winters, others might be more precise and blame snowplowing incidents. I'm still waiting to see if the pear trees ever bear fruit, but we get lots of apples - this year we got so many that we couldn't pick all of them. It was a big job picking all of them, and a big day of processing. Here are the steps we followed. 1. Early harvest: Ray got a little impatient and harvest a first crop sometime in September, and made it into Hard apple cider. It fermented quickly and we've been having it as bubbly, relatively low alcohol cider. 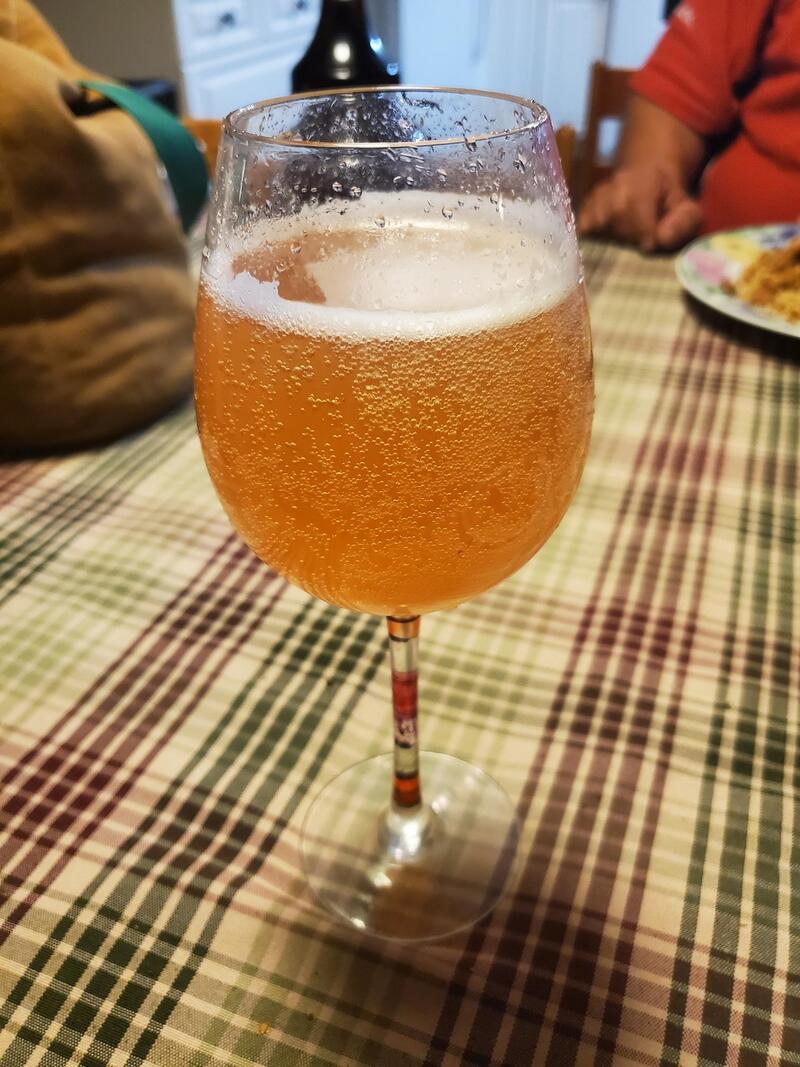 Bubbly hard apple cider When the apples were truly ready, we harvested the rest. It works best to do this as a two person job - one person on the ladder and one person on the ground. We are careful not to bruise the apples during this process. I then sorted the apples into categories and processed them appropriately 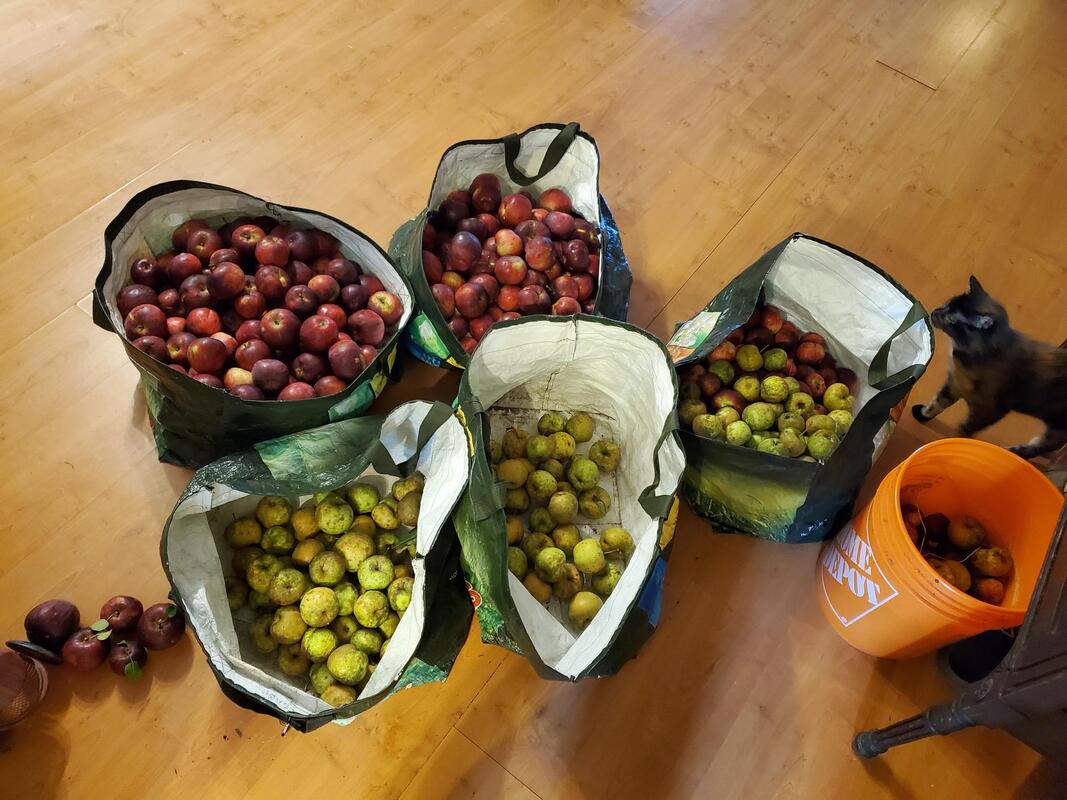 From left to right: Red picture-perfect apples, then yellow and red perfect apples (for storage), yellow and red apples with some blemishes (for slicing and canning), mixed irregular apples (for juice), and rejects (for compost). Cat for scale Perfect apples (no blemishes, no bruises) were set aside for storage. I wrapped them individually in newspaper. I filled up the two fridge crisper drawers with apples (one drawer of red apples and one of yellow apples). All the overflow (two crates) went into my parents' basement fridge so that the rest of the family can have as many as they like, and for future processing possibly. 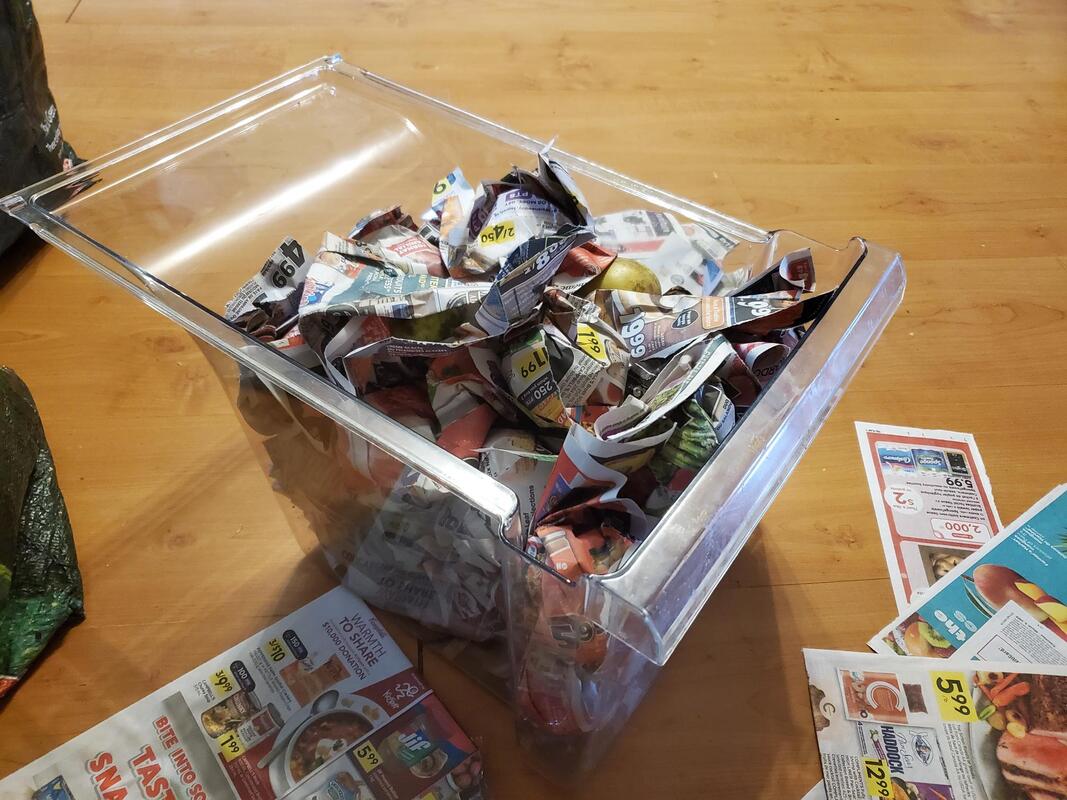 Apples with some blemishes or bruises were peeled and sliced, with the blemishes removed. The resulting apple slices get canned and I'll use them for cooking and baking. For example for fruit crumble or apple pie. Very small / irregular shaped apples became apple juice. I used the steam juicer for this, and canned the resulting juice. I process it for 10 minutes instead of 5 minutes, since you don't have to sterilize the jars ahead of time if you process for 10 minutes. It's possible to make the leftover pulp into fruit rollups, too, but I didn't take the time. I also couldn't resist making a special category of the five best looking apples, they are really picture-perfect and they are on my desk so I can admire them for a little while before eating them for snacks as I work! I find that having apples (or other fruits) right on my desk makes it less likely that I'll get up and get a less healthy snack from the kitchen when I get hungry and I don't have much time to get up between meetings.  The picture perfect apples I have a couple of tools that are really helpful to process apples. I use a handcrank peeler. It speeds up peeling by a factor of two. I like the kind with the suction cup on the bottom (instead of a clamp) - I suction it to a cookie sheet and the cookie sheet catches most of the debris. I also have a slicing gadget that slices the apple into six pieces plus the core. My steam juicer is very helpful for juicing the apples. Finally I use my steam canner to put everything into shelf stable jars. 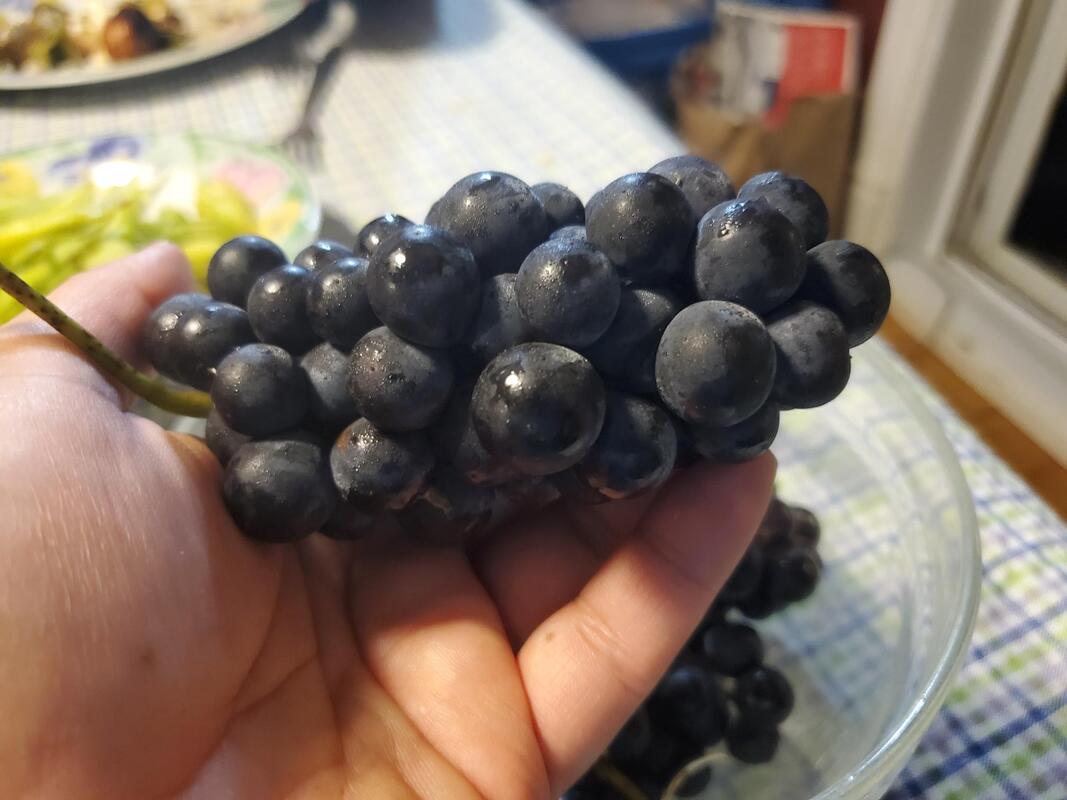 Some days when I'm feeling more philosophical, I think about how bigger sustainability concepts connect to our little homestead. For example, the circular economy is a big concept in sustainability. A circular economy is a production and consumption model within which all things are reused, recycled, repurposed as much as possible. Here are a bunch of real life case studies of circular economy. Closer to home, I couldn't help but think that our recent grape harvest was like a little model of a circular economy. When we harvested grapes this year, we made very good use of everything we harvested... anything that was a byproduct of an operation became something else that was useful. Nothing went into the garbage. Here's a little diagram of how it played out. 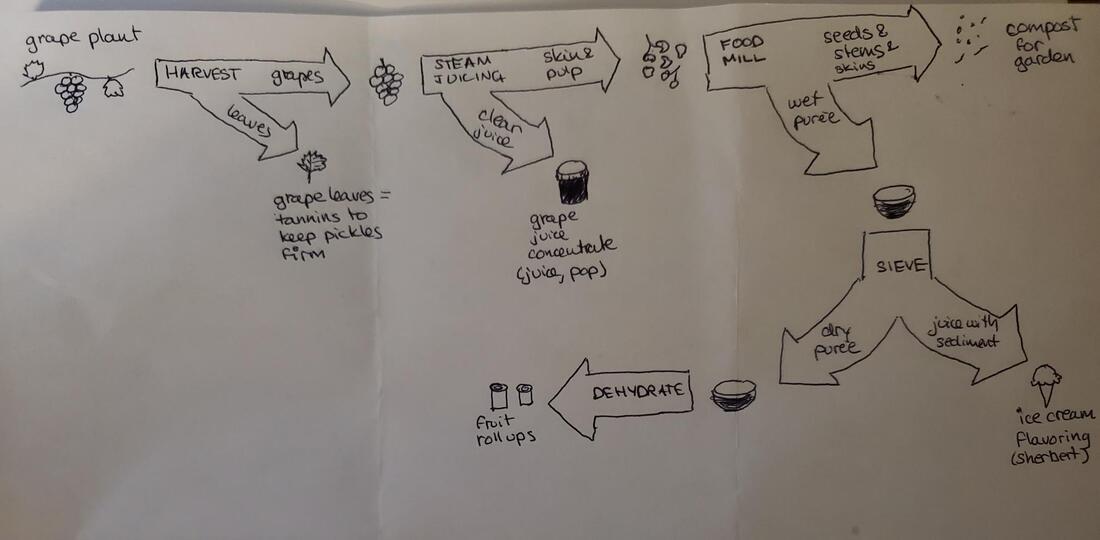 This is the tastiest kind of circular economy! Flip through to see some of the products we got from our delicious Concord grapes. Fruit leather (fruit roll-ups) is a great snack or dessert that makes good use of the pulp that is leftover from processing fruit for various recipes such as jelly, juice, etc. It satisfies a sweet craving. It's a snack we like to bring on biking or kayaking trips and when camping. A couple of days ago I made grape fruit leather. I started off with the pulp that was leftover from steam juicing grapes for grape juice - basically it was grapes that had popped and had most of the juice drain out. You can of course start with whole fruit too. The first step once you have your fruit or leftover pulp is to purée it. I use a handcrank food mill for that operation, which has the advantage of removing the fruit's skin and any seeds. Alternatively, you can just put everything in a blender. Ideally you are looking for applesauce consistency or dryer. If there seems to be excess liquid in it at this point, I would recommend straining it. Personally I would use the liquid I strain out for something like flavoring sparkling water from our sodastream or adding flavor to homemade ice cream. Once you have your purée, you spread it on parchment paper and put it in the dehydrator. I have a nice Excalibur dehydrator (it comes on sale on amazon once in a while). If you don't have a dehydrator, you can also dehydrate using an oven with the door ajar - I haven't tried that myself but it seems like many people do it that way. Your dehydrator will likely indicate the temperature to use (mine says 135F). Dehydrating fruit leather can take anywhere from 6 to 12 hours depending on your dehydrator, the consistency of the pulp, and the thickness (I recommend between 1/8 to 1/4 inch for the thickness of the layer of pulp). If you have a more basic dehydrator, you may have to rotate the trays during the process. It's best to monitor the process the first few times to get an idea of the timing that works for your setup. I like to start mine just before bedtime as it takes at least overnight. After waking up, if the process isn't done, I can keep an eye on things. The leather should be pliable and be easy to peel off of the parchment paper without falling apart. Once it's ready, I use scissors to cut it into strips and I roll up the strips. I store them in a mason jar in the fridge. They do okay at room temperature for a while which makes them a good camping or biking snack. 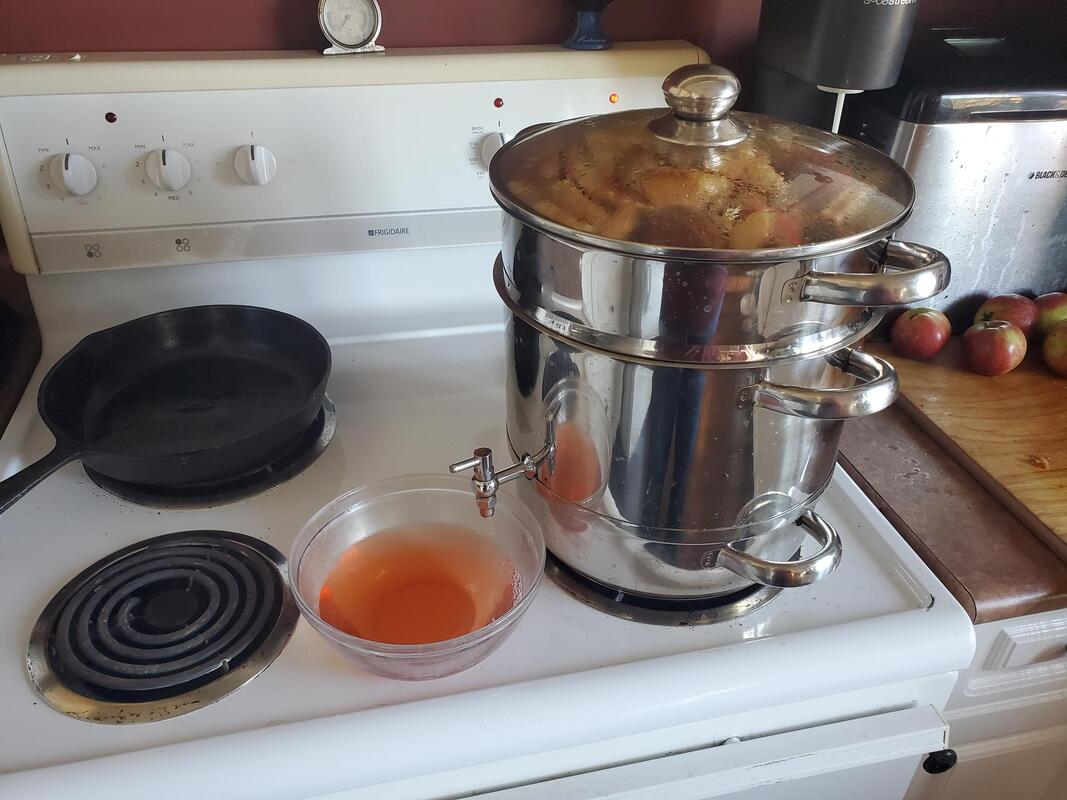 Originally I did all my juicing with an electric juicer. A couple years ago though, after our apple trees really came onto their own, my electric juicer died (the motor burned up). After doing some online research into what a more robust model might be, I realized that a steam juicer might be better suited to the homesteading lifestyle. Electric juicers seem to be better suited for making a couple glasses of juice here and there, whereas a steam juicer seems better equipped for handling large quantities of fruit. There is a third option which is a juicing press but I haven't looked into it seriously (I am not sure I want to dedicate the space to it). This is my first year using my steam juicer, and so far, so good. A steam juicer is made to run on the stovetop and it has three components:
It takes a couple of hours to extract the juice from the fruit. It's not a labour intensive process, but you do have to be around to occasionally drain off the juice and refill the bottom pan. It's most convenient to run a batch on a day where you are doing something else in the kitchen (not a problem at this time of year). So far, we made grape juice from our concord grapes, which I canned in quart jars. It is concentrated, we'll dilute it what we drink it. We also made apple juice which Ray is preparing for hard cider as I type. A steam juicer is really nice when paired up with a dehydrator. Once the juice is extracted from the fruit, you'll be left with pulp in the colander. We ran the pulp through a food mill (to purée it) and spread the purée onto dehydrator trays. This made delicious fruit leather. |
About this blogThis is where I share my learnings and adventures in homesteading Archives
May 2024
Categories
All
|


 RSS Feed
